To add a Client to your Oasis Platform database follow the above video or below instructions.
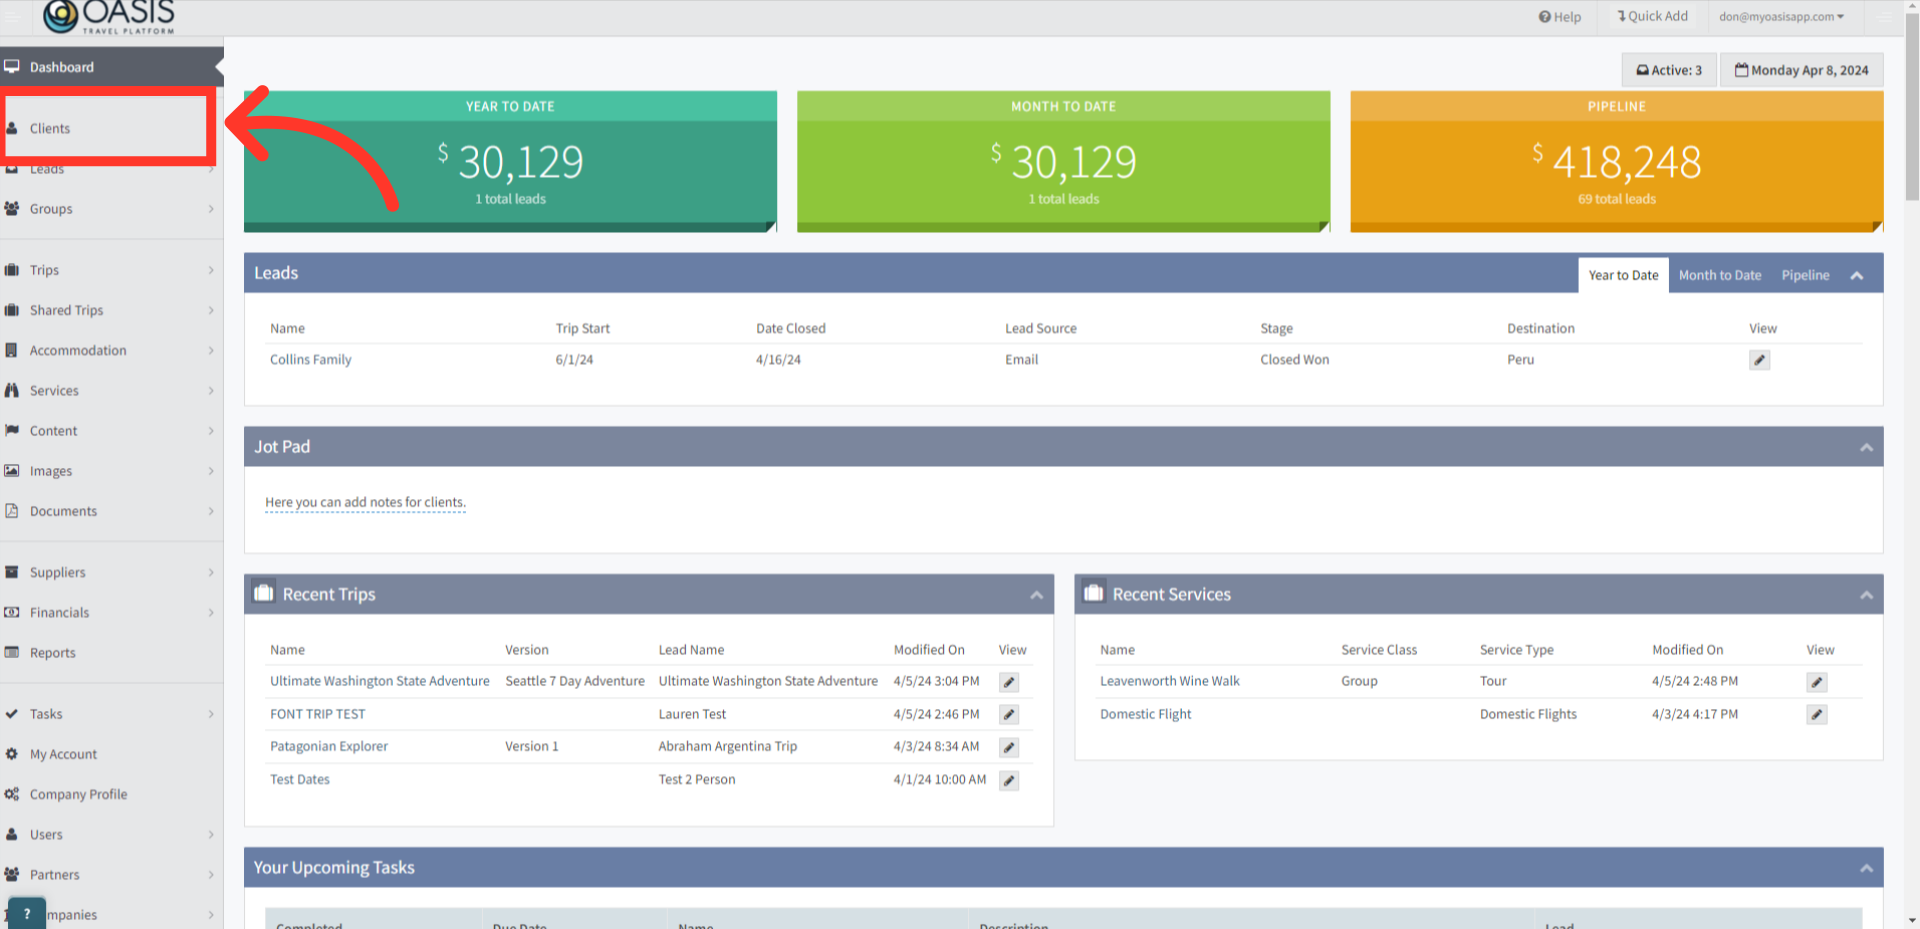
1. Select Clients from the Dashboard on the left hand side.
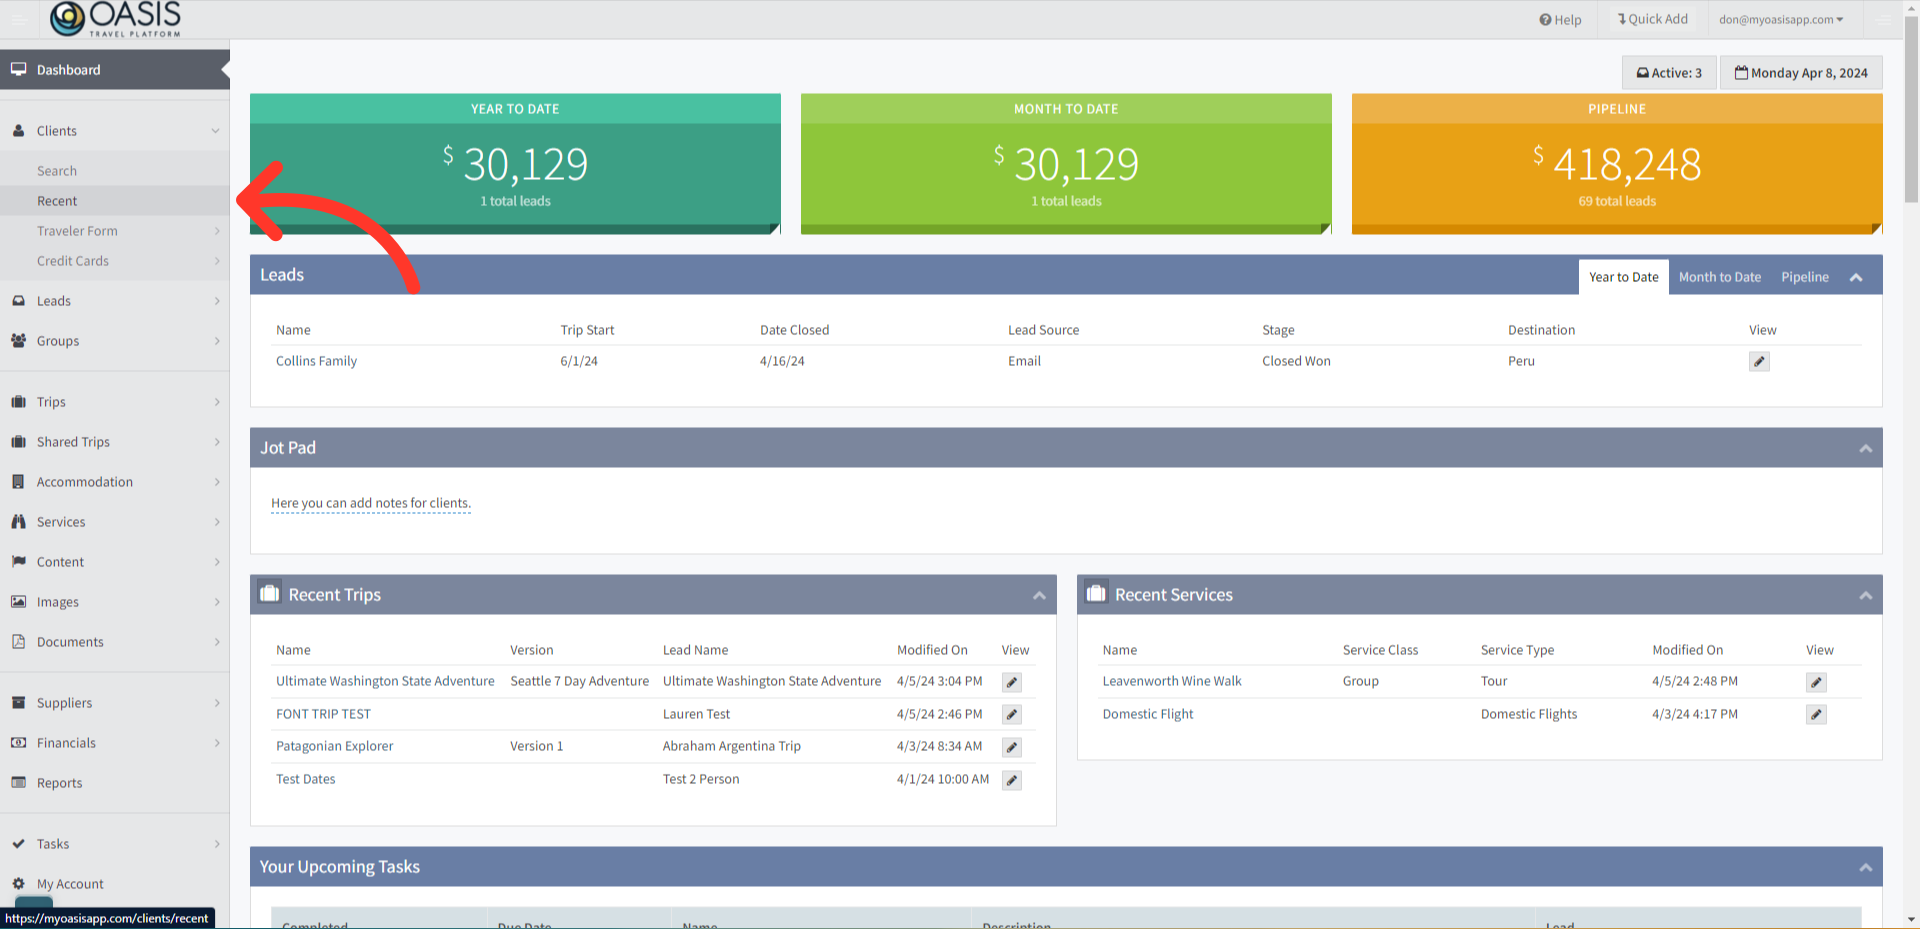
2. Next, select Recent
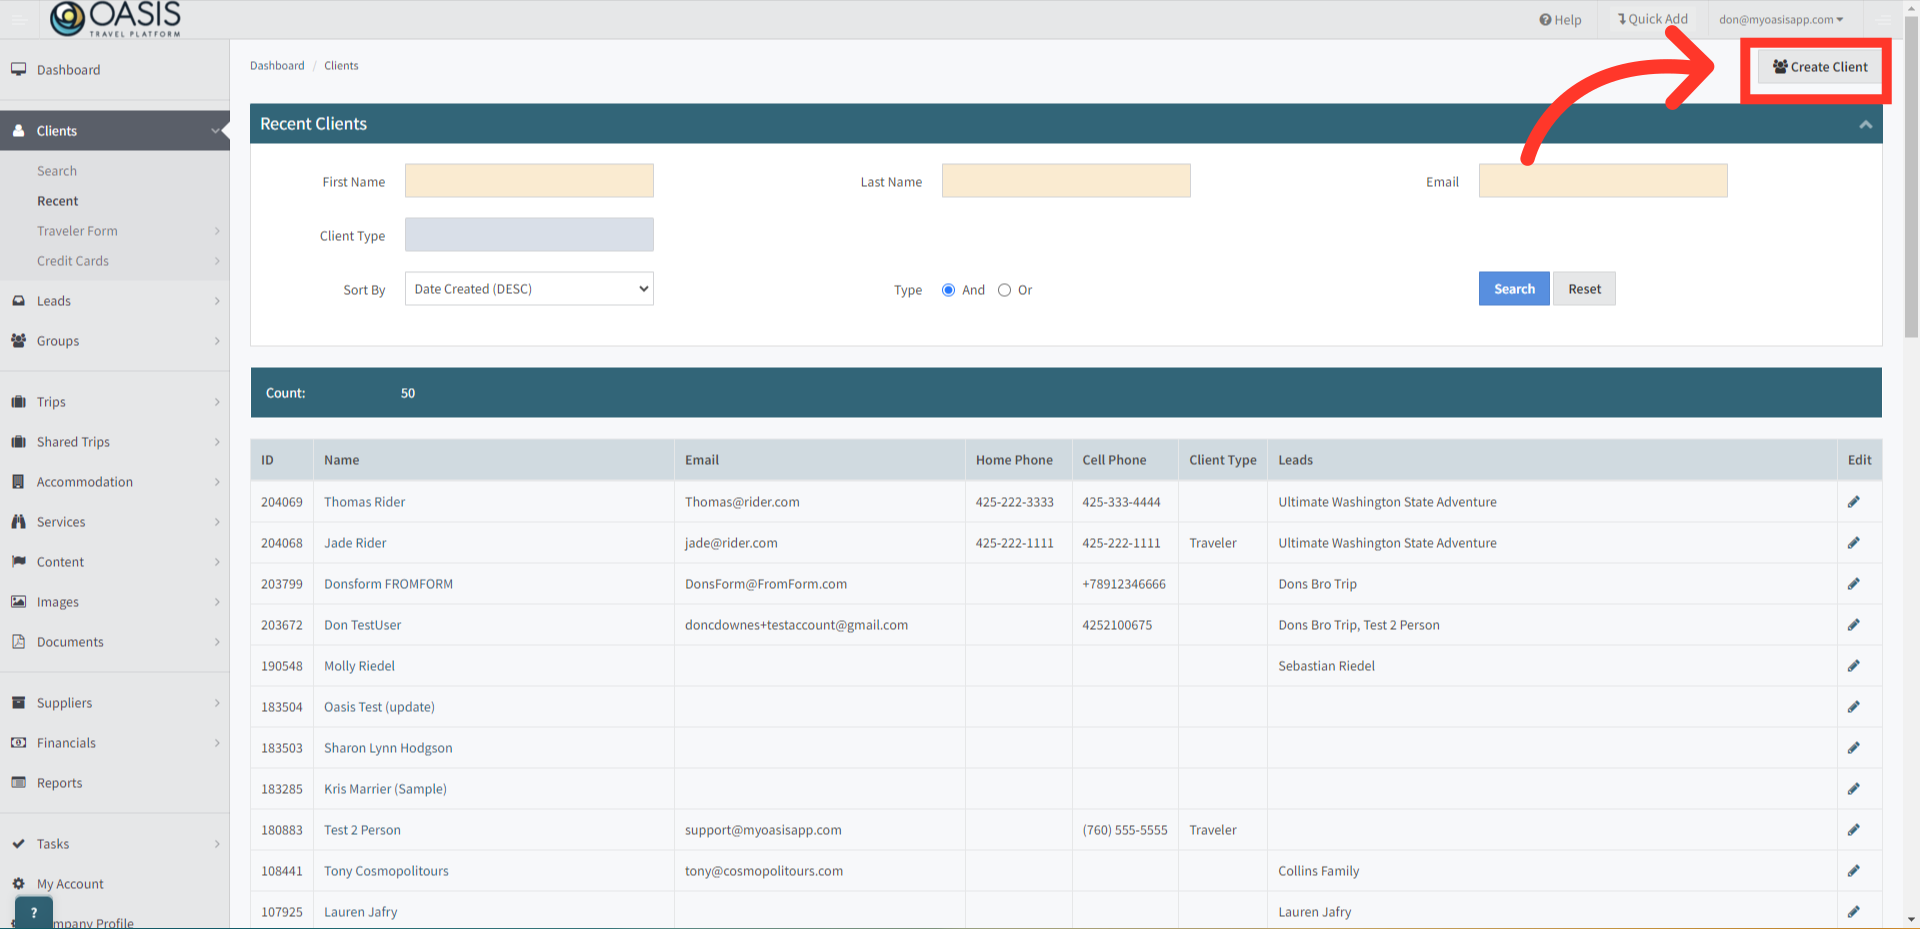
3. In the top right corner, click on Create Client
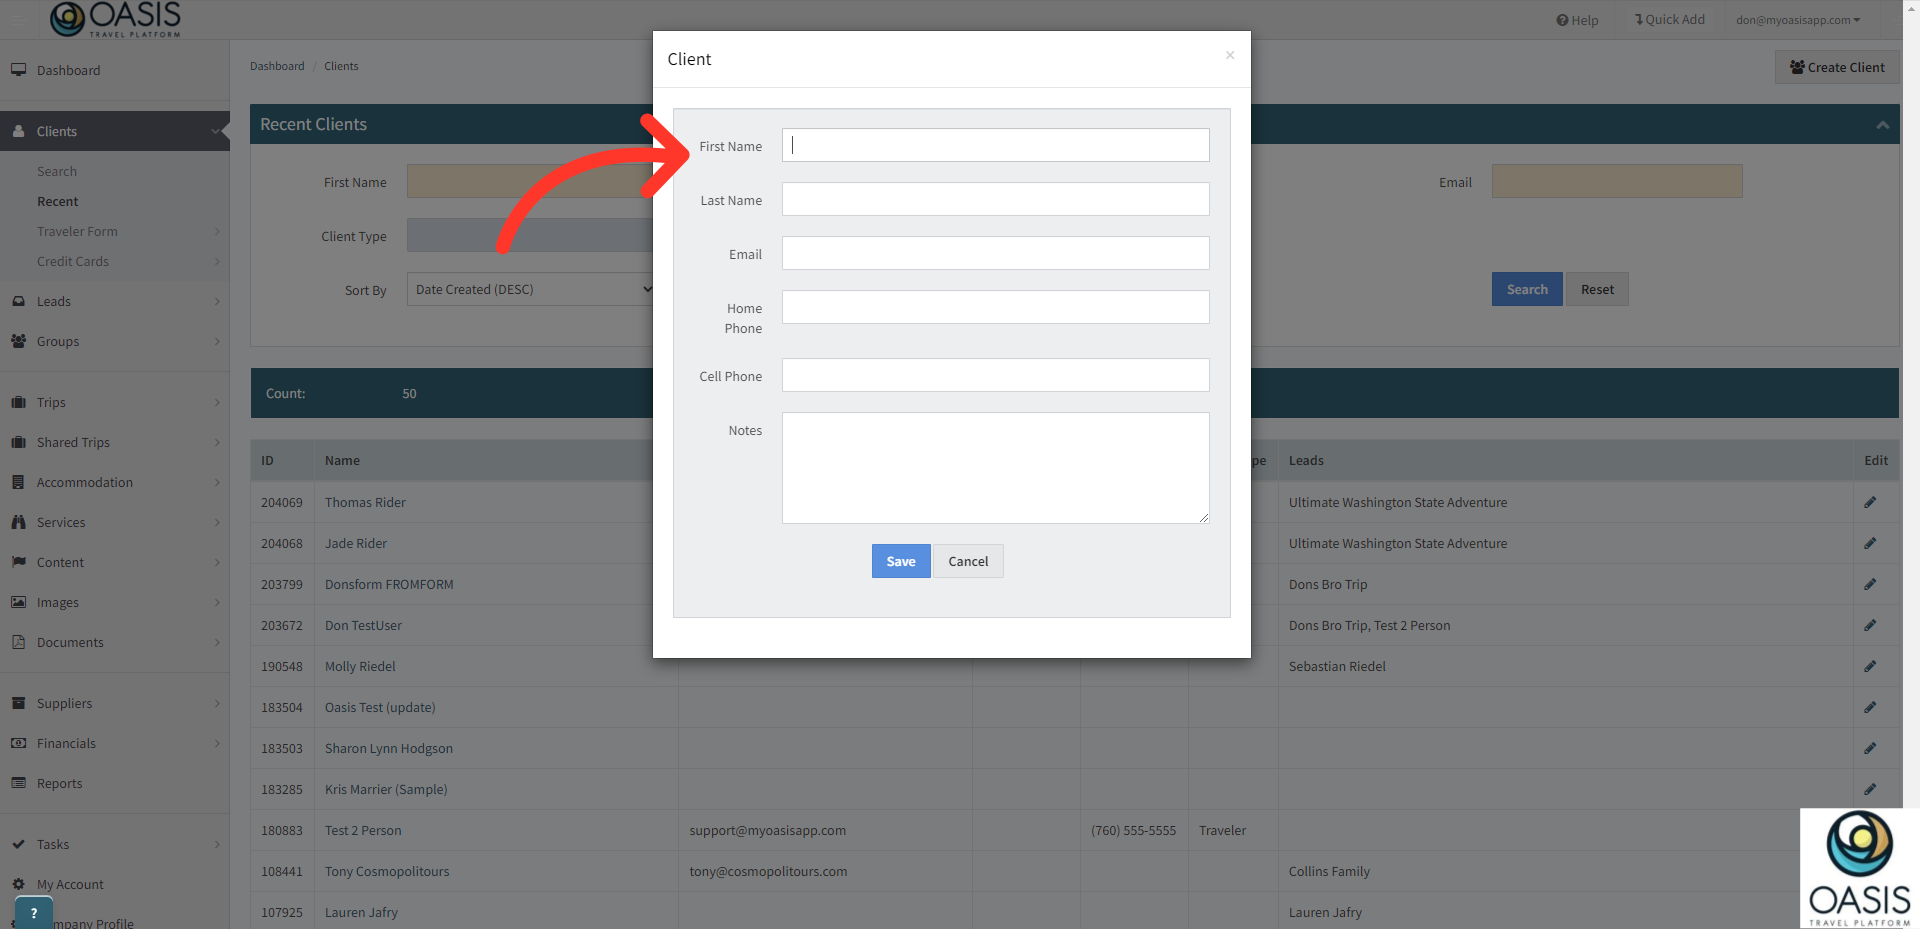
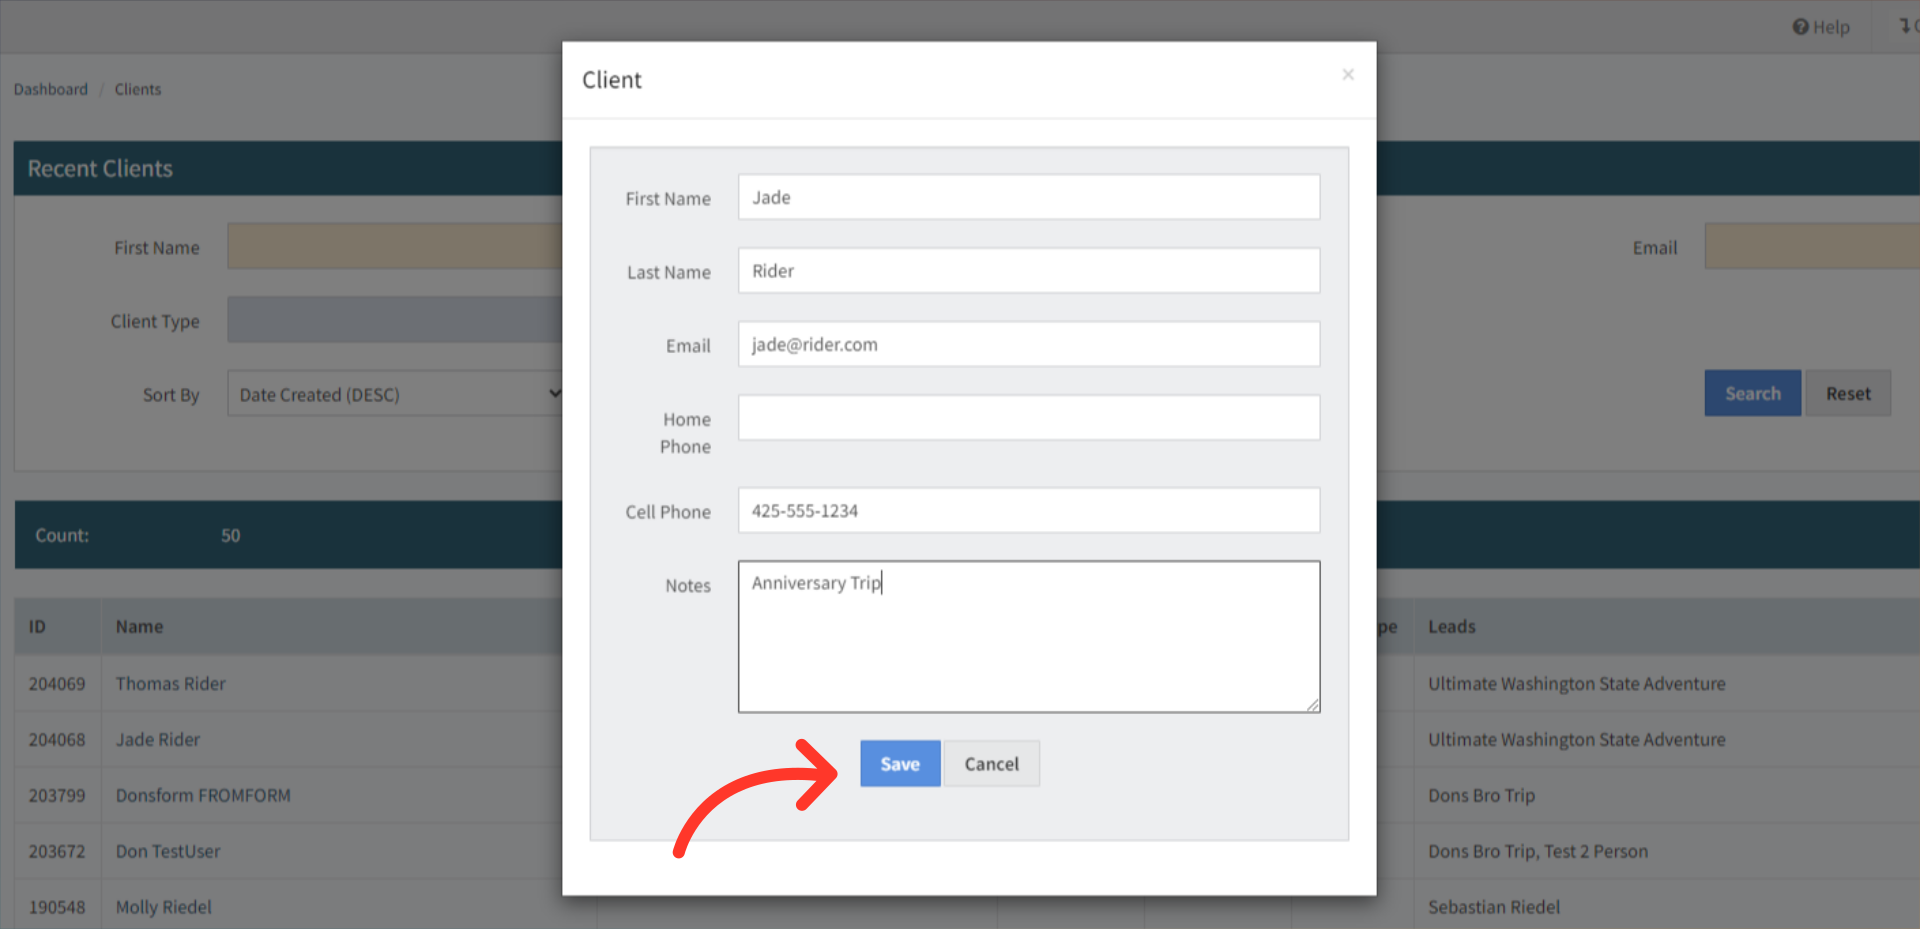
4. Enter your client's information. If you receive an alert saying the client already exists, please search for their record using their email address instead of creating a new client.
5. Click Save to continue
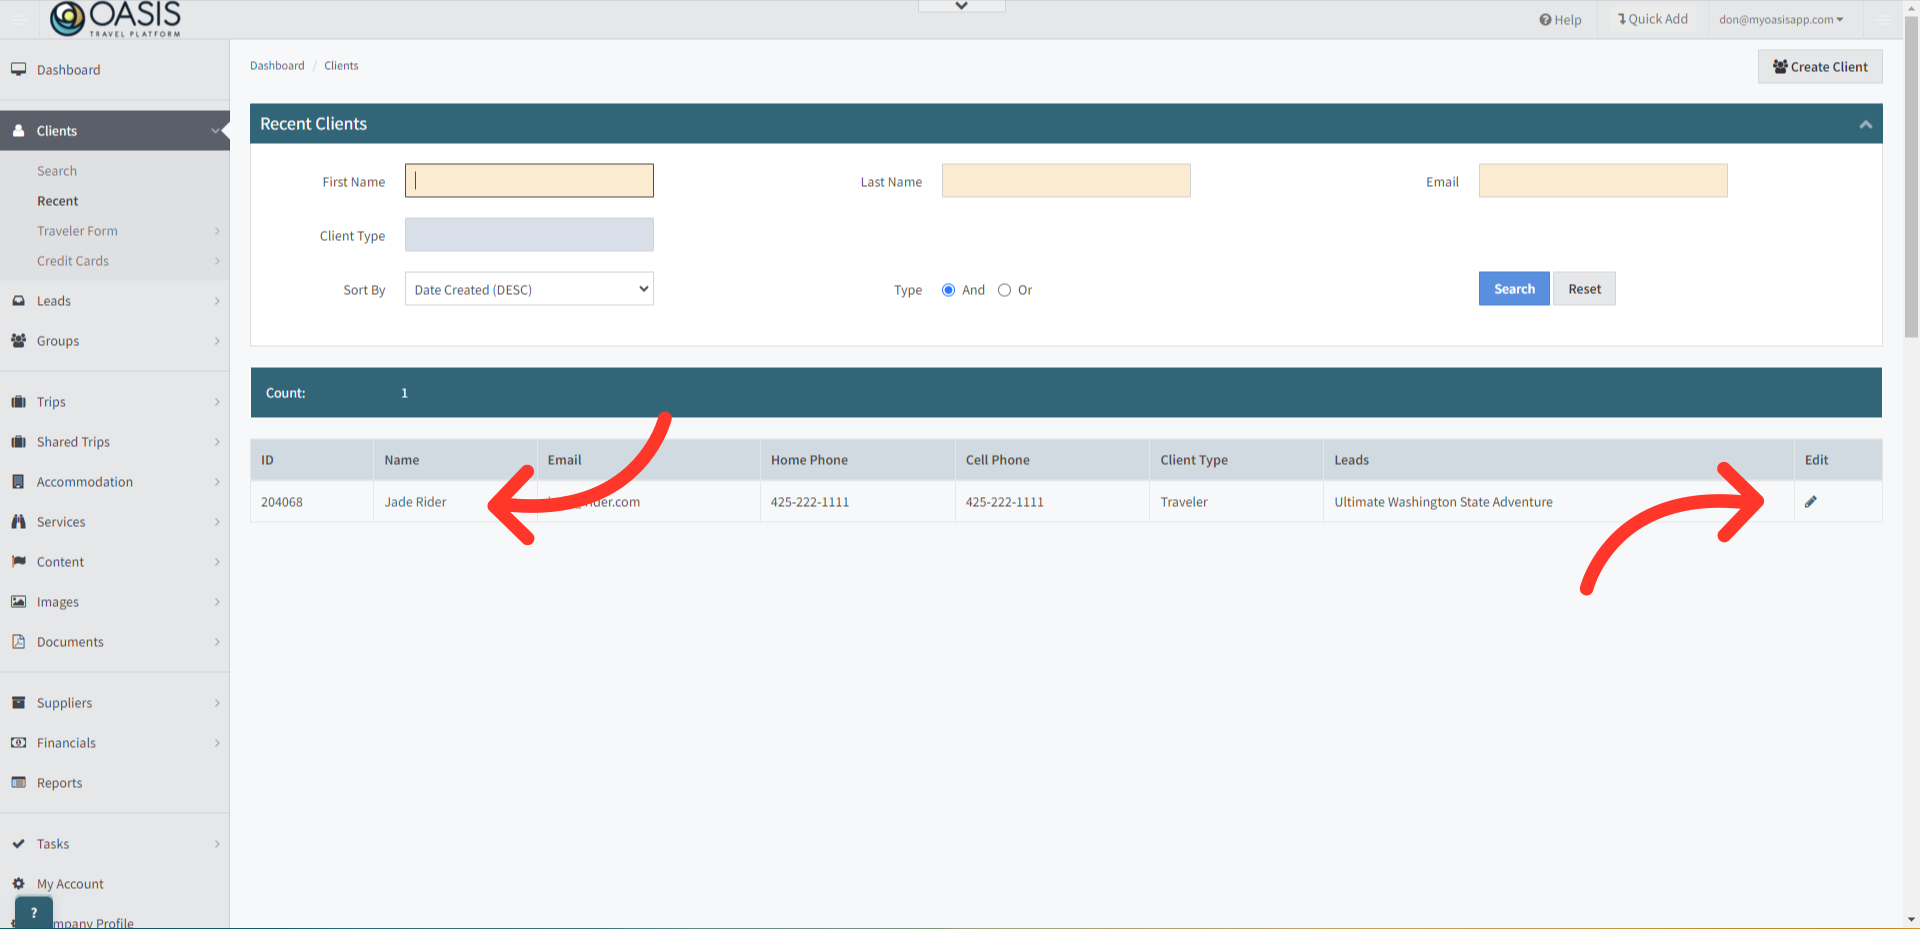
6. The new client will display in the list below the search fields. Click on either the contacts name, or the edit icon to the right to make changes to the record.
7. On the Contact tab you can fill in any missing details such as addresses, profile info and notes, Social Links, and Last Contacted Dates.
8. On the Personal tab you can edit more personal information such as the Clients Passport, Emergency Contact info, preferences, flight info and other travel preferences specific to the client.
9. Under the Miscellaneous tab will house any custom fields your company has setup. These custom fields can be modified or created under your Company Profile tab on the left hand side. Learn how to Edit Custom Fields here.
10. The Leads tab shows any Lead booking this Client is associated with. These connections are created when the Client is added to a Lead under Lead >> Clients, making it easy to see all related bookings and activity tied to that Client in one place.

11. The Documents tab is where all documents associated with the Client are stored. Agents can upload files directly here, such as passports, visas, insurance, or signed forms, and view any documents that have already been added. Documents can also be collected through other methods, including sharing an individual Document Uploader URL or allowing clients to upload documents directly through a Form if the Document Uploader is enabled there (To see more about the Document Uploader click here).

12. The Credit Cards tab provides a secure method for storing client credit card information, ensuring end-to-end protection. This feature allows for seamless payment of travel expenses without the need for frequent client contact.

13. The History tab, displays historical changes to the client information.
 | Learn how to Use Forms to Create or Update Clients Information |
