Welcome! Today, we'll quickly show you How to Add Service Costs in the Oasis Travel Platform.
Service Costs allow you to automate the trip-building process by adding costs directly to services. These costs are automatically applied to any trip that includes the service, streamlining your workflow and ensuring accurate pricing for your clients. Whether you're working with simple costs or utilizing advanced features like Min/Max PAX and Seasonality, this guide will help you make the most of these capabilities.
Note:
If a service already has costs configured, you do not need to enable the Add New Cost toggle when adding it to a trip. Those costs will be included automatically if they meet the set criteria. Turning on Add New Cost is only used when you want to manually add one additional cost on top of the existing ones. Leaving it on without entering a new cost will result in an empty $0.00 cost line. To avoid this, leave the toggle off unless you’re adding a custom ad-hoc cost.
Adding a Simple Cost with No Parameters
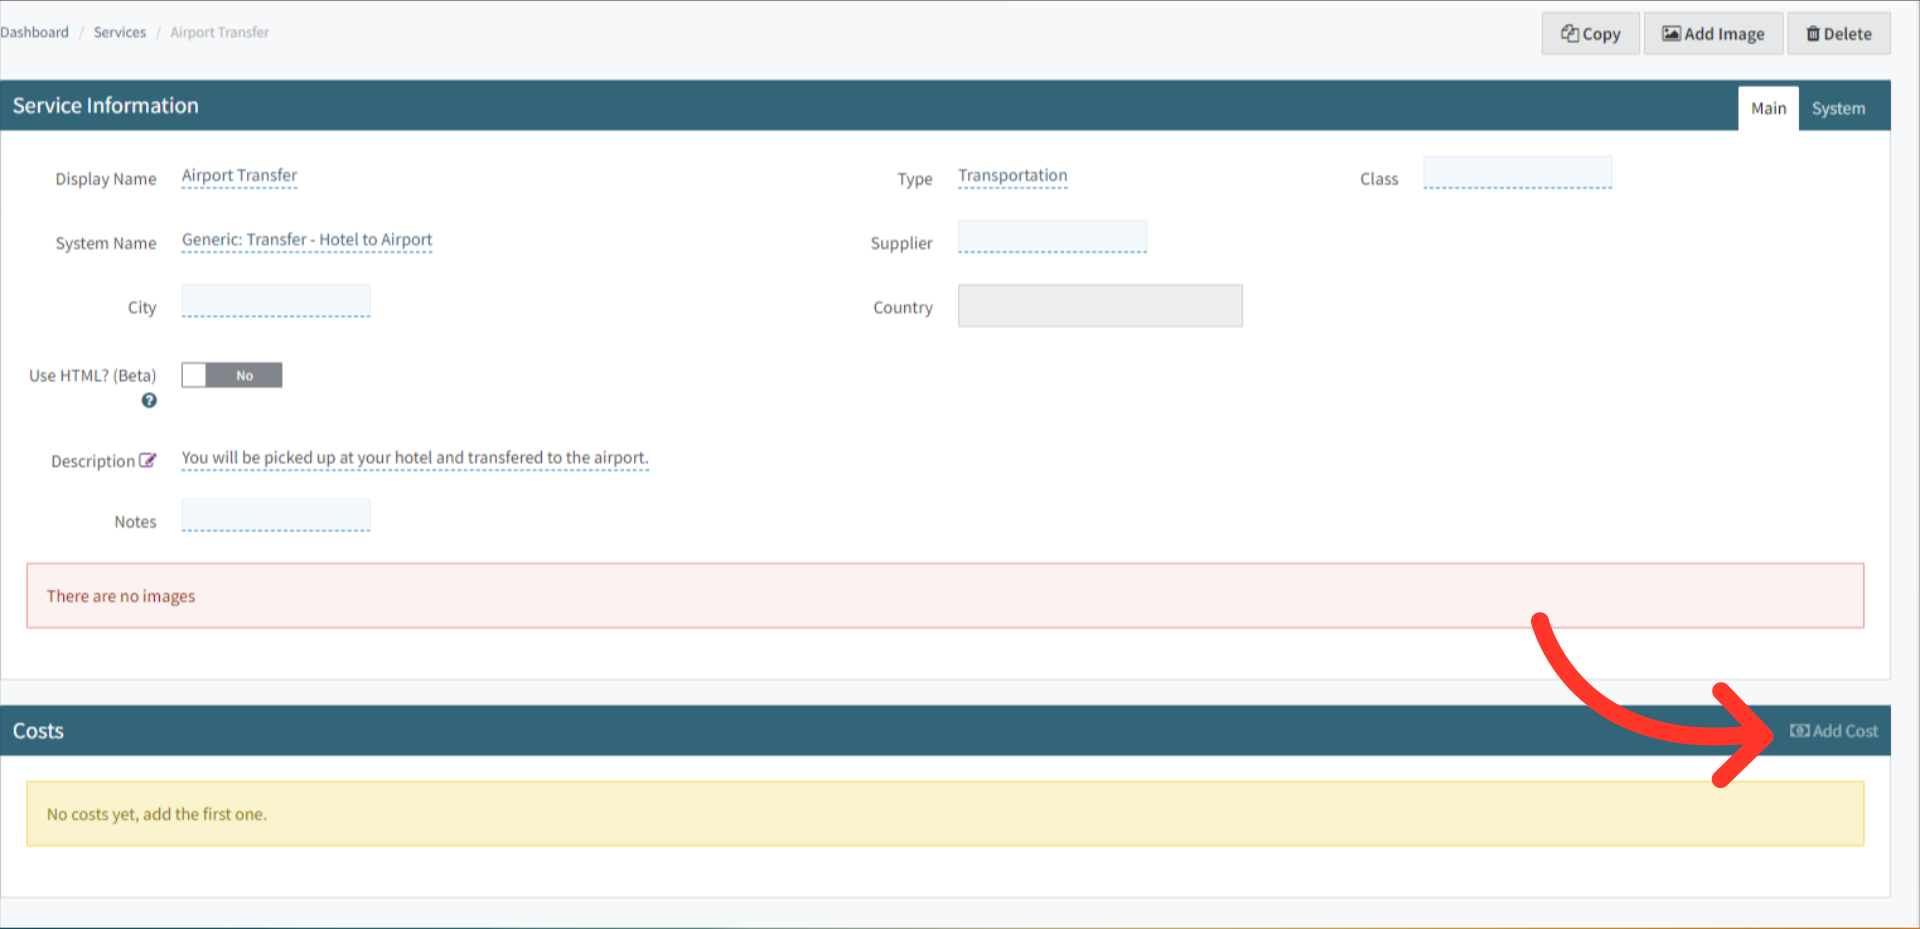
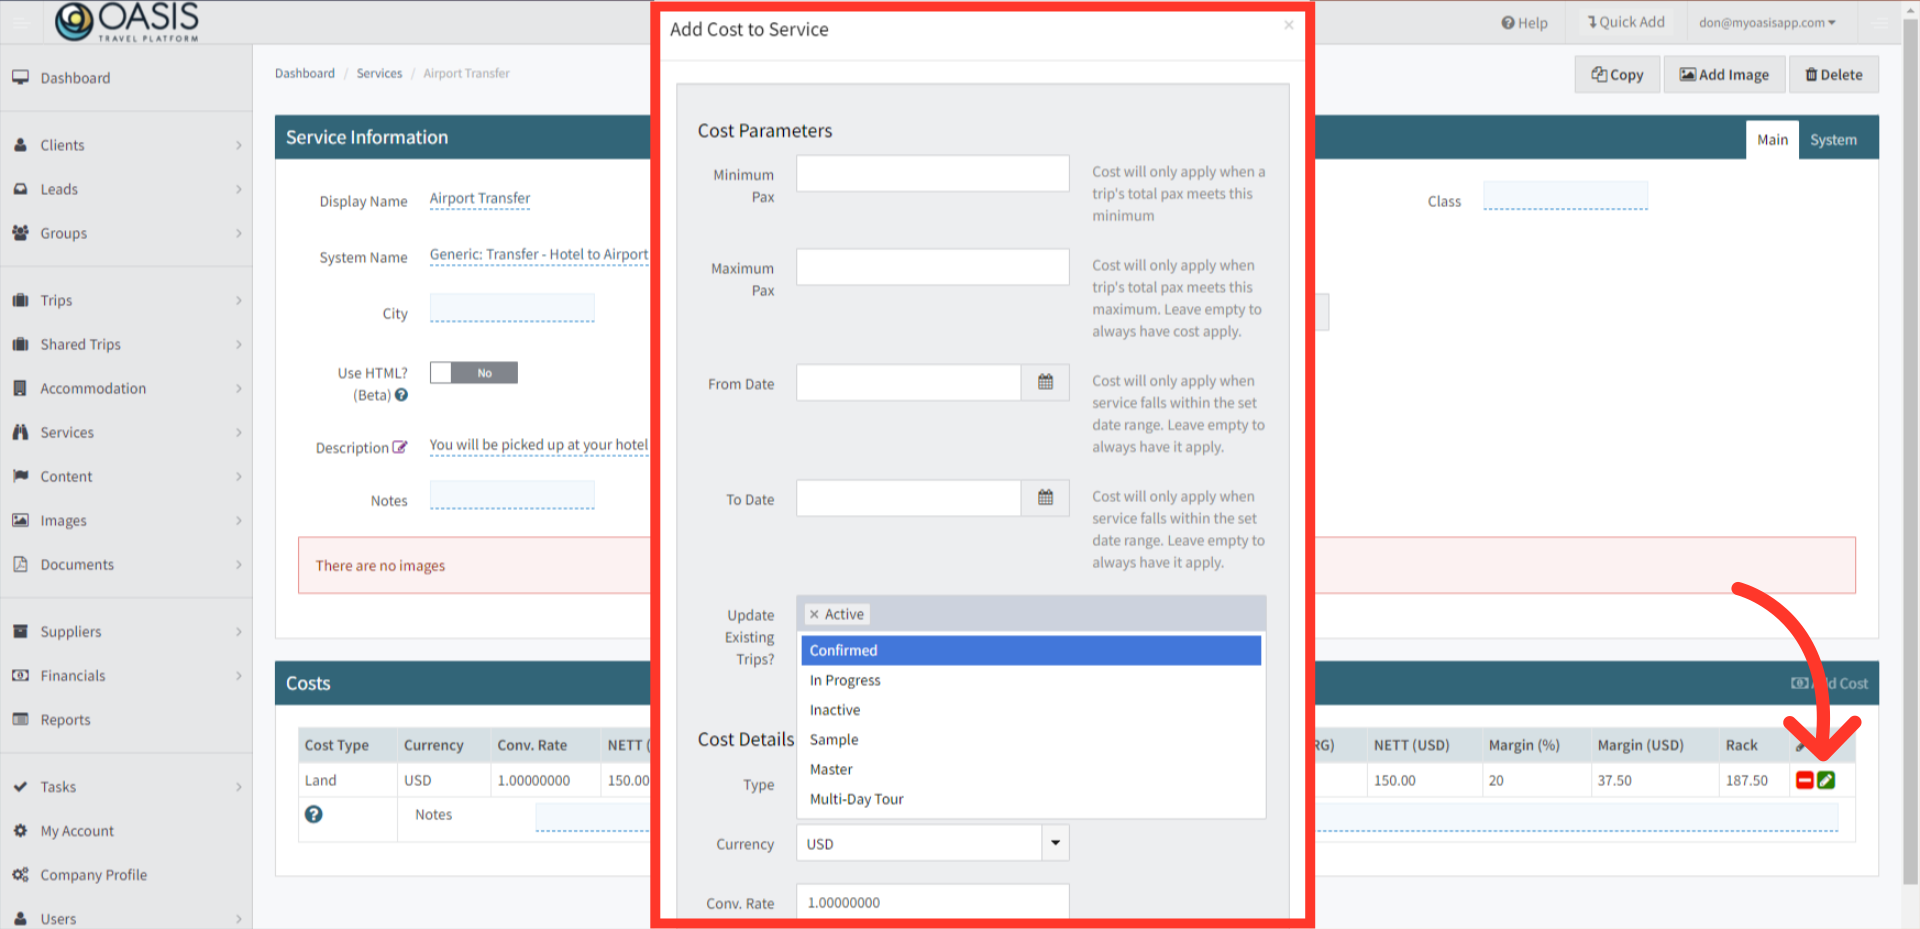
1. To start, open the specific service you want to add a cost to. Click on the Add Cost button in the Cost section toward the bottom of the page.
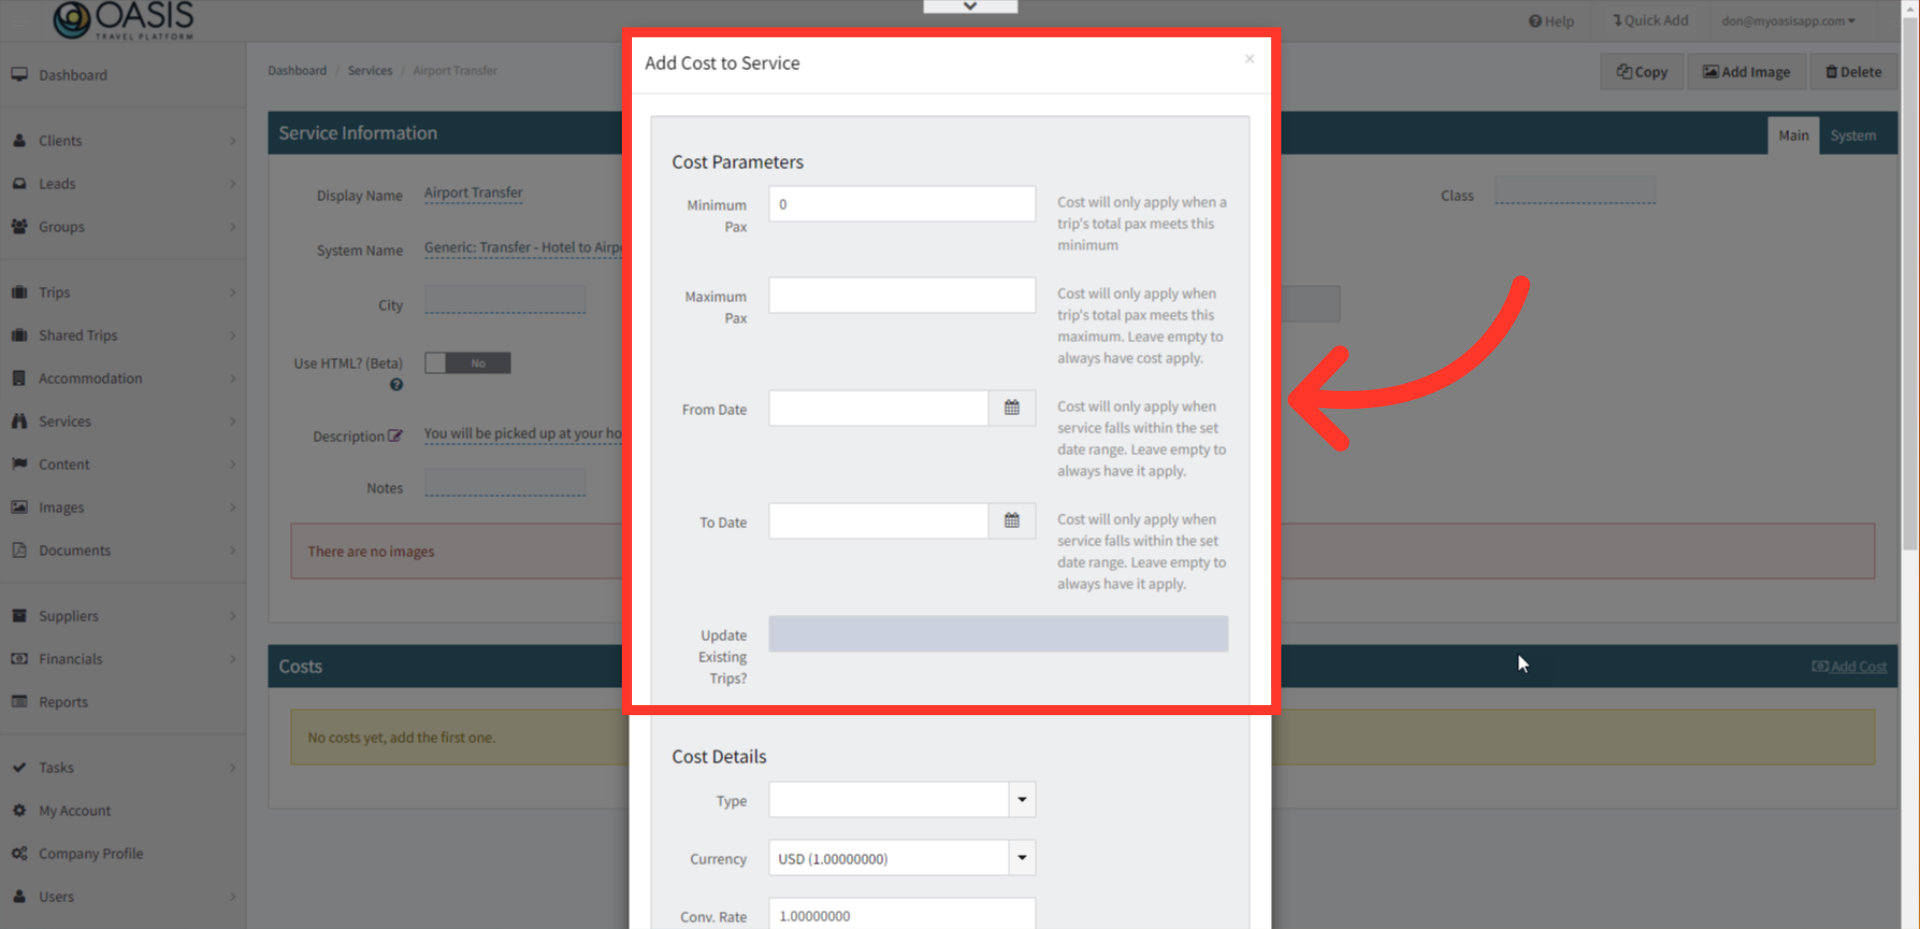
2. In the popup, enter the relevant details for the service. For this example, let's create a simple cost with no parameters. Since we want this cost to apply every time the service is used, we'll leave the cost parameters blank. This ensures the cost is applied universally, without any specific conditions.
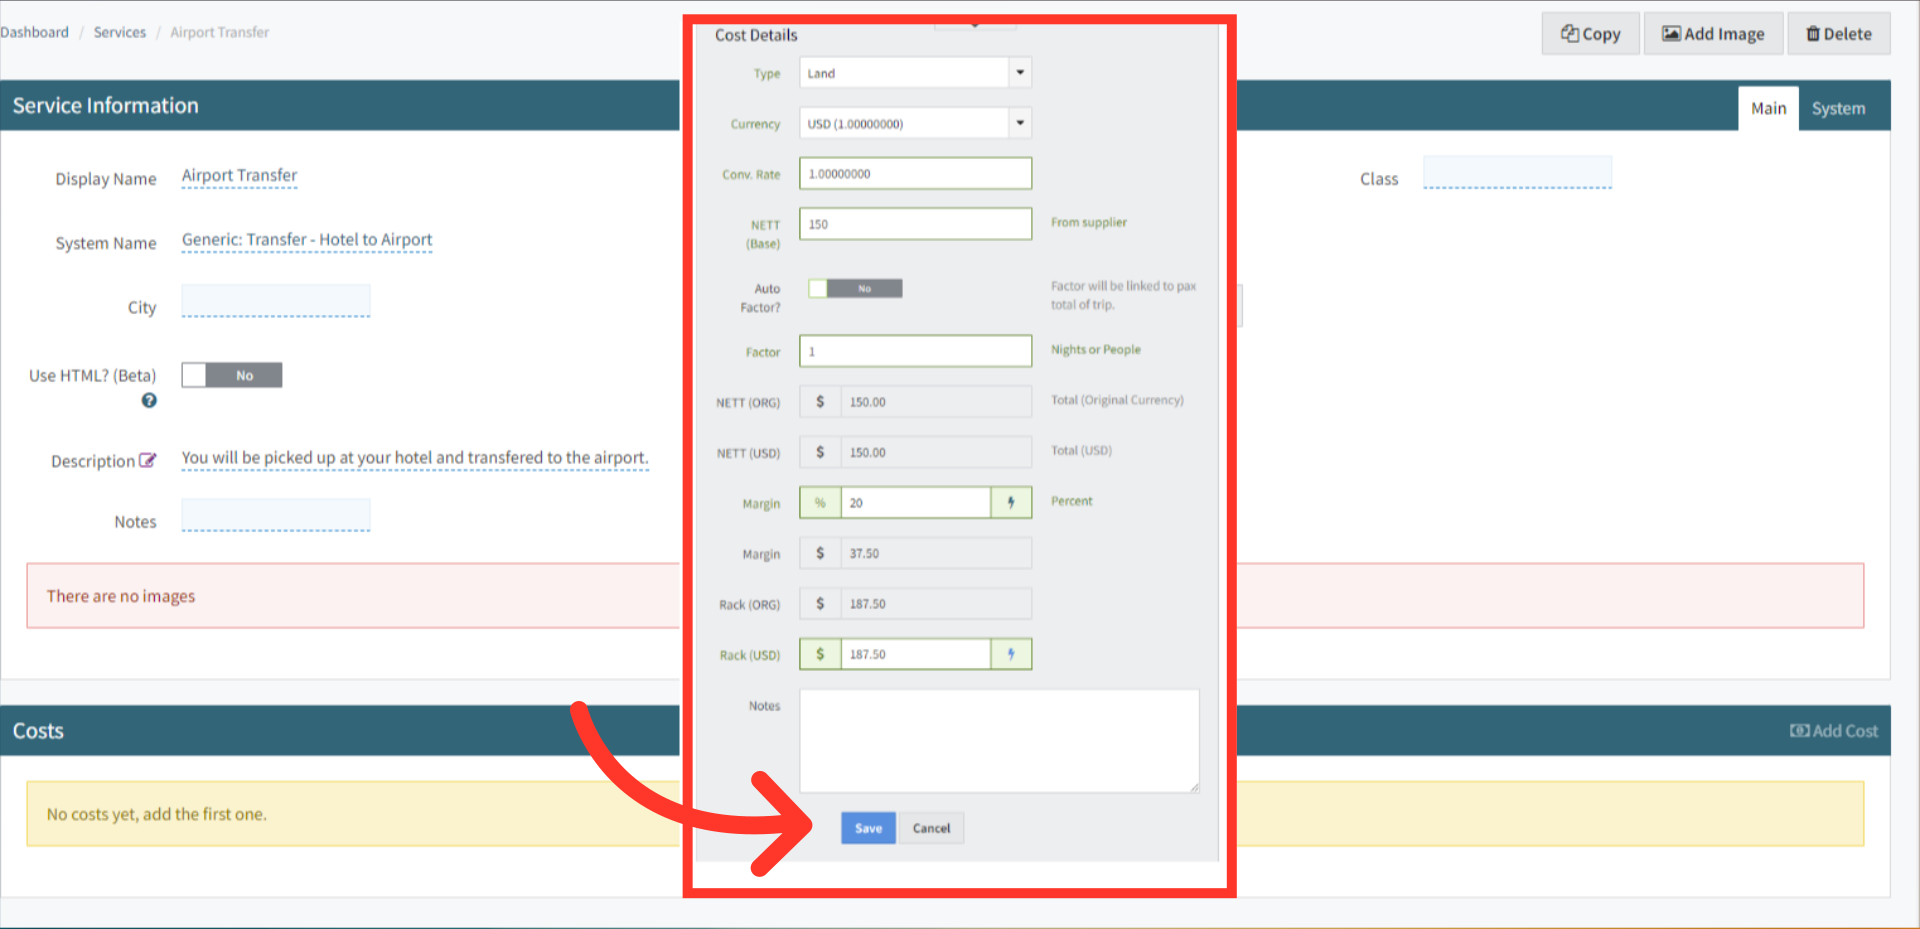
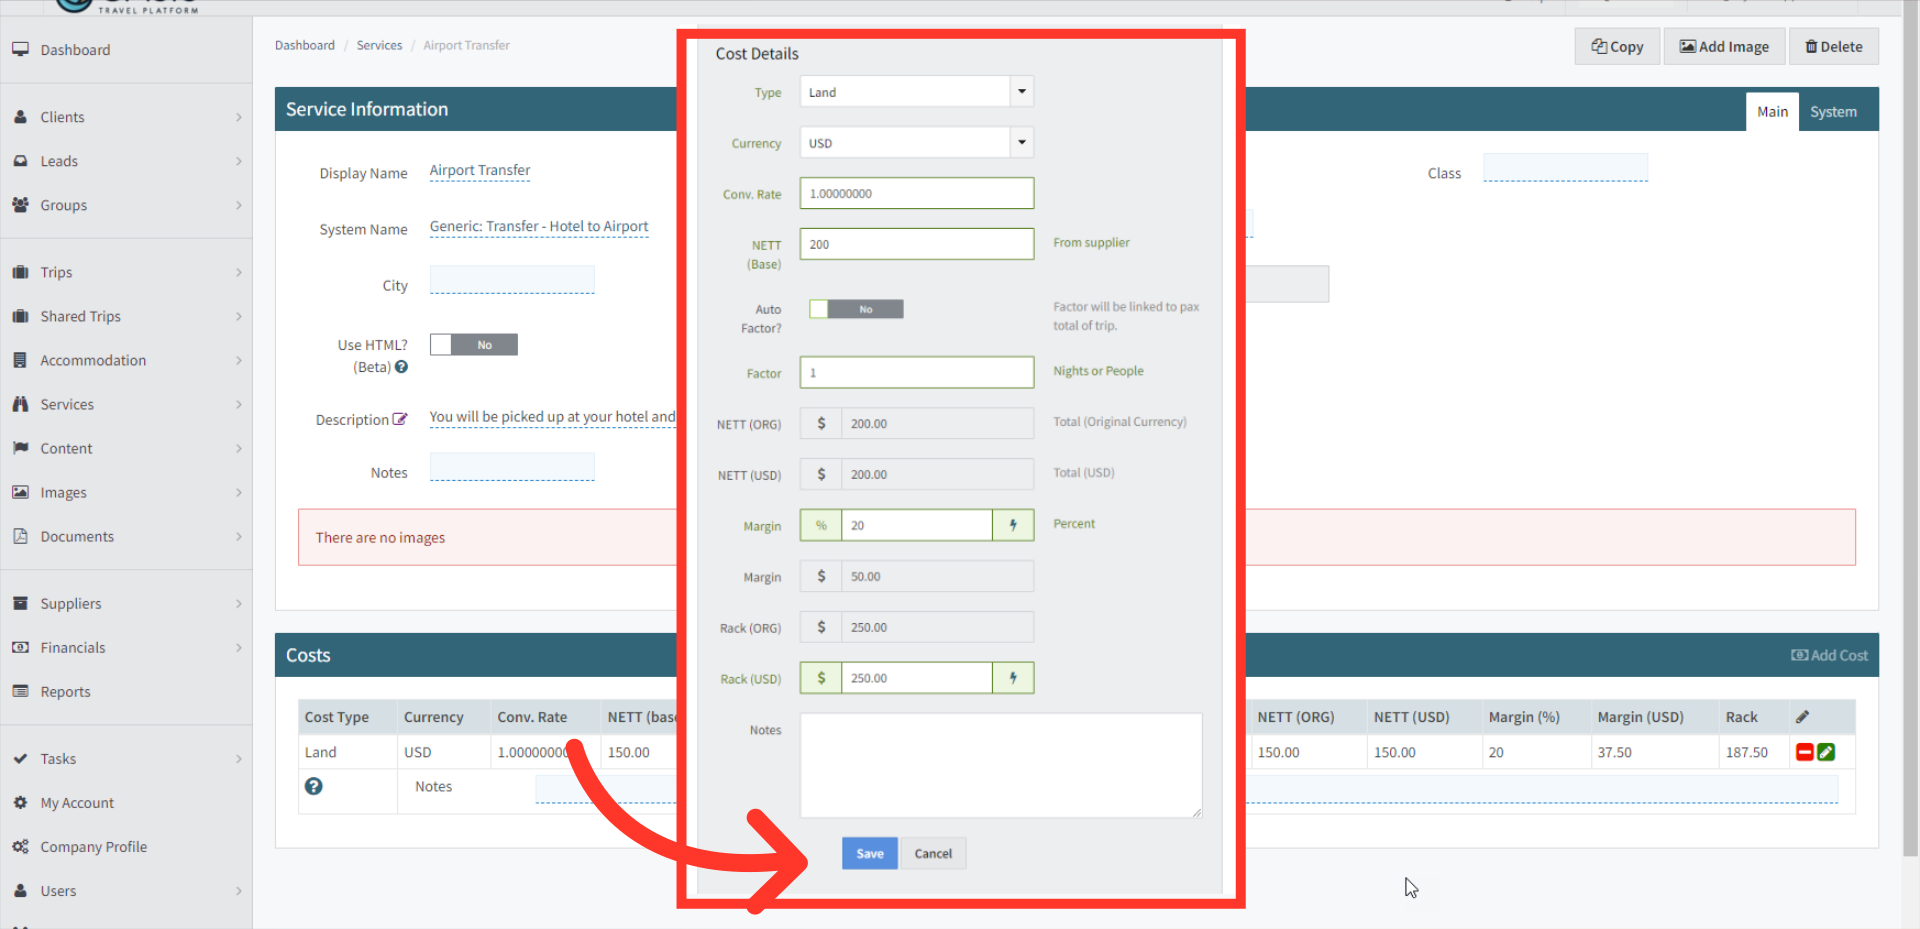
3. Next, fill out the Cost Details section. This includes specifying the cost amount, as well as the Margin, Rack, and Nett amounts. Ensure all necessary details are accurately entered to reflect the true cost structure. Once completed, click Save to apply the cost.
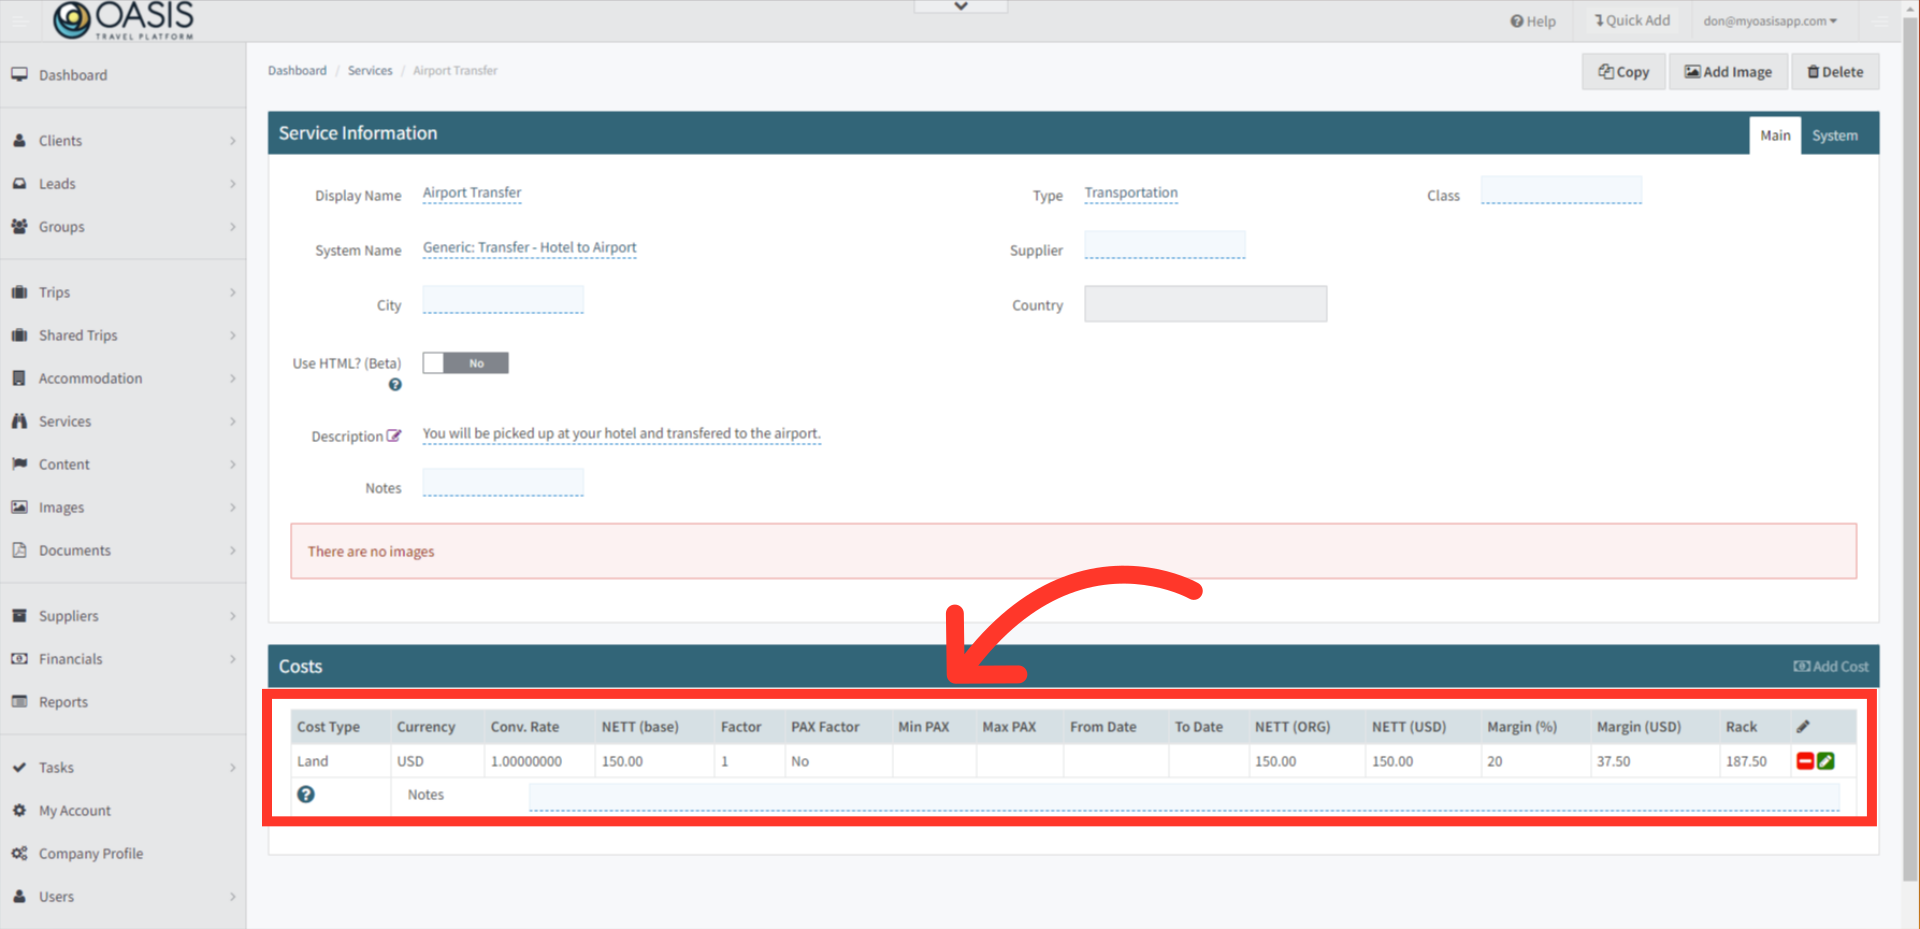
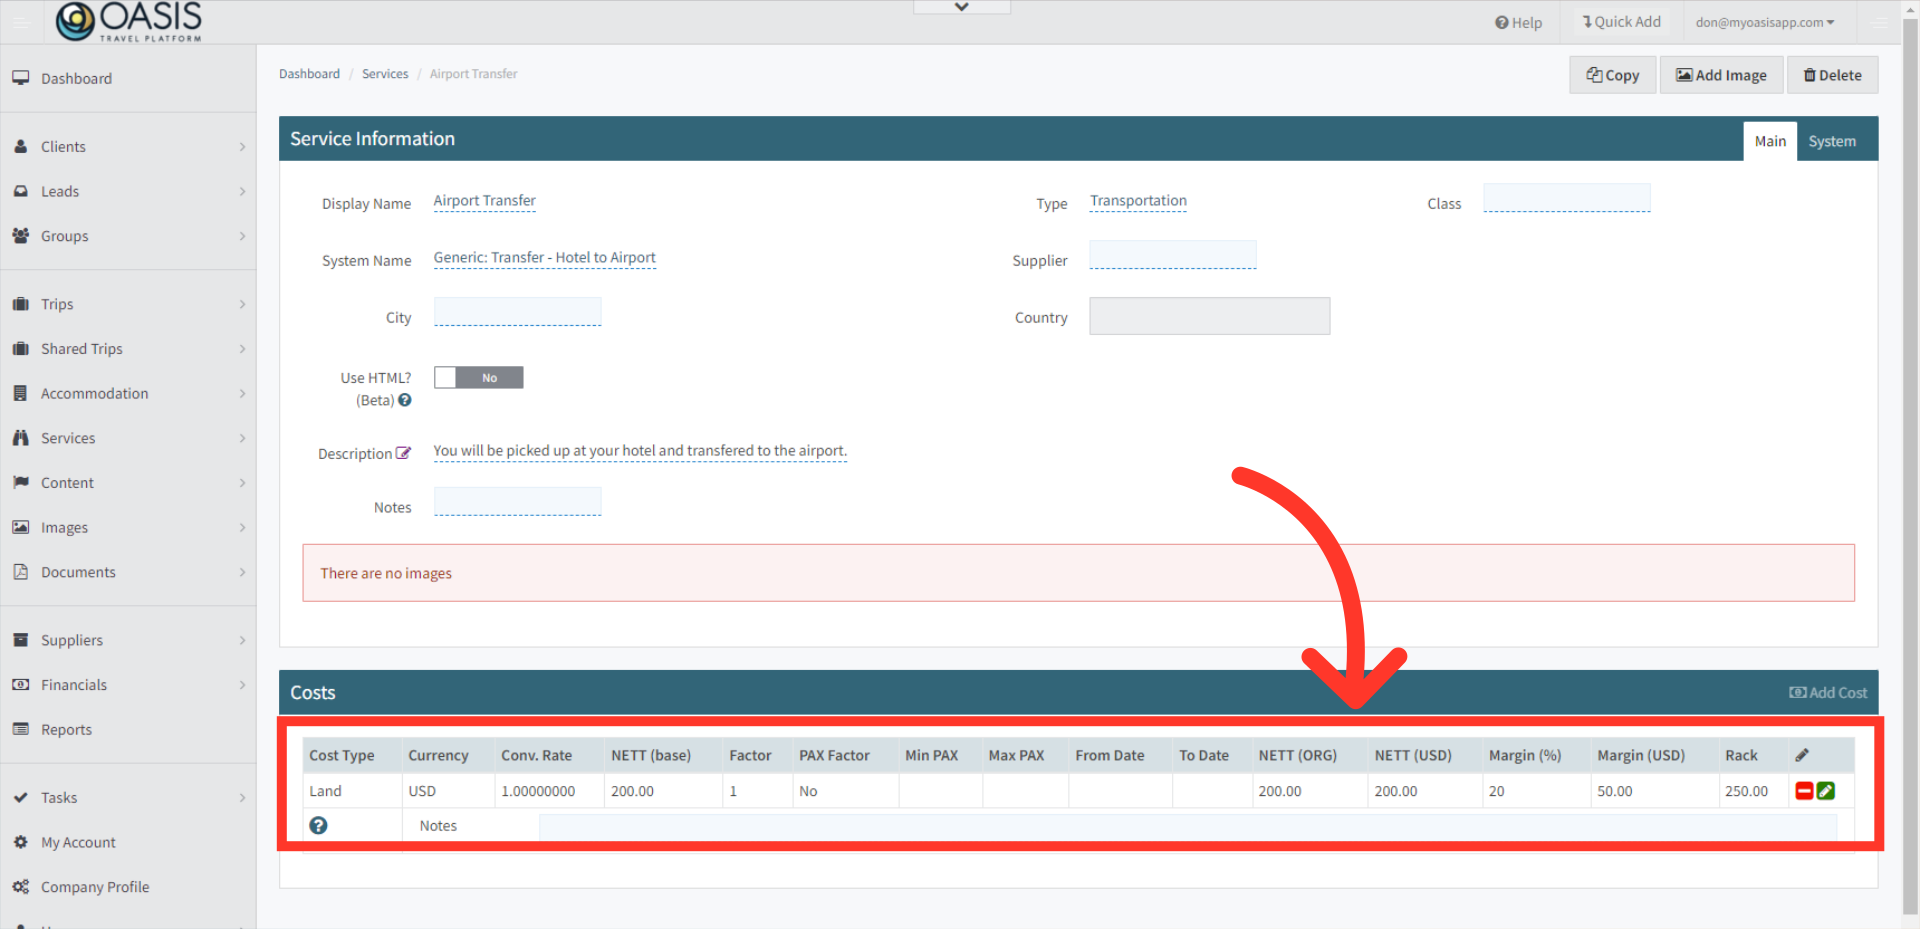
4. After saving, the service cost will appear as a line item under the Costs Section of the service record. This confirms that the cost has been successfully added.
Updating Service Costs
1. To update an existing service cost, click the green edit button next to the cost line item. This will open the cost details form for editing. You can choose whether to update costs for trips that already have this service applied. For example, you might decide to update only trips with an 'Active' status. Make your selection based on your needs.
2. Make any necessary changes to the cost details, then click Save. In our example this means any Trip with an 'Active' status will update.
3. The updated cost will automatically apply to all relevant trips as well as the Service Costs.
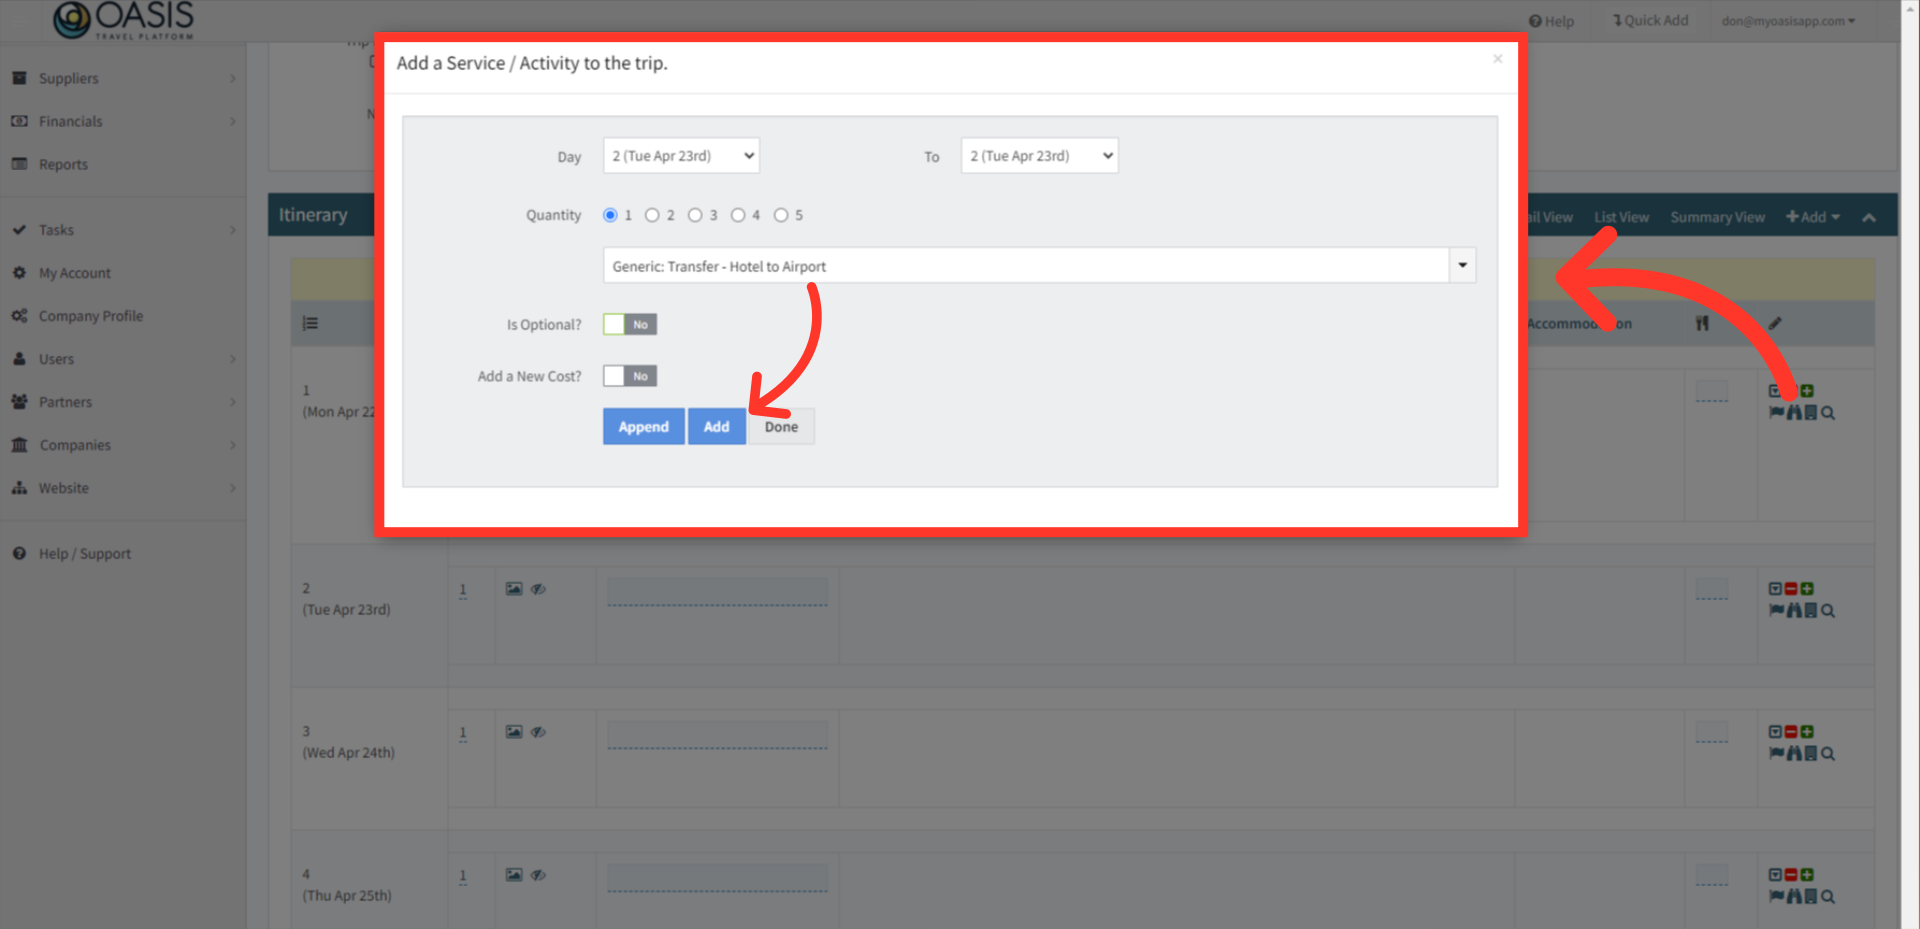
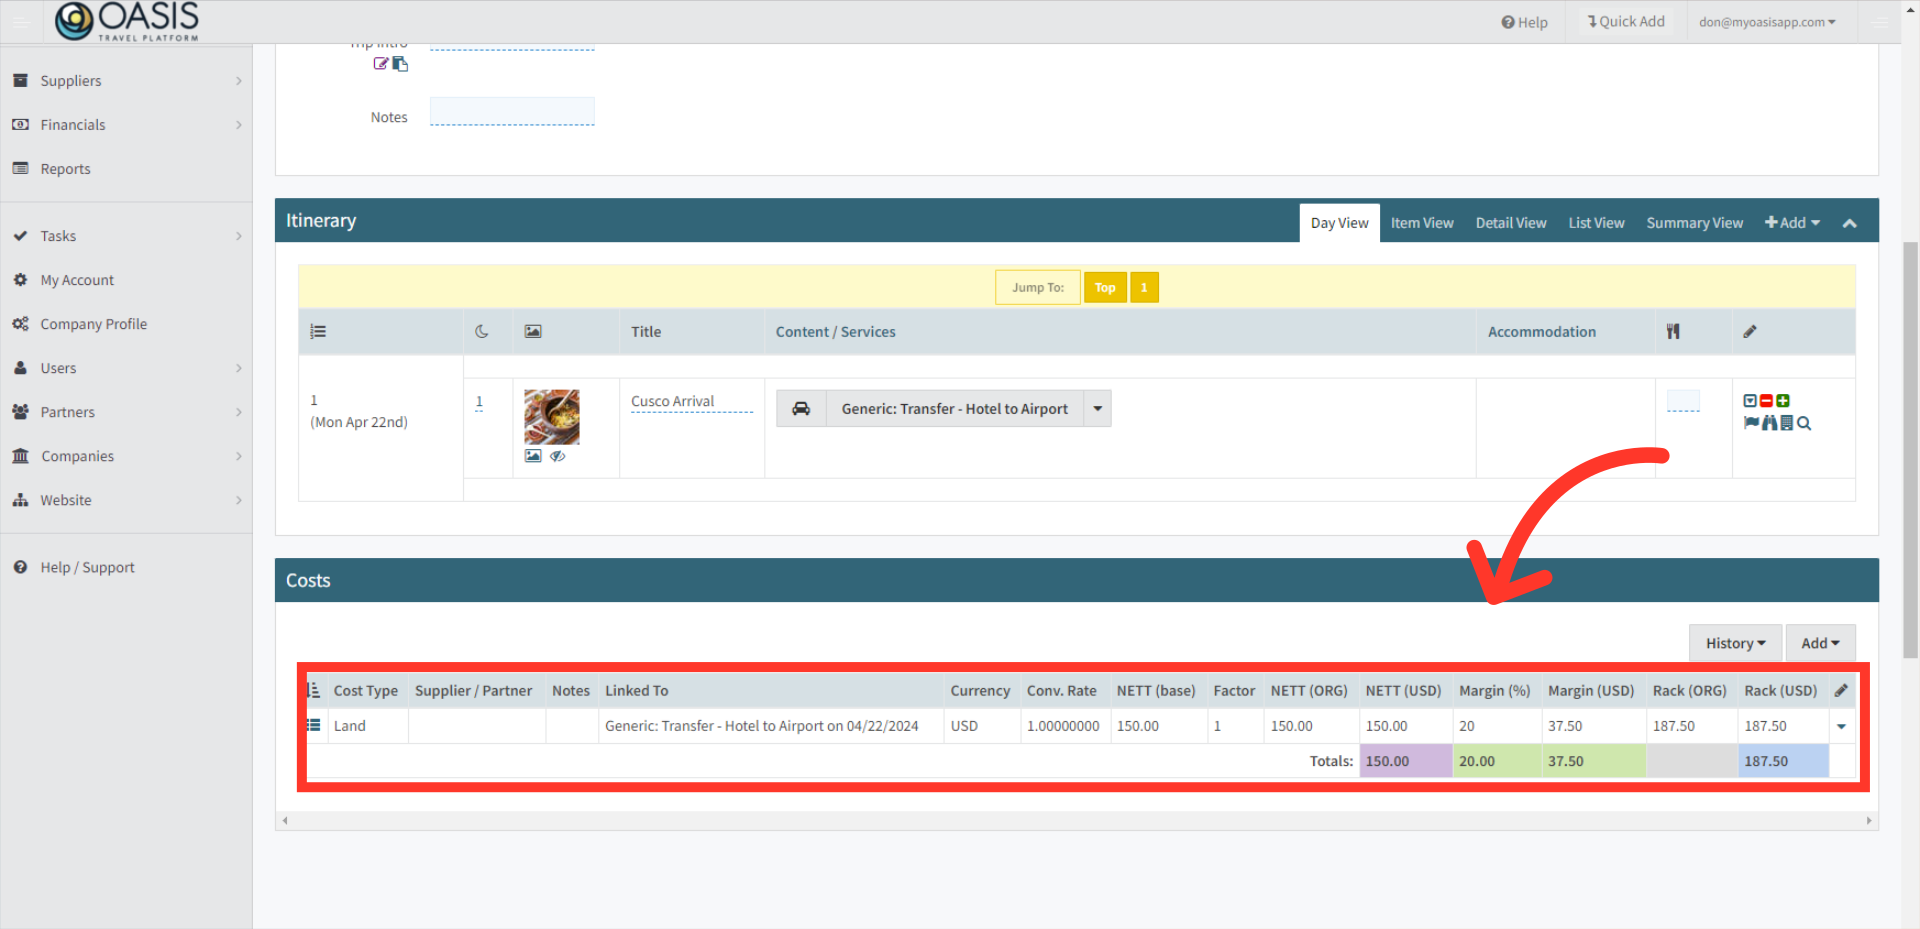
4. Now, inside the Trip Builder, when you go to add the service to a trip, the associated cost will then automatically appear in the Costs section at the bottom of the trip details.
5. After clicking Add or Append to the service, the associated cost will then automatically appear in the Costs section at the bottom of the trip details. The Nett, Margin, and Rack amounts will be broken out and displayed under the Costs section.
Editing Service Costs Added to a Trip
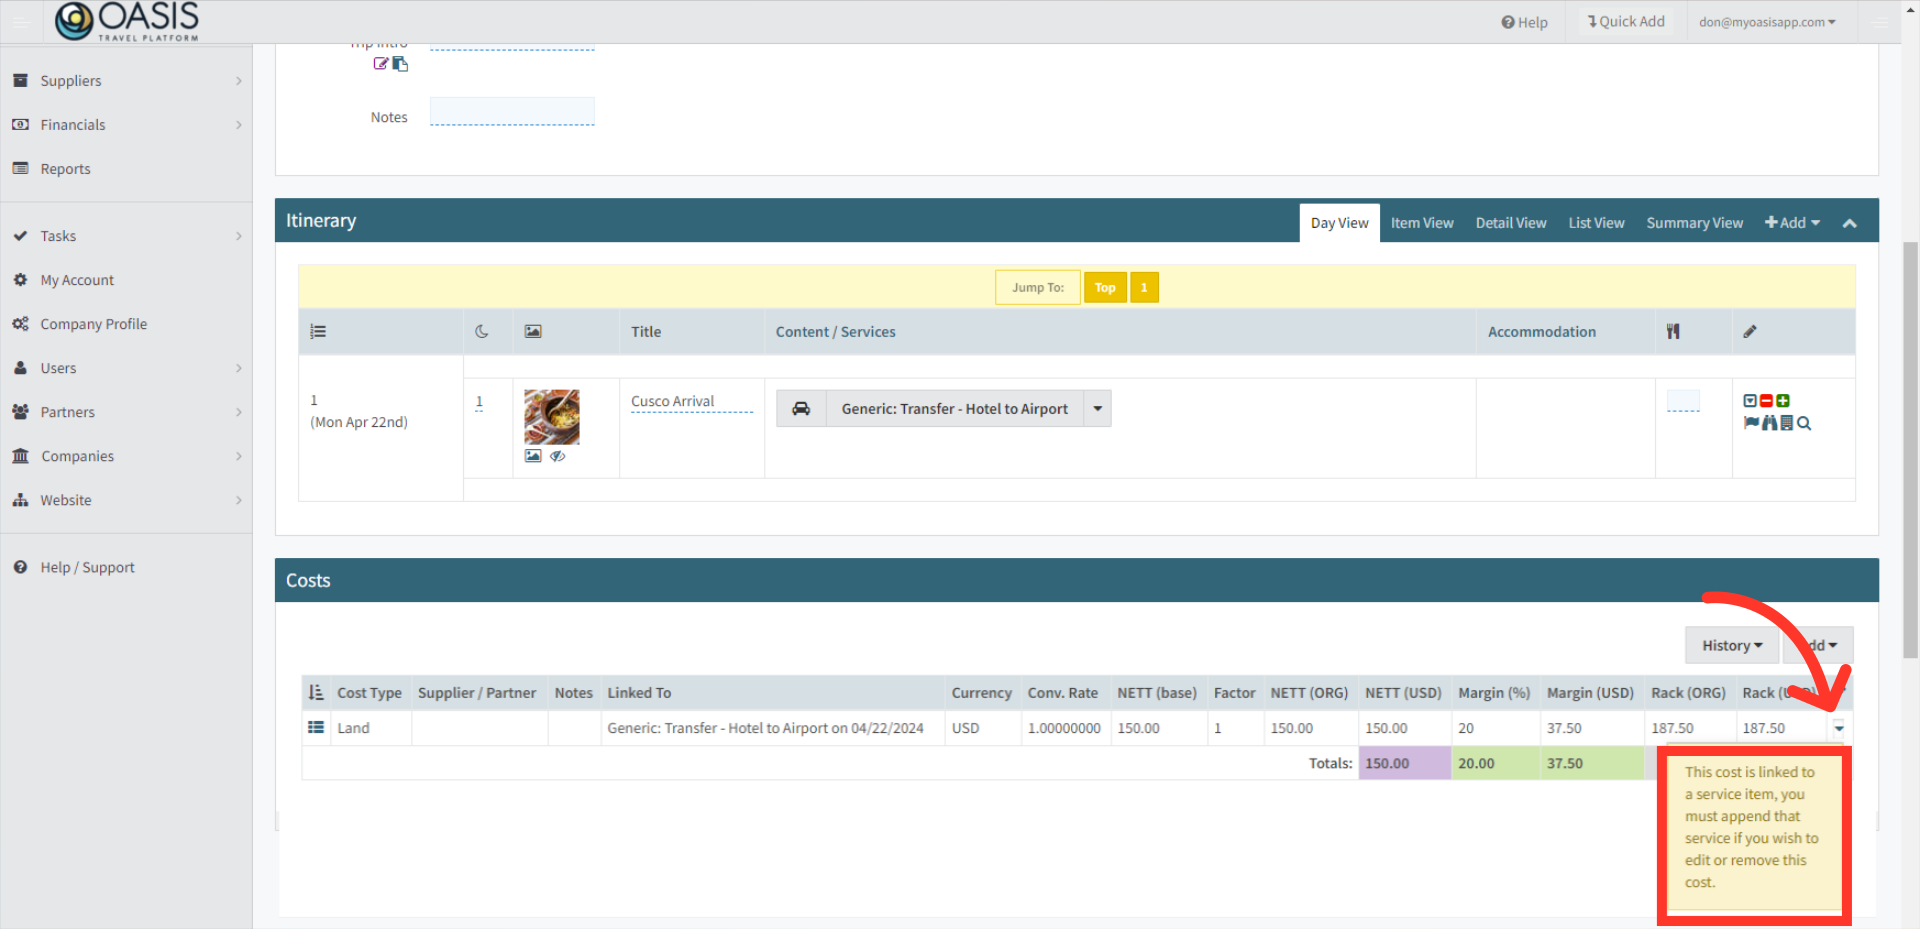
1. Once a service cost is added to a trip, it cannot be edited directly within that trip. However, there is an option to customize the cost for that specific trip.
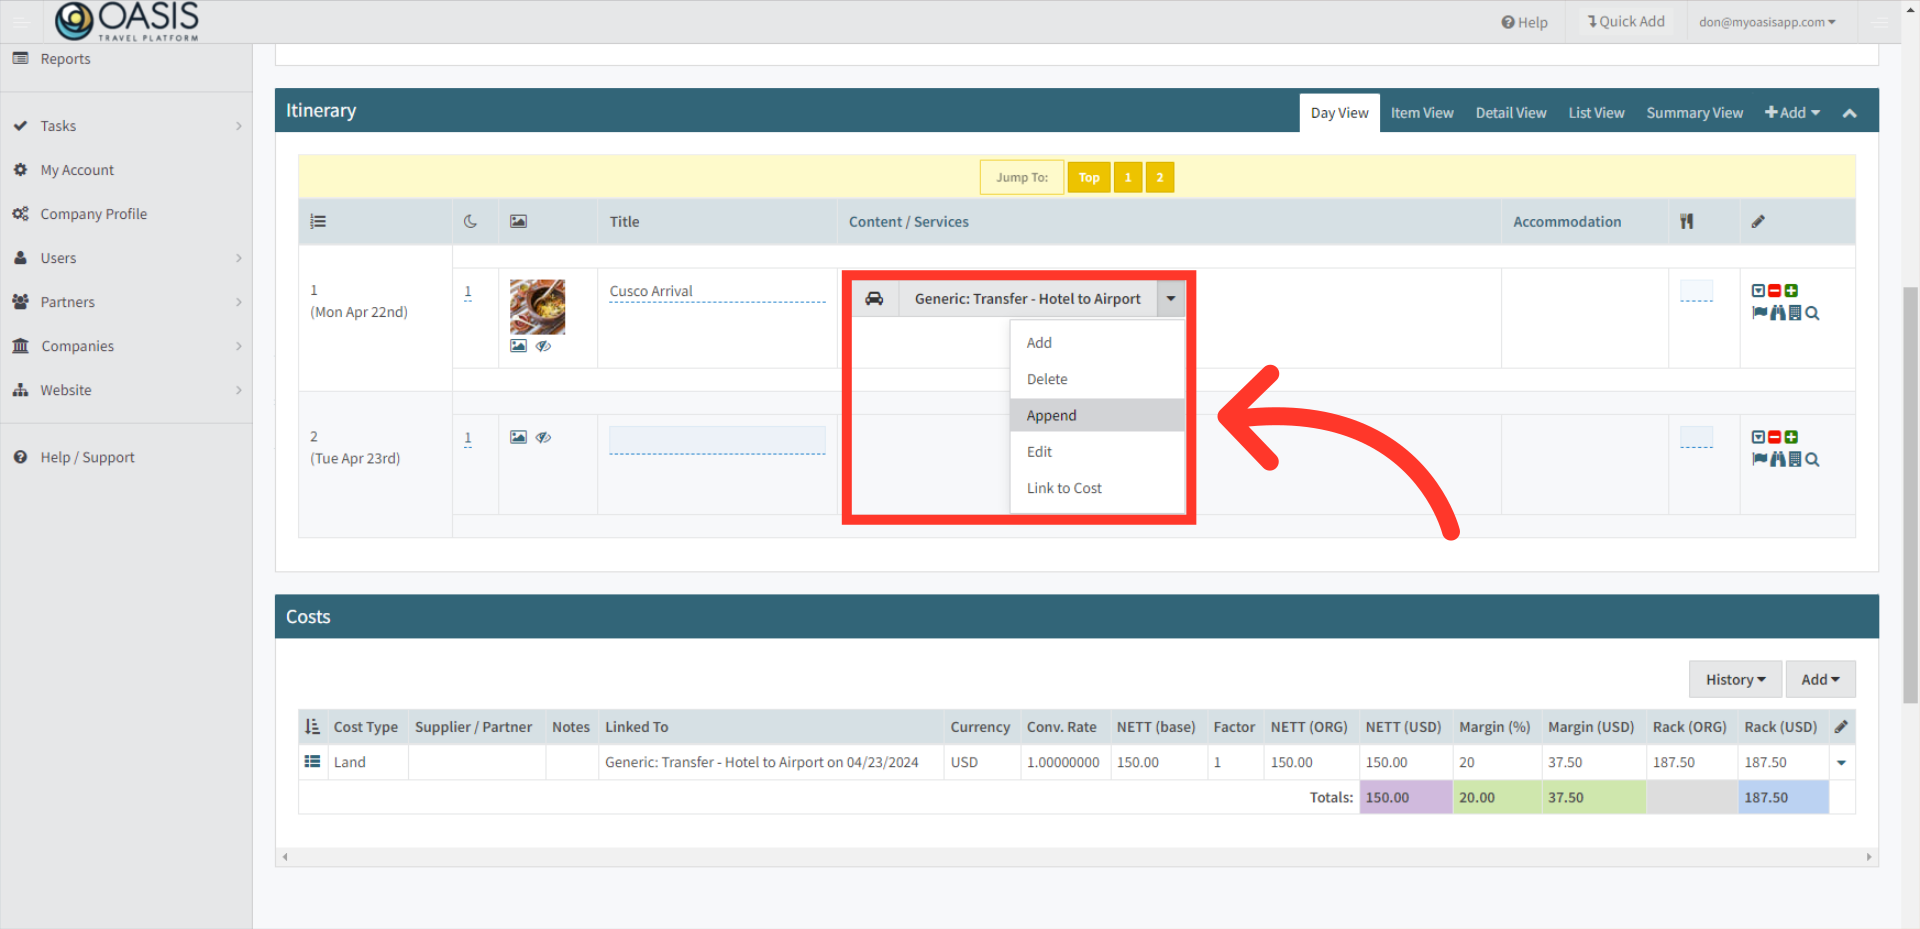
2. Edit the service cost and append the service. This breaks the link to the original service, allowing you to adjust the cost for this trip only. Future edits to the original service cost will not affect this trip.
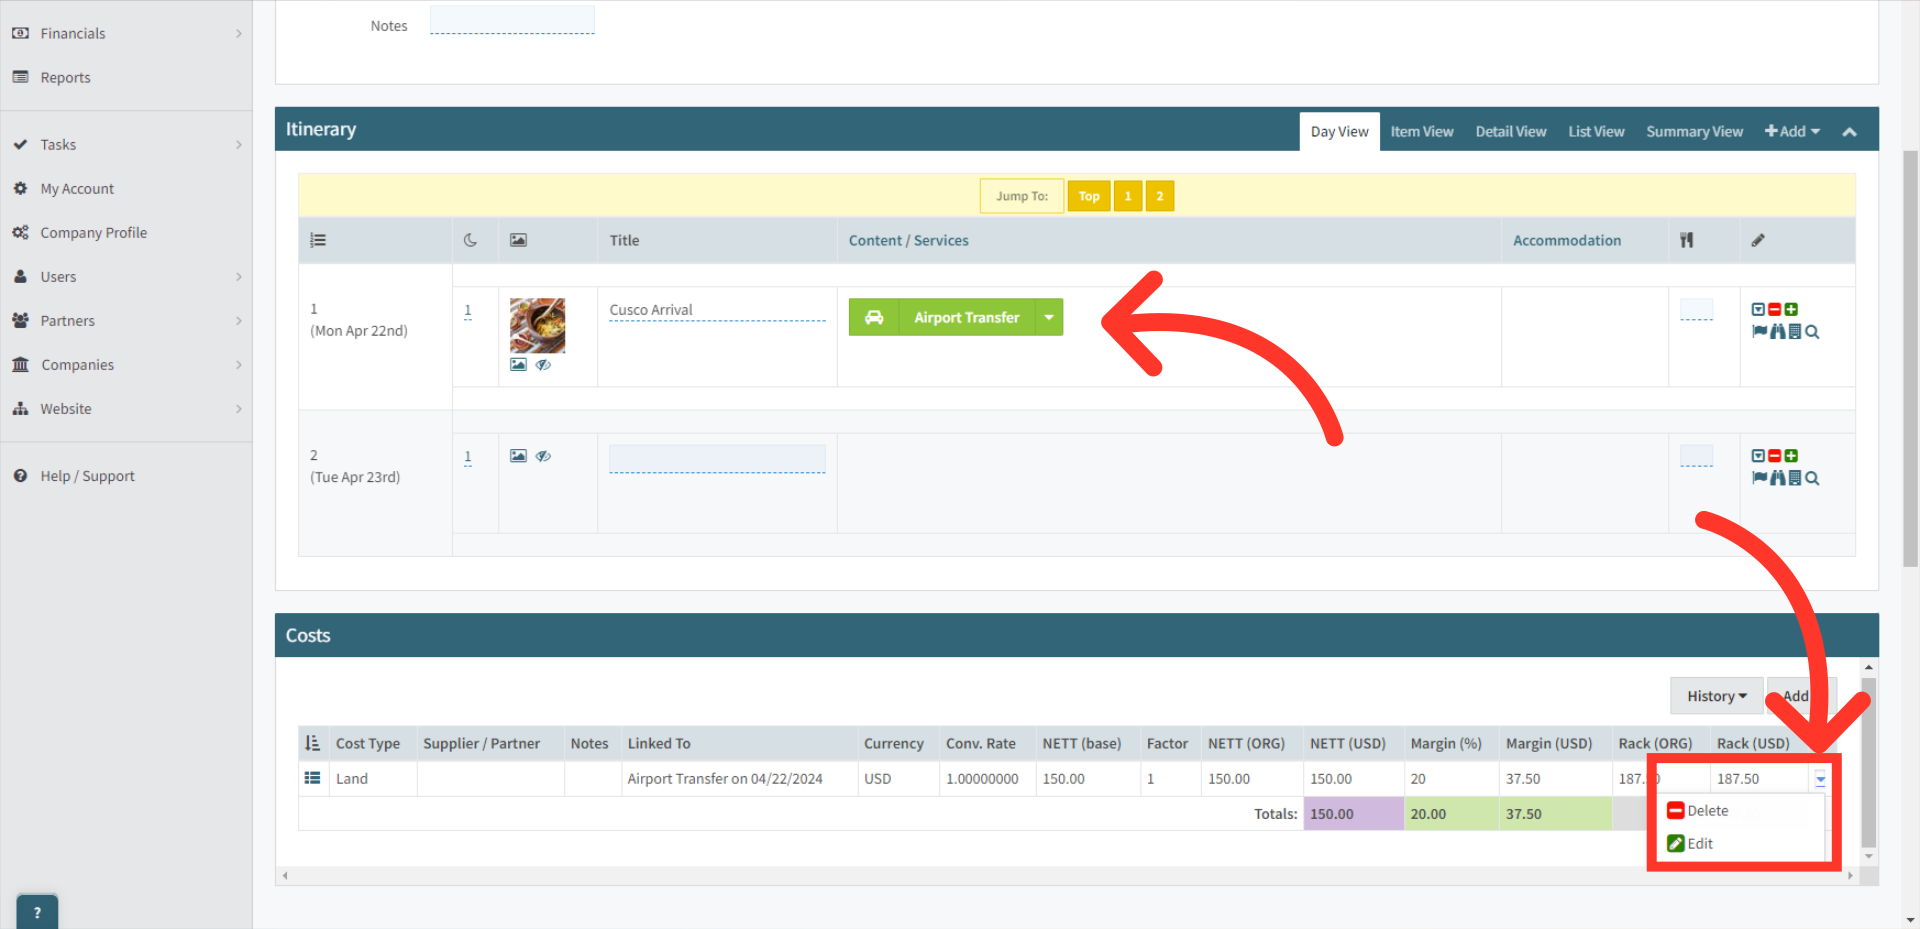
3. After you click Append, the service will turn green, indicating that it has been successfully appended and is no longer connected to the main service. This allows the cost item, as well as other aspects like descriptions, to be edited or deleted as needed for that specific trip. Clicking Edit will bring up the Cost Details window, where you can make the necessary changes.
It's important to note that the append function works the same way across all aspects of service editing within a trip. When you initially add a service to a trip, all elements of that service—including descriptions, costs, and other details—are linked to the original service record. To make any changes to a linked service within a trip, you must first append it, which breaks the link to the original service record. This gives you the flexibility to customize the service specifically for that trip, without affecting the original record or any other trips.
Relevant Articles: |

