Table of Contents
- How to Configure Supplier Bills
- How to Configure Company Supplier Bill Auto-Generate Settings
- How to Configure Supplier Deposit and Final Settings
- How to Add Manual Supplier Bill
- Manually Added Bill Fields Descriptions
Welcome! Today, we'll quickly show you how to Add Supplier Bills in the Oasis Travel Platform.
1. First, Navigate to the Lead Booking where the Financials need to be Updated.
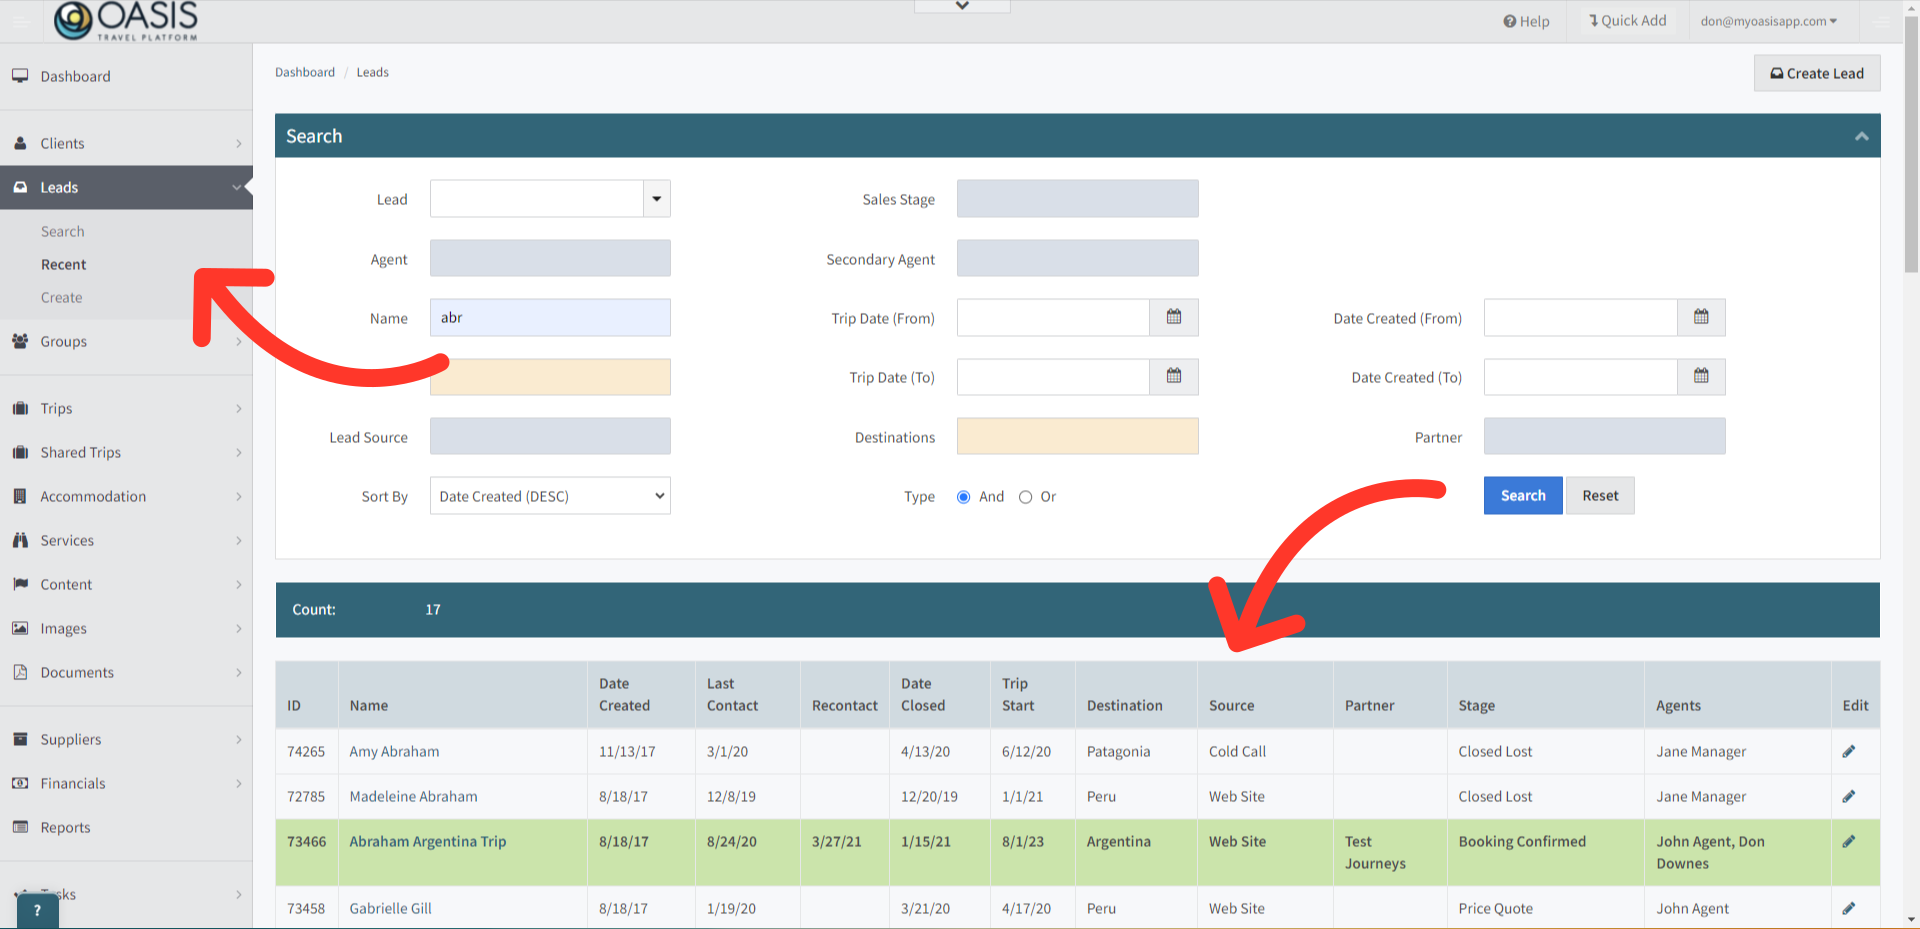
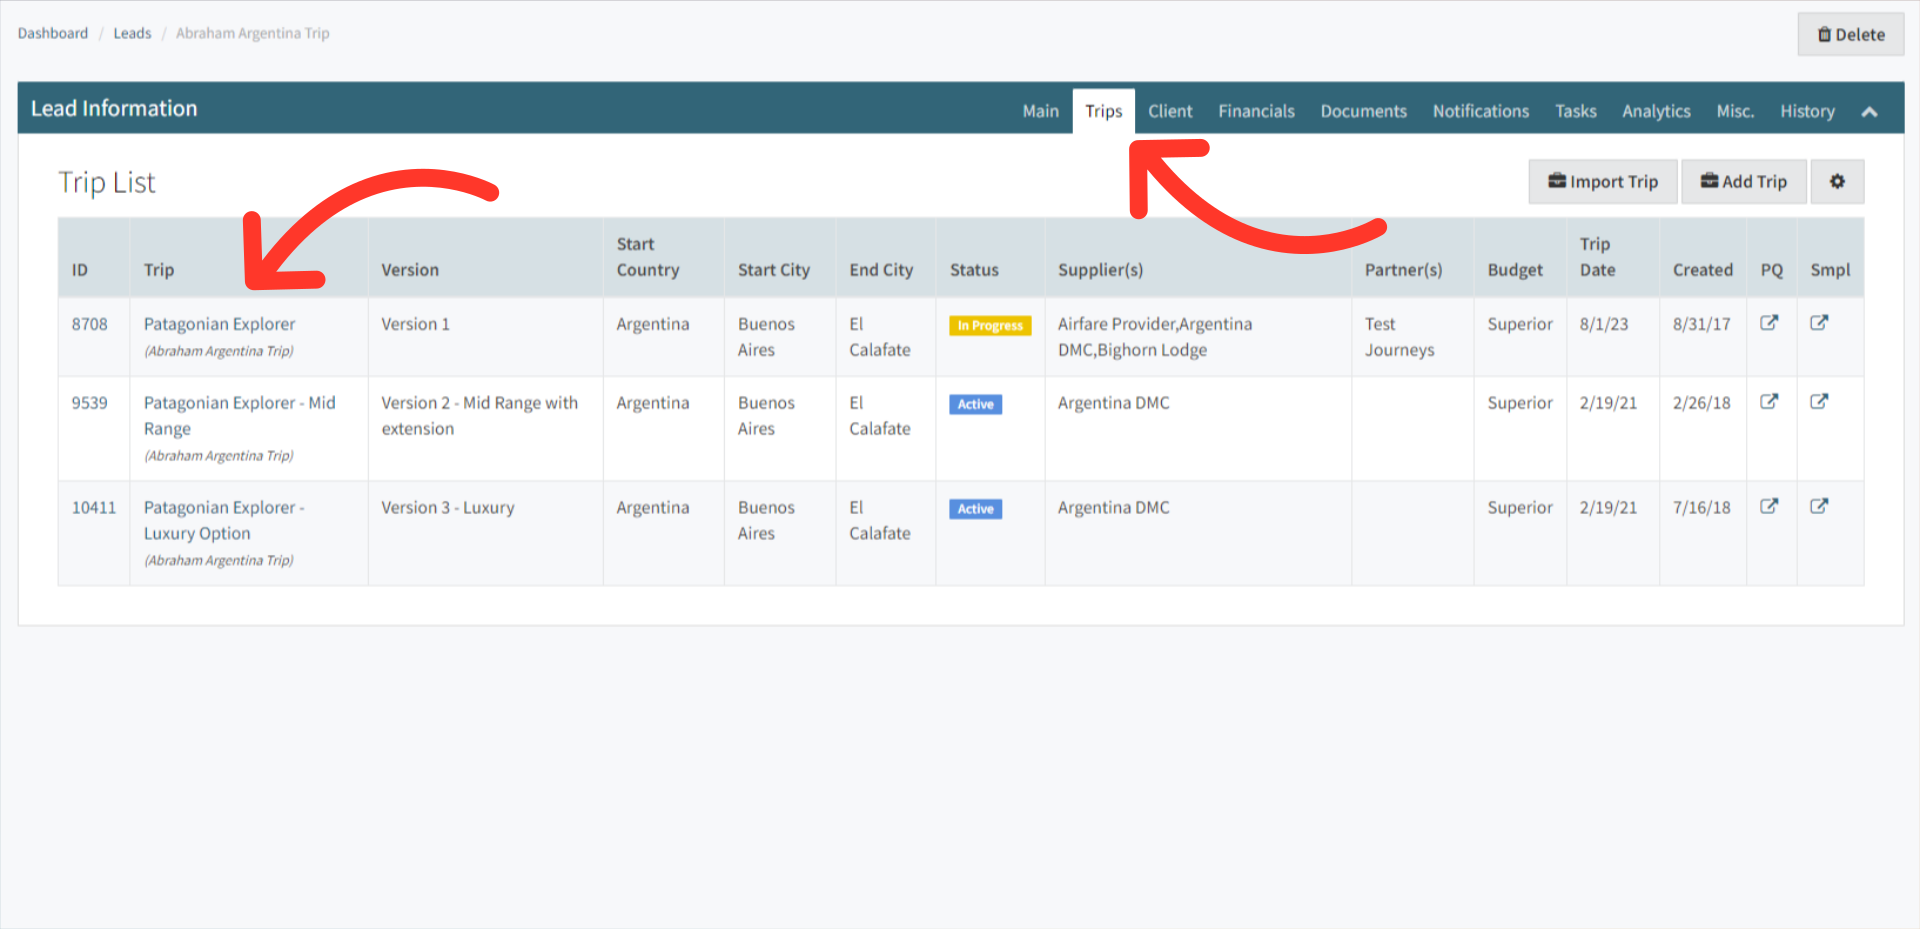
2. Next, Navigate to the Trips tab located within the Lead Information section. Then, select the specific Trip you wish to add Financial details to, by clicking on the name.
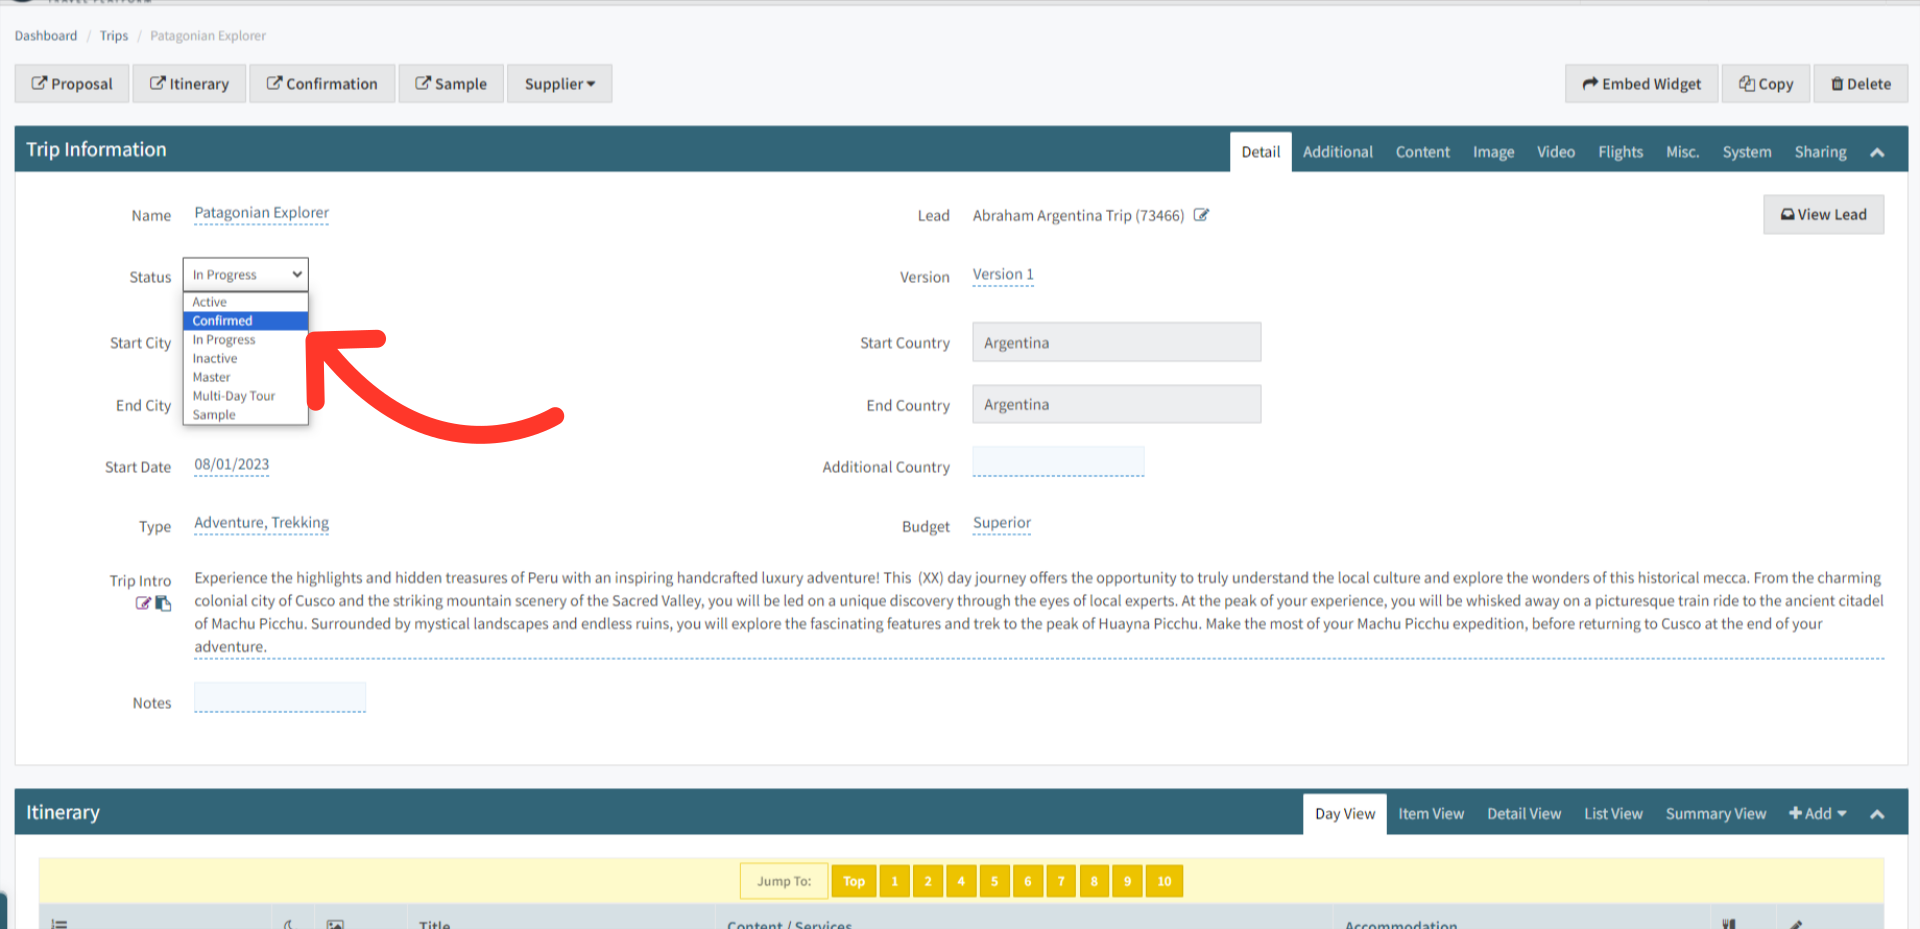
3. In the Trip Information, if not already, change the status to Confirmed, this step connects the trip financials to the Lead Financials Page.
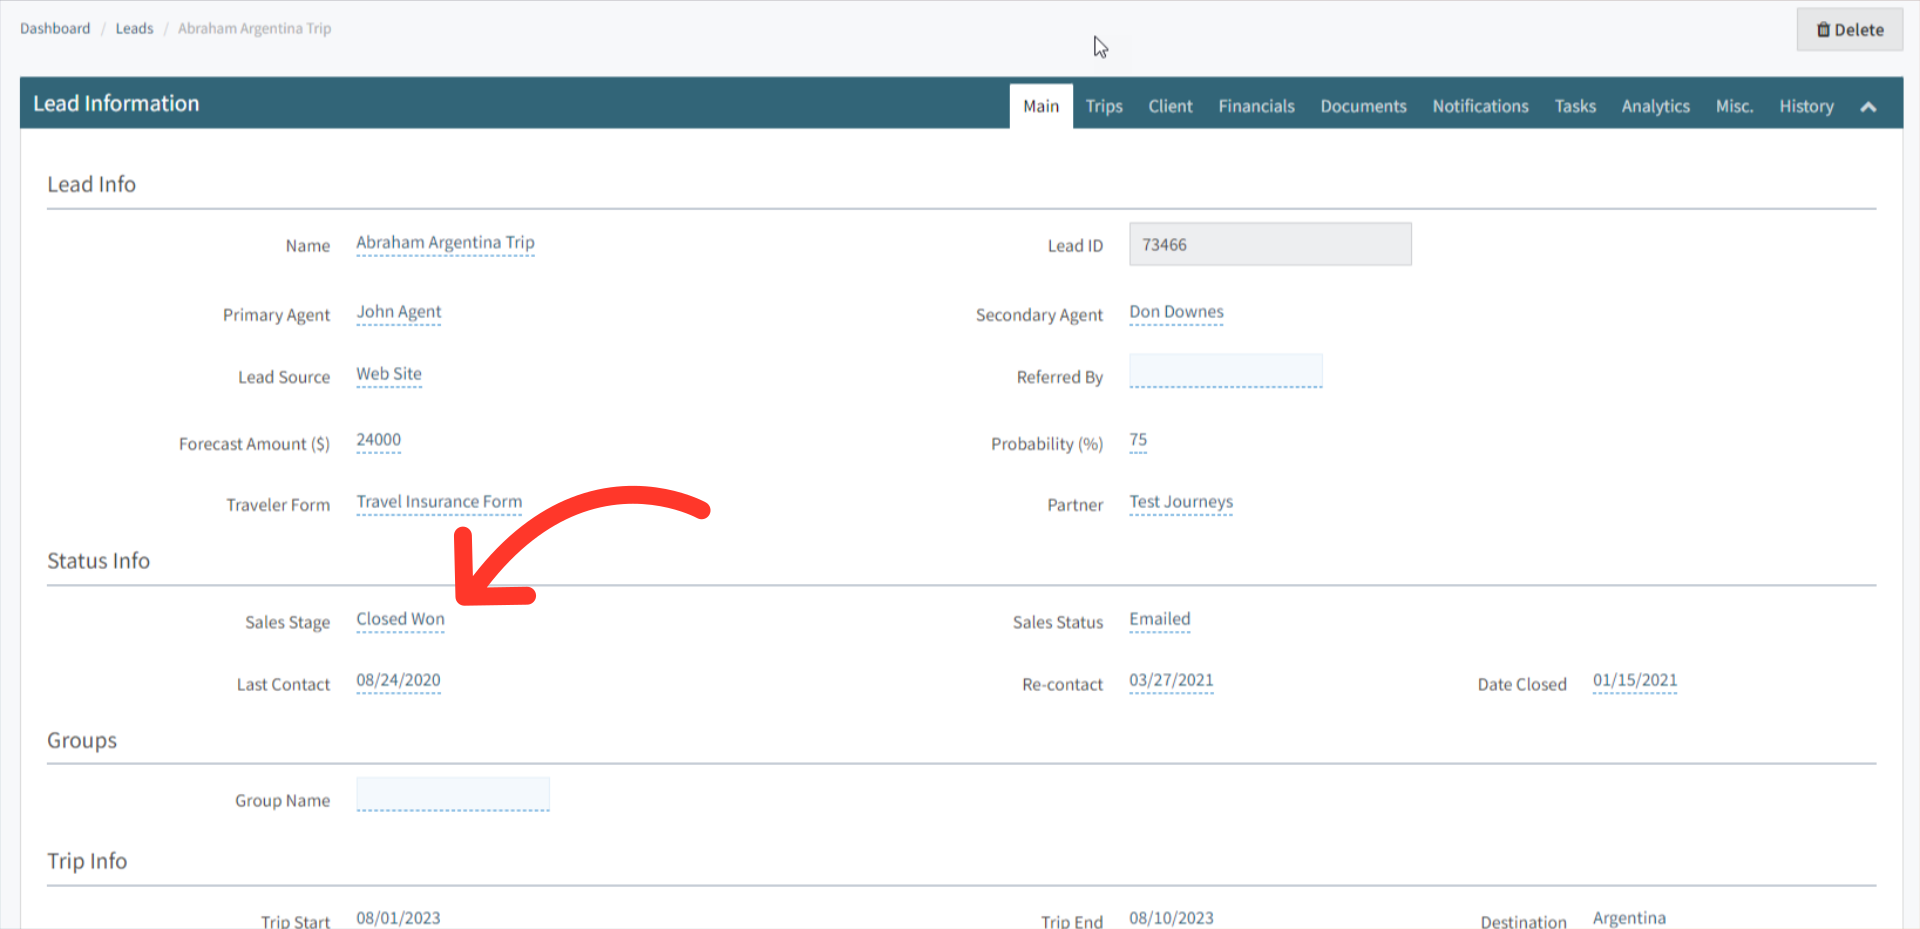
4. With the Status changed to Confirmed, click View Lead to update the Sales Stage.
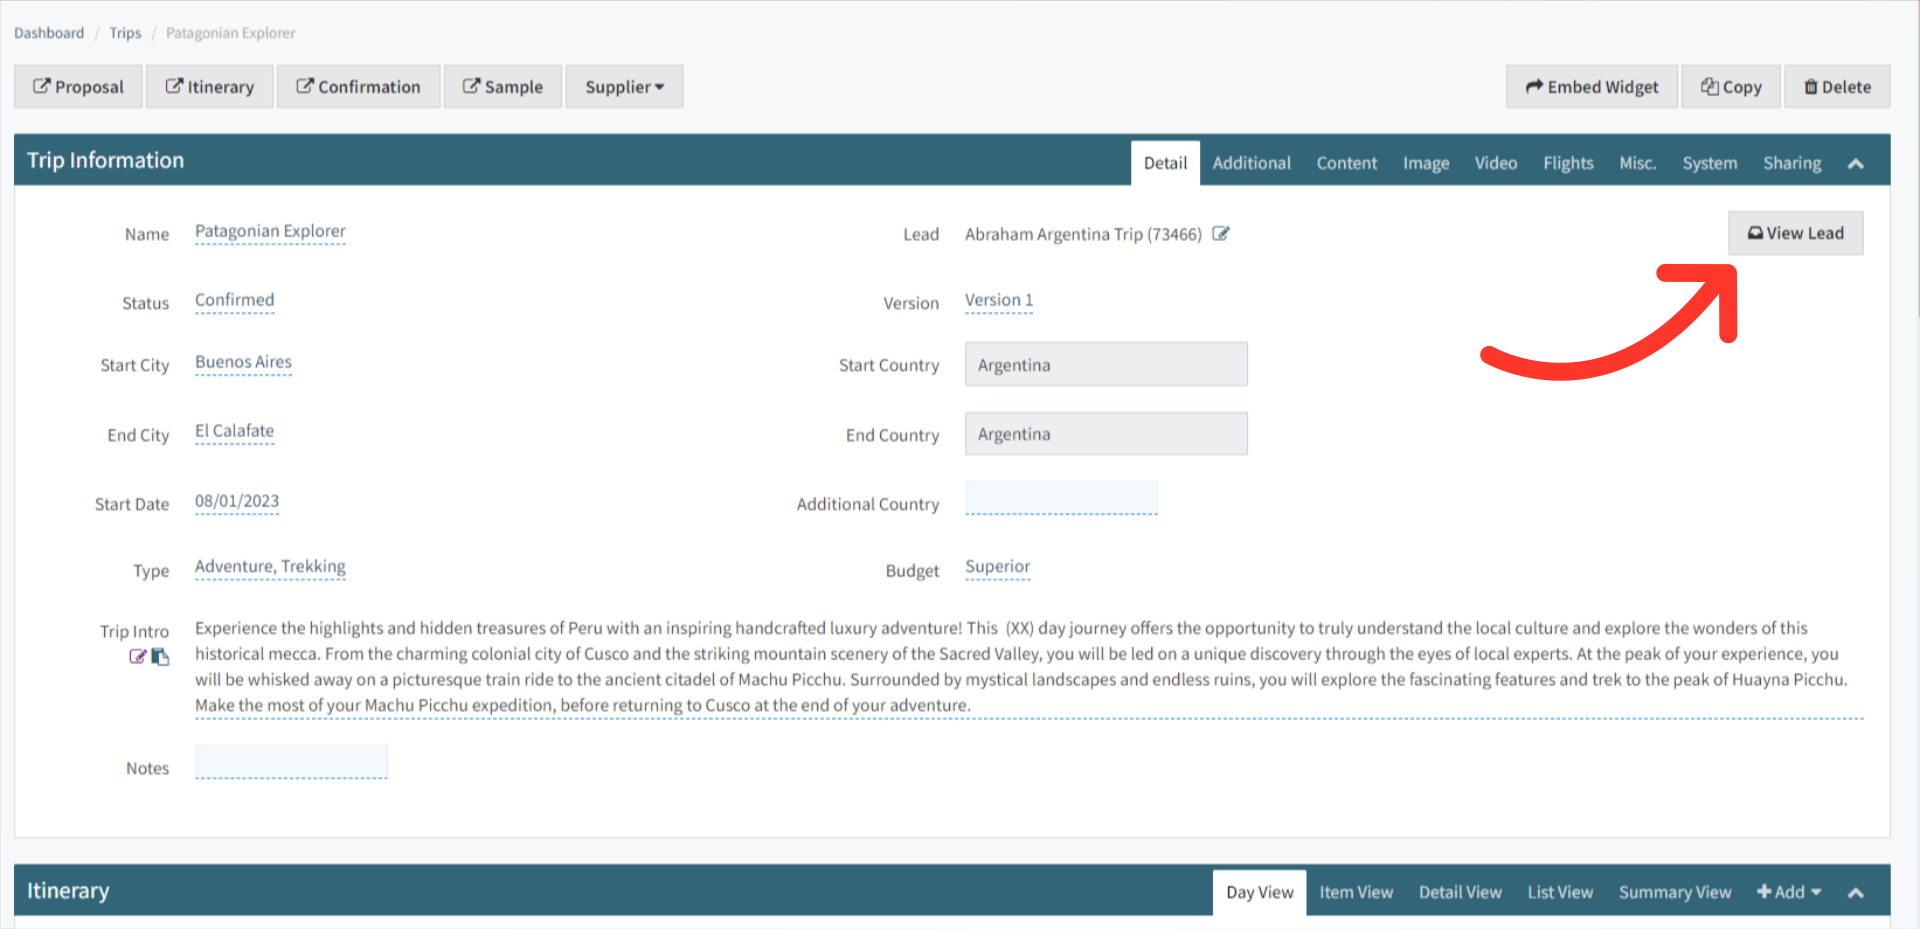
5. Ensure in the Leads Status Info section, the Sales Stage is set to "Closed Won", or, if confirming a trip deposit select "Booking Confirmation".
6. Next, Click on the Financials Tab to move into the Costs for the Trip.
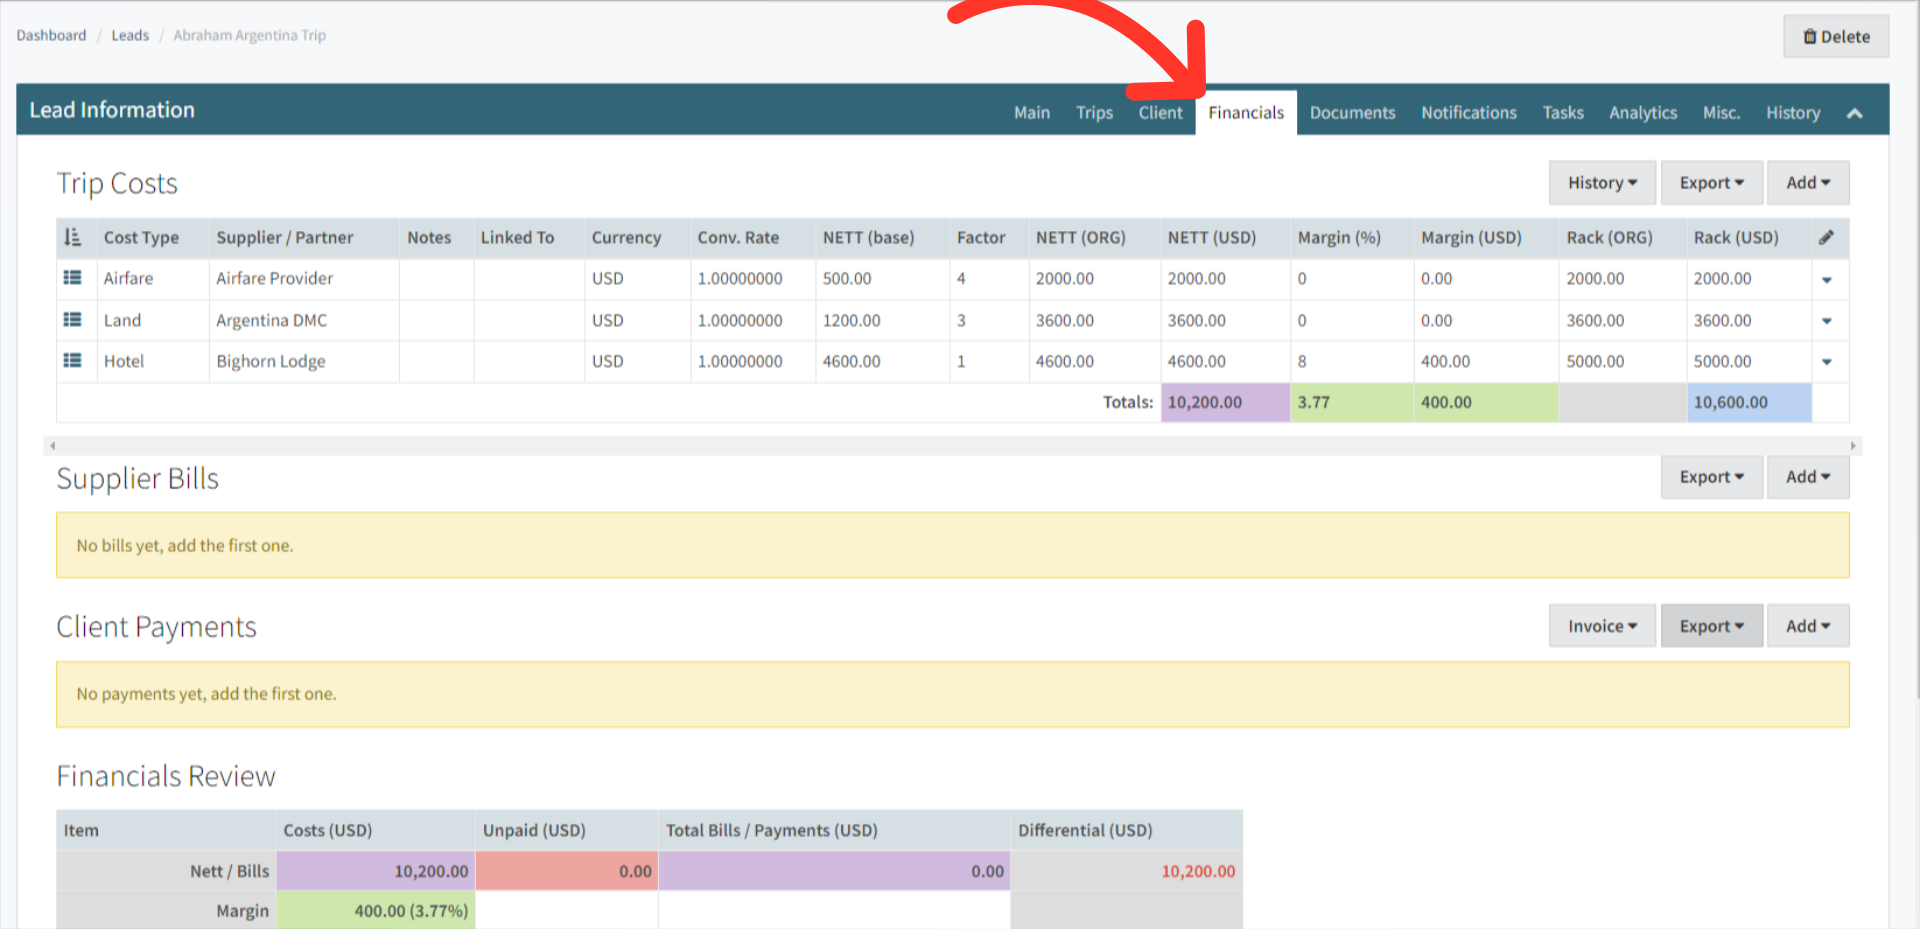
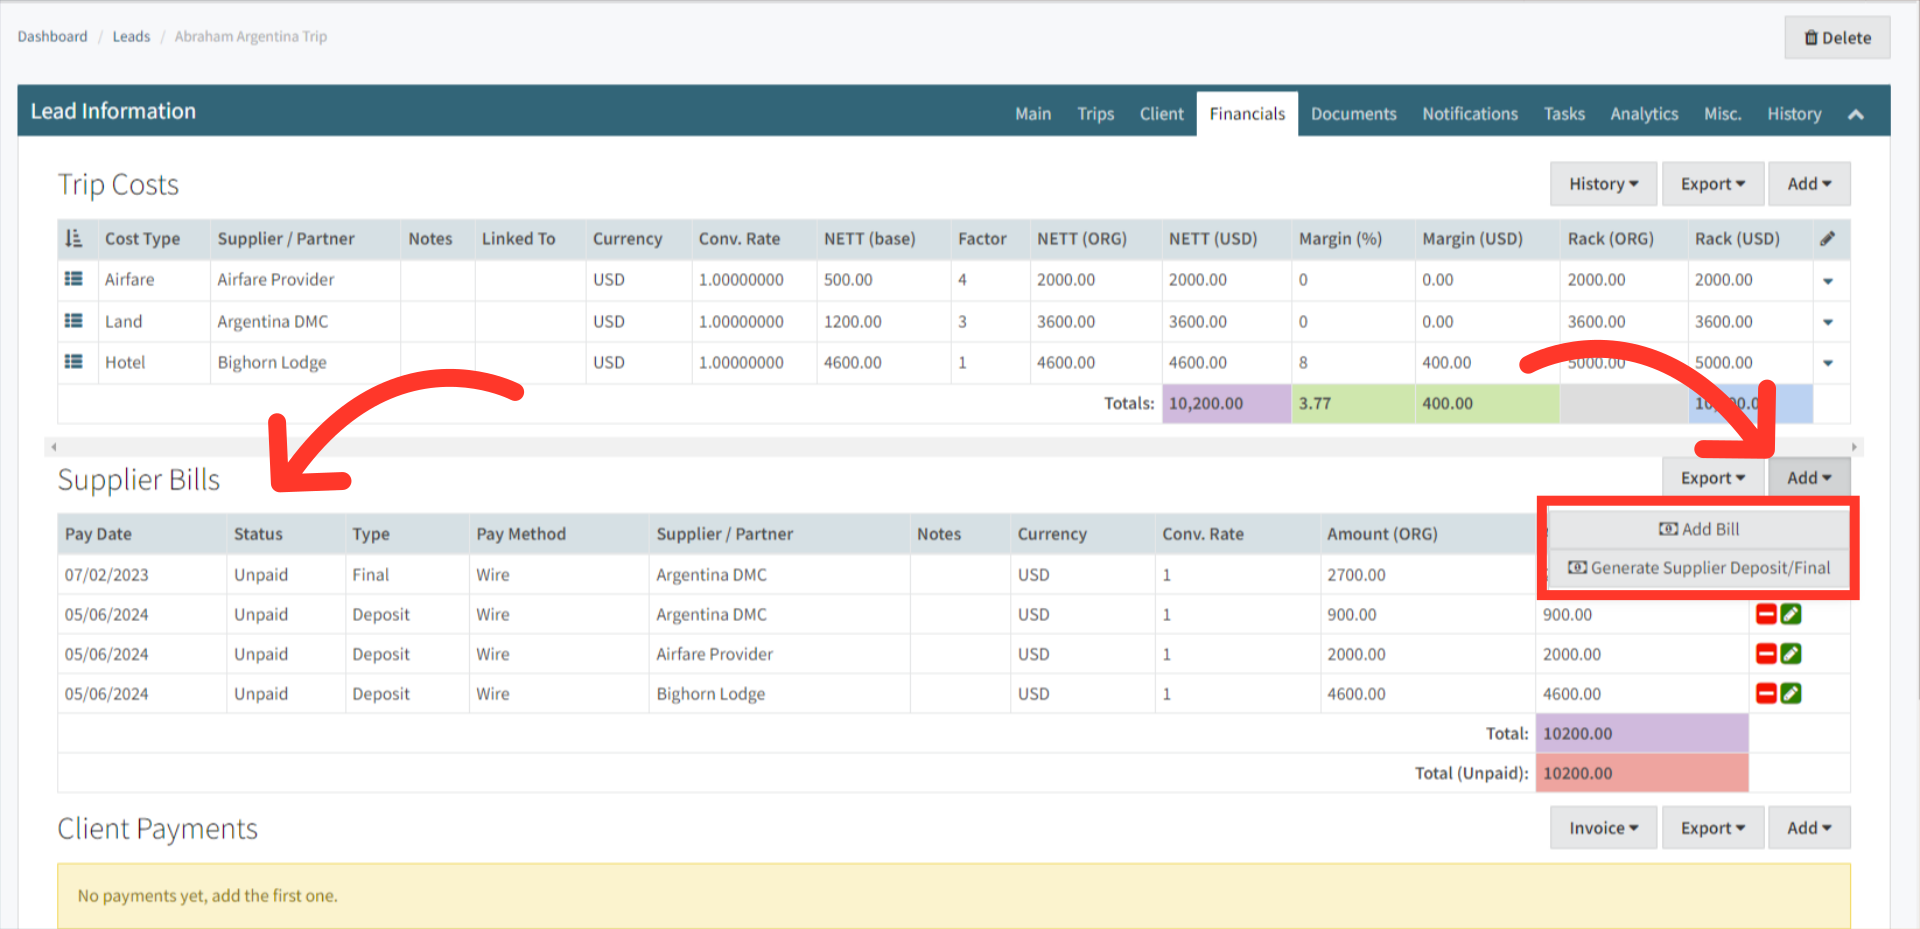
7. Under the Supplier Bills section, you have two options,
You can Manually Add bills for any of the services,
If the Suppliers are set up with the Deposit and Final payment schedules, clicking the "Generate Supplier Deposit Final" button will automatically generate the bills for you.
At a glance from left to right, you can identify payment dates, if the bill has been paid or not, if it is a Deposit or Final payment and what method of payment is expected. To the right is the currency, conversion rates and total amounts for the suppliers.
8. To setup your Companies Supplier Deposit and Final settings so you may use the Generate Supplier Deposit/Final button, navigate to Company Profile. Near the bottom of the page you'll find the
Deposit Bill Percent - This determines the deposit amount. If your suppliers do not require deposits, you can set this to 0 and the full amount will be due on the final bill.
Final Bill Due (Days before trip) - This determines when the final supplier bill will be scheduled. For example, if your final bill is due on the trip start date, you can set this to 0. for one week before the trip start date, set this to 7.

9. Along with Company-wide terms, you can also set terms for Individual Suppliers.

 | Note: If specific terms are set for a Supplier those will be used when generating bills, otherwise your company-wide defaults will be used. |
10. Here is an example of a Manual Bill being added to the Supplier Bills. Fill in the general information for the bill, and by clicking on the Lightning bolt at the Bottom next to Amount, this will automatically calculate the conversion rate, if any. Clicking Save will append the charge to the Supplier Bills.
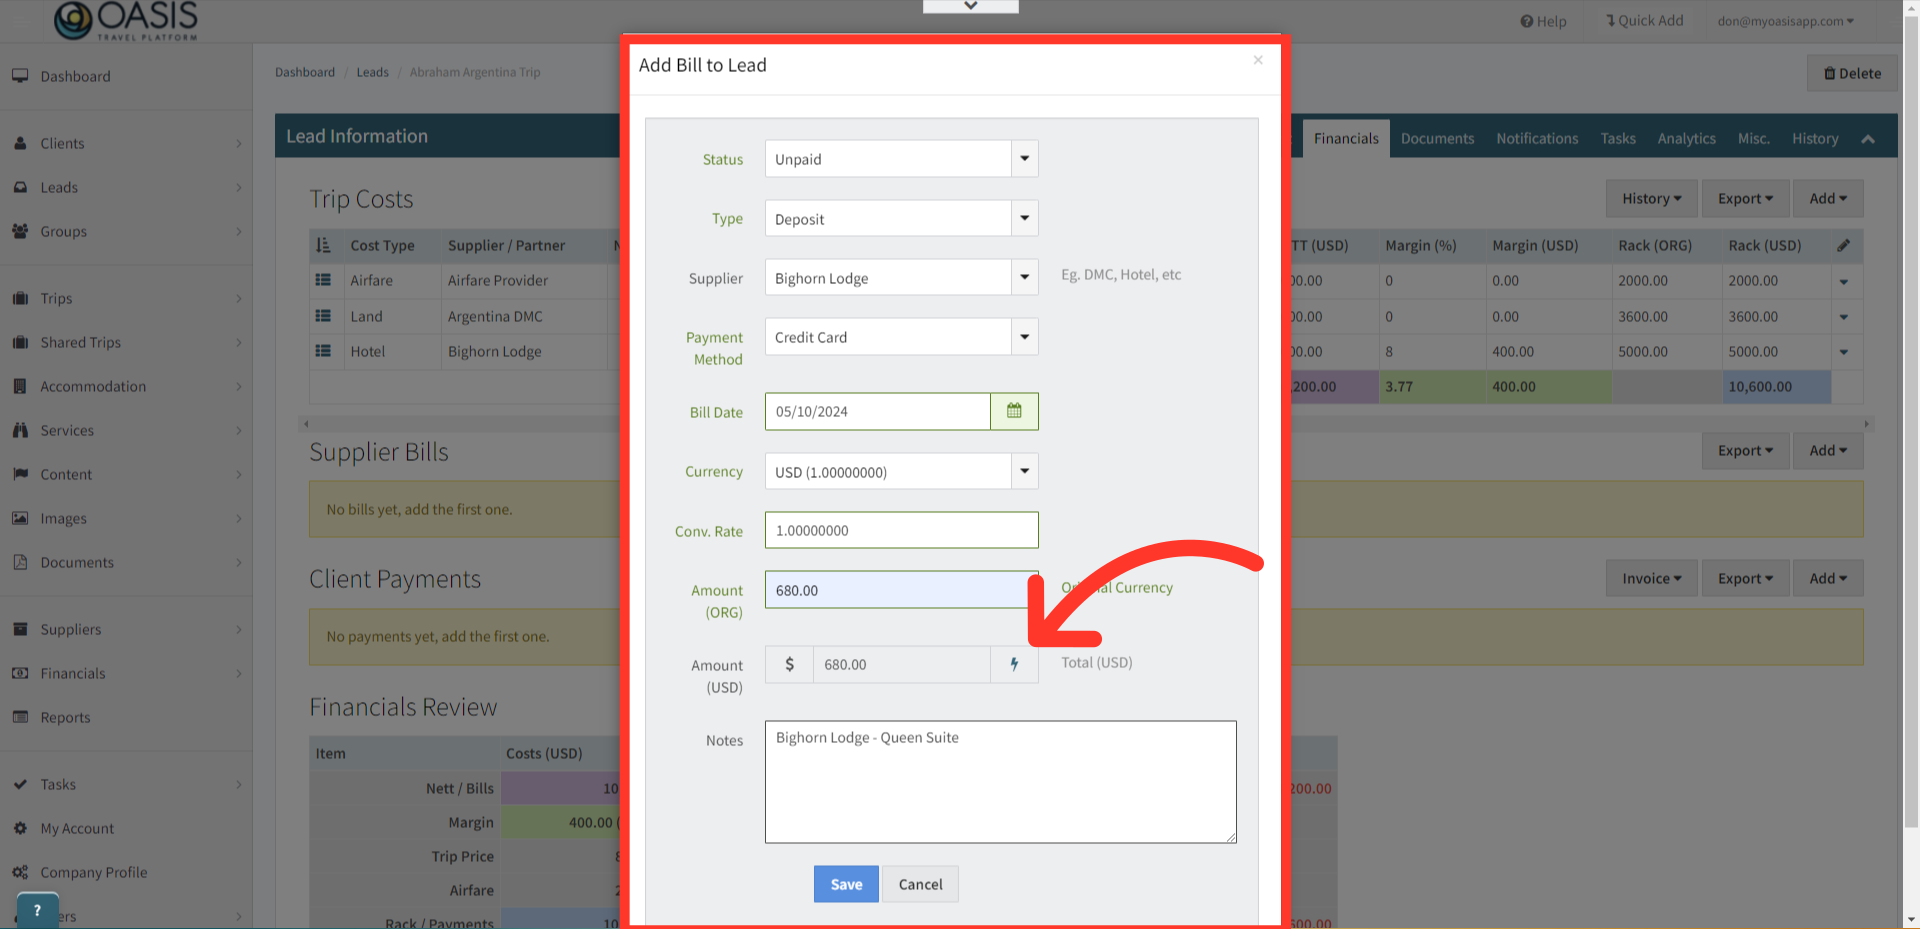
11. Add Bill to Lead Fields
Status
Unpaid - Bill has not been paid yet
Reconciled - Bill has been paid and tied out
Scheduled - Bill has been scheduled to be paid
Paid - Bill has been paid for
Type
Deposit - Partial payment to Supplier as a Deposit
Final - Final Payment to the Supplier
Credit - If Supplier has applied a credit to your account (example: a refund or cancelled trip) you would mark the Bill Type as Credit
| Admin: To add or edit Bill Types, navigate to Company Profile >> Lists >> Bill Type or click How to Edit Basic Lists for step by step instructions. |
Supplier - Choose the Supplier that is associated with the Bill (should match with the Trip Cost). If a Supplier is not in your system, see How to Create a Supplier to add them to your database.
Partner - This option will only appear if you do not add a Supplier. The Partner option is used if you are working with a Travel Agent rather than a Supplier and need to associate a Bill with a Partner.
Payment Method
Credit Card
Wire
Check
Cash
Flywire
| Admin: To add or edit Payment Methods, navigate to Company Profile >> Lists >> Payment Method or click How to Edit Basic Lists for step by step instructions. |
Bill Date - Choose the appropriate Bill Due Date for this specific bill
Currency - Choose the currency that a Trip Cost is quoted in by the supplier
| Admin: To add or edit Currency Types, navigate to Company Profile >> Lists >> Currency or click How to Edit Basic Lists for step by step instructions. |
Conversion Rate - This is the rate used to convert the original currency of costs into USD
Amount ORG - This is the NETT Amount associated with the Trip Cost that is Owed to the Supplier in the bill's original currency
Amount USD - Clicking the Lightning Bolt calculates the Total Amount in USD) once you have filled out the Currency and Original Amount

Notes - Internal noes that allow you to write any details pertaining to the bill
13. Once the Supplier Bills and Client Payments have been scheduled, it will tie out the financials by removing the Red Differential for both the Nett Bills and Rack Payments. Leaving only the Red Unpaid bills and payments remaining which can be handled from the Financials tab on the left hand side.

And that's how to Add Supplier Bills on the Oasis Travel Platform! We hope you found this guide helpful. If you need additional help or want to share your thoughts, reach out at support@myoasisapp.com. We love hearing from you and are always here to help.
Was this article helpful?
That’s Great!
Thank you for your feedback
Sorry! We couldn't be helpful
Thank you for your feedback
Feedback sent
We appreciate your effort and will try to fix the article