
Welcome! Today, we'll show you how to offer ViCoverage Travel Protection directly on your client's invoice through the Oasis Travel Platform.
ViCoverage, powered by Vertical Insure, brings travel protection directly into the booking experience.
Through the integration, Oasis sends your trip details to ViCoverage, and a live travel protection quote appears directly on your client's passenger invoice. From there, your client can compare plans, choose coverage or decline, and purchase protection right from the invoice.
Vertical Insure powers the technology behind ViCoverage and handles the policy, claims, and customer support, so there's nothing extra for you to manage.
To get started with ViCoverage, you'll first need to set up your account. Getting set up takes just two steps:
Get Set Up with ViCoverage by Vertical Insure: fill out this form to connect with the Vertical Insure team. They'll follow up with next steps and instructions to get the travel protection integration activated in Oasis.
Connect it to Oasis: once your Vertical Insure account is ready, contact our support team at ( support@myoasisapp.com ) and we'll connect it to your Oasis account for you.
 | Learn more about ViCoverage Travel Protection. Click Here! |
Step 1: Find the Travel Insurance Quote Section
1. Open the lead booking for a confirmed trip and click on the Financials tab.
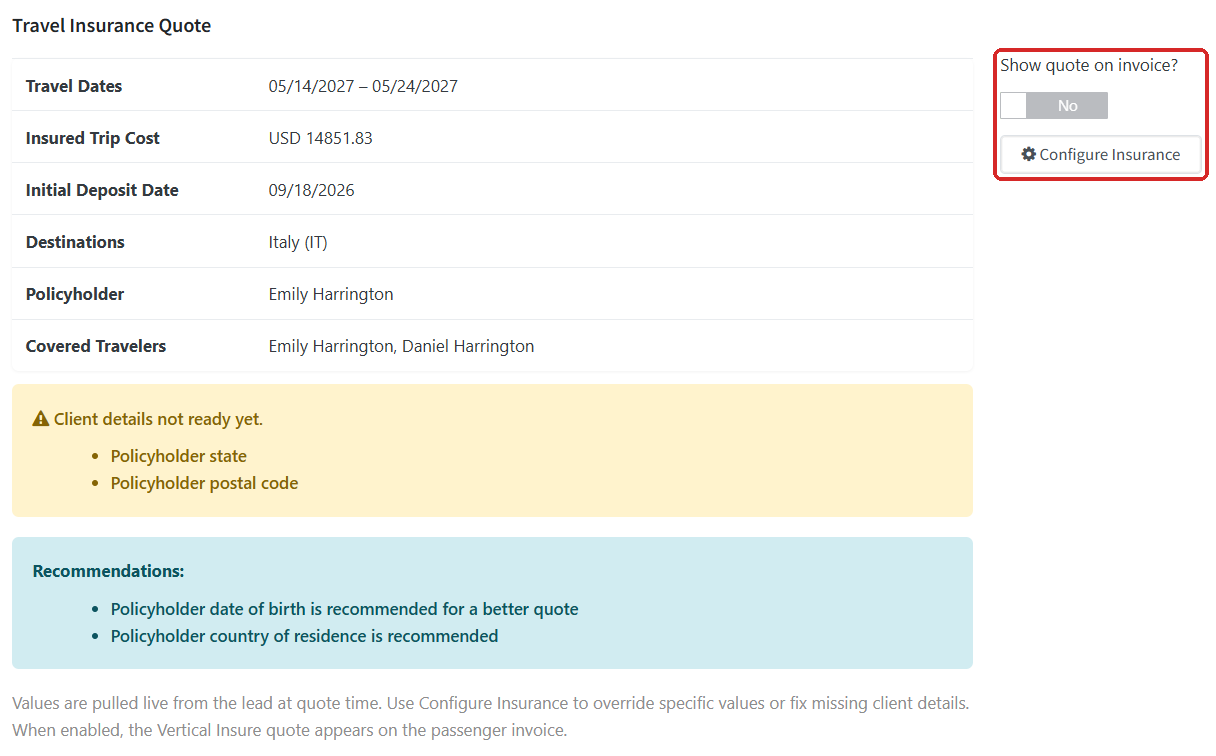
2. Scroll to the very bottom of the page, below Financials Review and Financial Notes. Here you'll find the Travel Insurance Quote section.
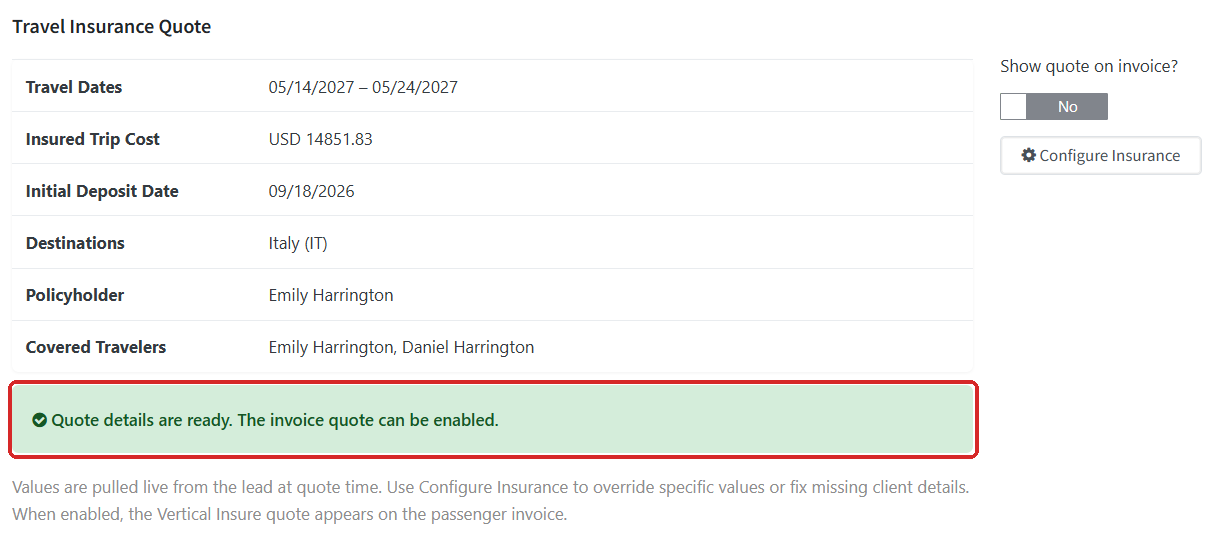
This section shows the details ViCoverage will use for the quote:
Travel Dates
Insured Trip Cost
Initial Deposit Date
Destinations
Policyholder
Covered Travelers
On the right, you'll see the Show quote on invoice? toggle and the Configure Insurance button. If anything is missing, a yellow Client details not ready yet box lists it, and a blue Recommendations box lists anything that will improve the quote.
| To Learn More About Lead Financials Click Here! |
Step 2: Check the Trip Dates
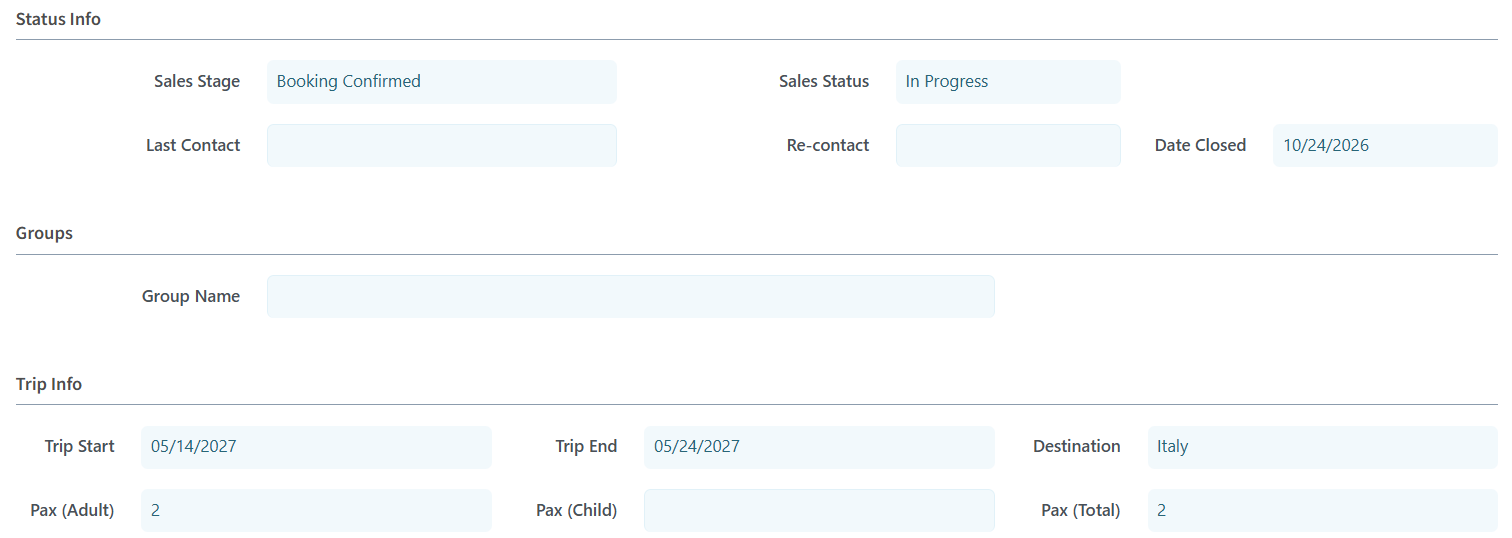
The Travel Dates for the quote come from the trip. Set the Start Date on the trip and build out the itinerary days. Once the trip is confirmed, the lead's Trip Start and Trip End fill in automatically, with the end date calculated from the number of days in the itinerary.
1. Open the trip and confirm the Start Date is correct and the itinerary has the right number of days.
2. On the lead, open the Main tab. Under the Trip Info section, you'll see Trip Start and Trip End filled in from the confirmed trip.
3. Refresh the page and click back on the Financials tab. The dates will now display in the Travel Insurance Quote section.
| To Learn More About Lead Bookings Click Here! |
Step 3: Configure the Insurance
Under the Confirmed Leads Financial tab, click on the Configure Insurance button. The Travel Insurance Quote Configuration window will open with the same yellow and blue boxes at the top, so you can see what still needs attention as you work.
Trip
Each value in the Trip section fills in automatically from the lead. Check the Override box under a value only when you want to set it yourself.
Travel Dates: taken from the lead (Step 2). This value can't be overridden.
Deposit Date: automatically uses the first paid invoice date.
Trip Cost: automatically uses the trip cost total.
Destinations: automatically uses the trip destinations. If this is empty, check Override, click in the field, start typing a country name and select it from the list. More than one country can be added.
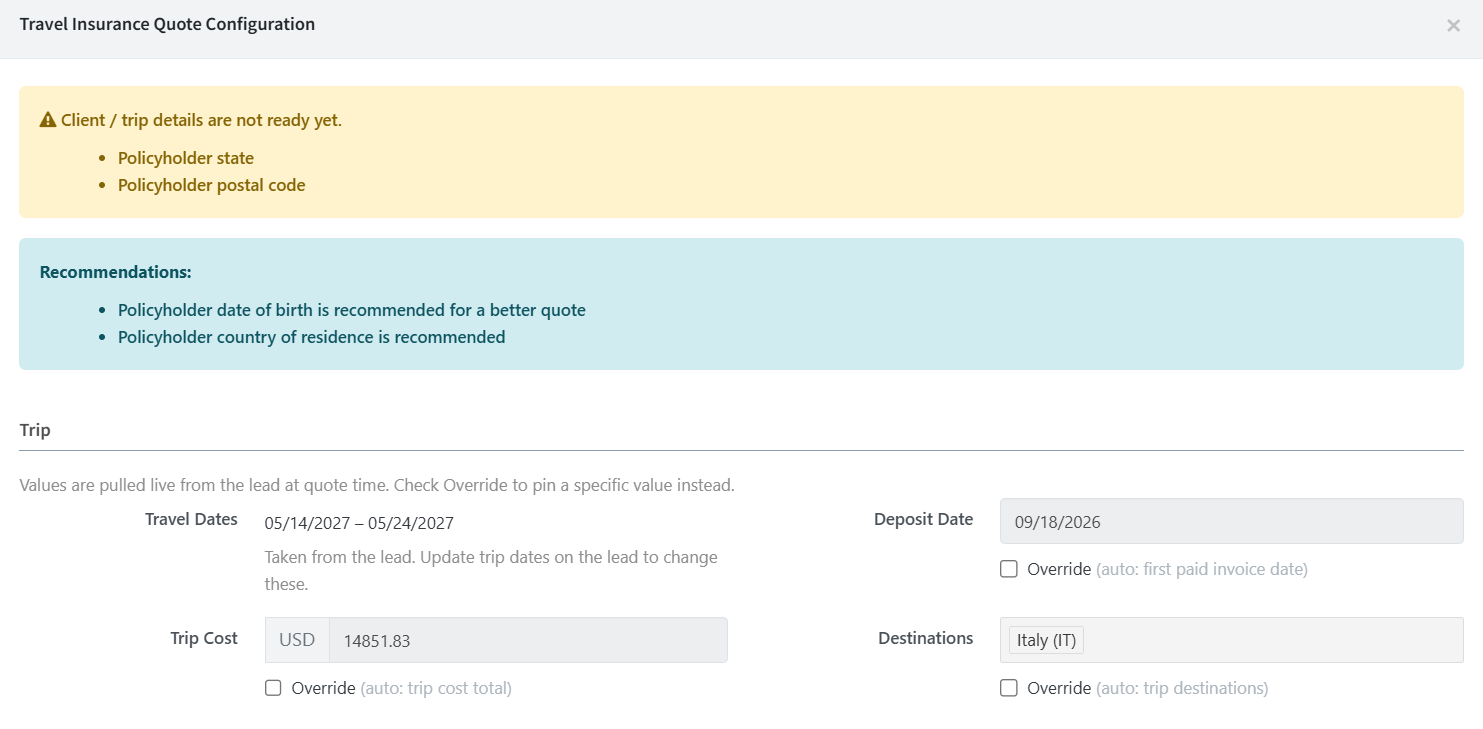
Any value you override will show a blue OVERRIDE tag next to it in the Travel Insurance Quote section, so you can always tell which values were set manually.
Travelers
By default, the Primary contact on the lead is the policyholder, and every traveler on the lead who isn't a Planner is covered, including any passengers added later.
Each traveler has their own card. Fill in anything the yellow box lists as missing. For the policyholder, State and Postal are required, and DOB and Country are recommended for a better quote. The State must be a 2-letter US state or Canadian province code, such as WA or ON.
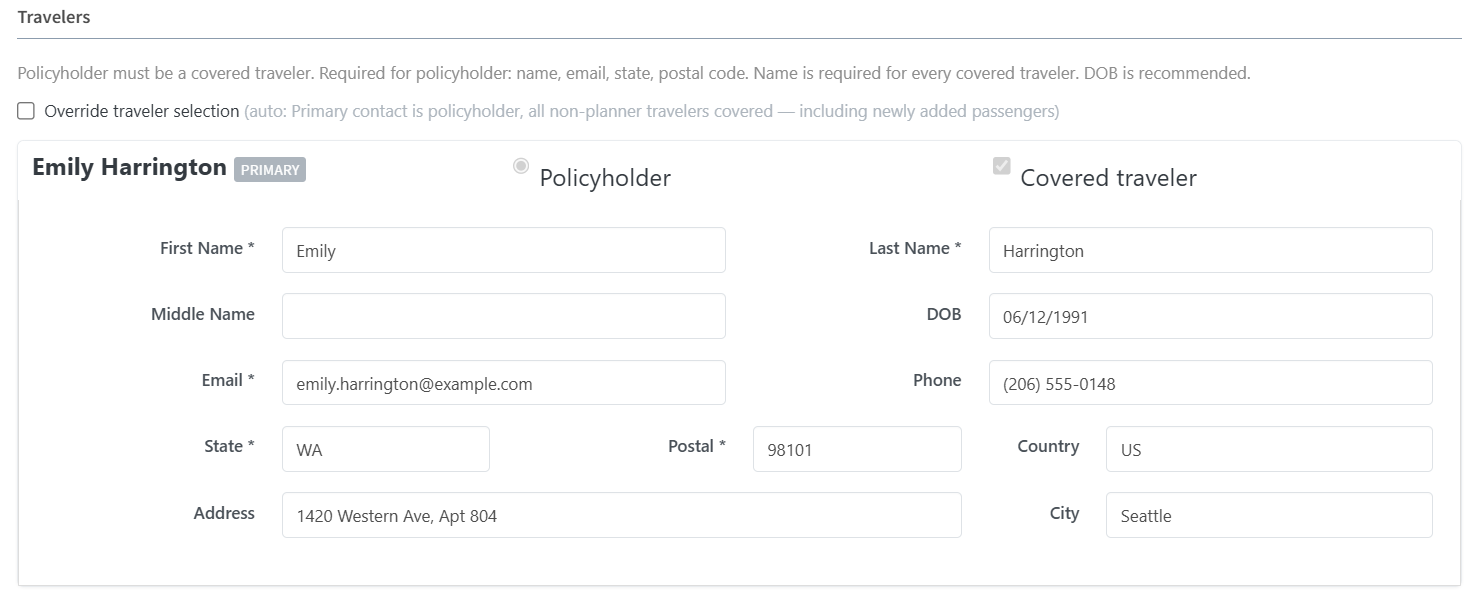
To choose a different policyholder or leave a traveler off the policy, check Override traveler selection. This unlocks the Policyholder option and the Covered traveler checkbox on each card.

Add or Link Travelers
Below the traveler cards, the Add / Link Travelers section gives you two options:
Link Existing Client: select the client from the Client dropdown, choose their Role (Passenger is the default) and click Link Client.
Add New Traveler: enter a First name (required), along with a Last name and Email, and click Add Traveler. A new traveler card will appear.
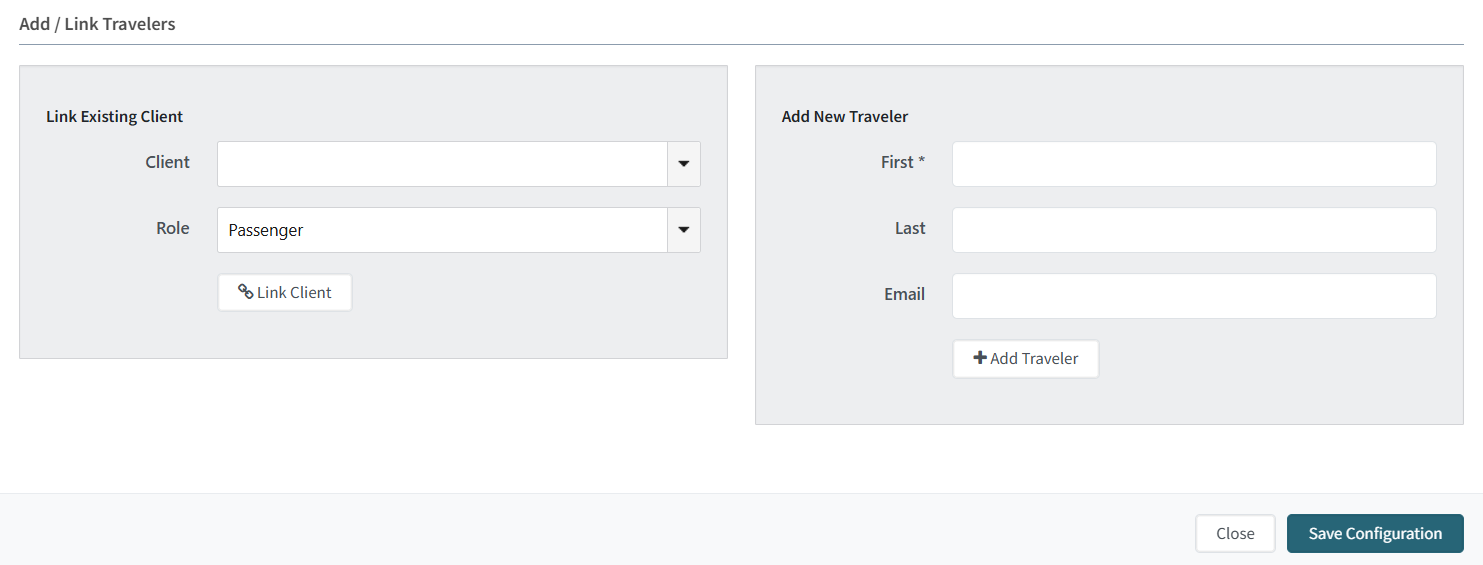
| Note: Adding or linking a traveler refreshes the traveler cards and clears anything that hasn't been saved yet. Add your travelers first, then fill in their details and save. |
| To Learn More About Clients Click Here! |
Step 4: Save the Configuration
Click on Save Configuration at the bottom of the window.
If a required detail is still missing, your changes are saved and a message in the top left corner lists exactly what is left to add.
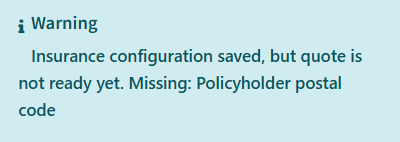
Once everything is in place, you'll see a green "Quote is ready to enable" message, and the Travel Insurance Quote section will show a green bar confirming the quote details are ready.
Step 5: Show the Quote on the Invoice
1. Click the Show quote on invoice? toggle so it displays Yes. The toggle can only be turned on once the quote details are ready.
2. A green Insurance quote shown on the invoice message will confirm the change.
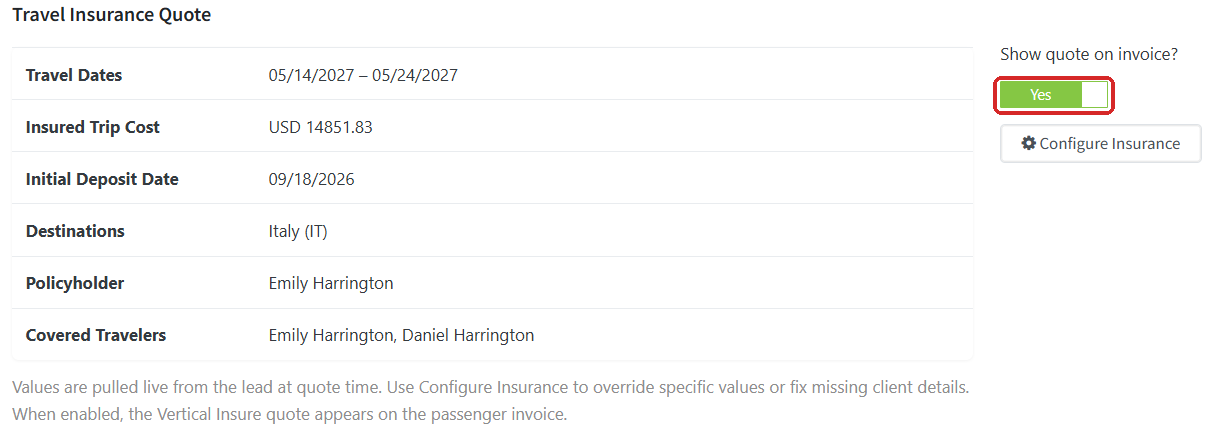
To stop offering insurance on a trip, simply switch the toggle back to No.
Step 6: Preview What Your Client Sees
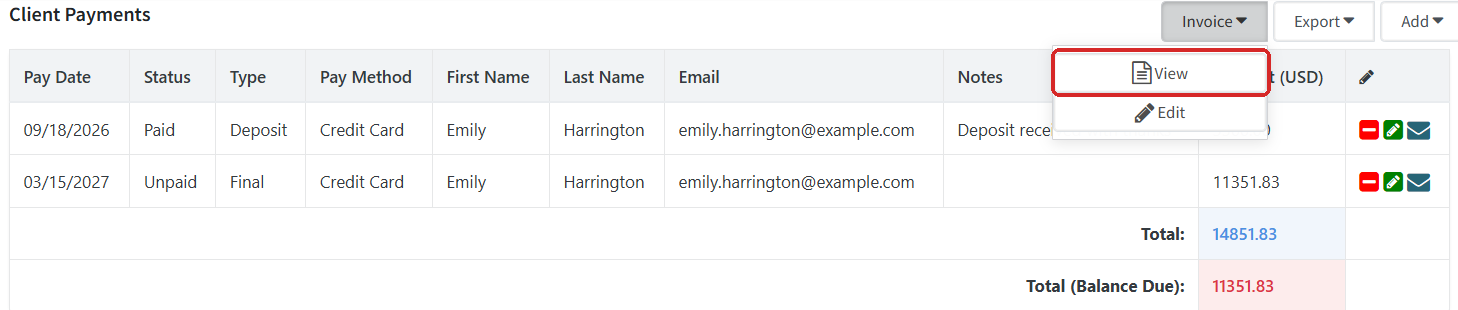
1. In the Client Payments section, click on the Invoice dropdown and select View. The passenger invoice will open in a new tab.
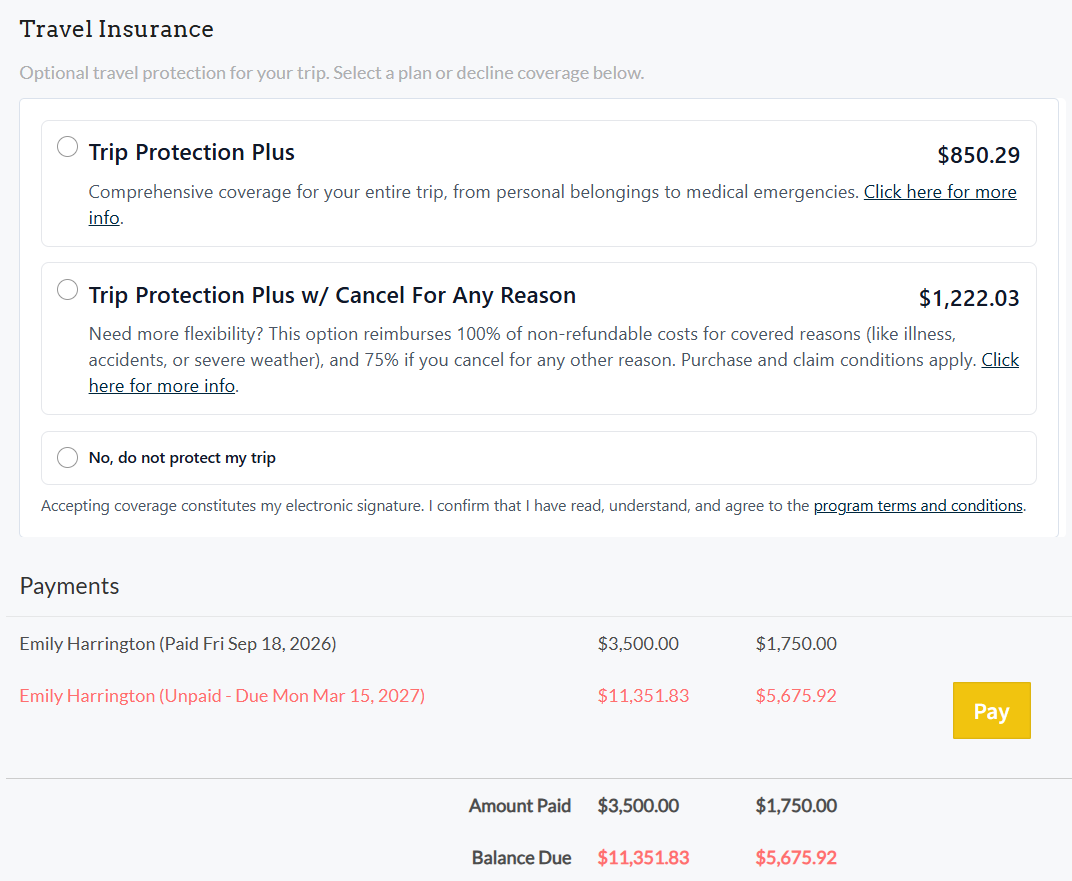
2. Below the trip costs, a Travel Insurance section displays the available plans, each with its price and a Click here for more info link. Plans can include:
Trip Protection Plus: provides up to 100% reimbursement of covered trip costs if a traveler needs to cancel for a covered reason, like illness, injury, severe weather, and more, plus coverage for unexpected issues during the trip, including delays, medical emergencies, and lost luggage.
Trip Protection Plus w/ Cancel For Any Reason: reimburses up to 100% of non-refundable costs for covered reasons (like illness, accidents or severe weather), and up to 75% if the traveler cancels for any other reason. Purchase and claim conditions apply.
No, do not protect my trip: allows your client to decline coverage.
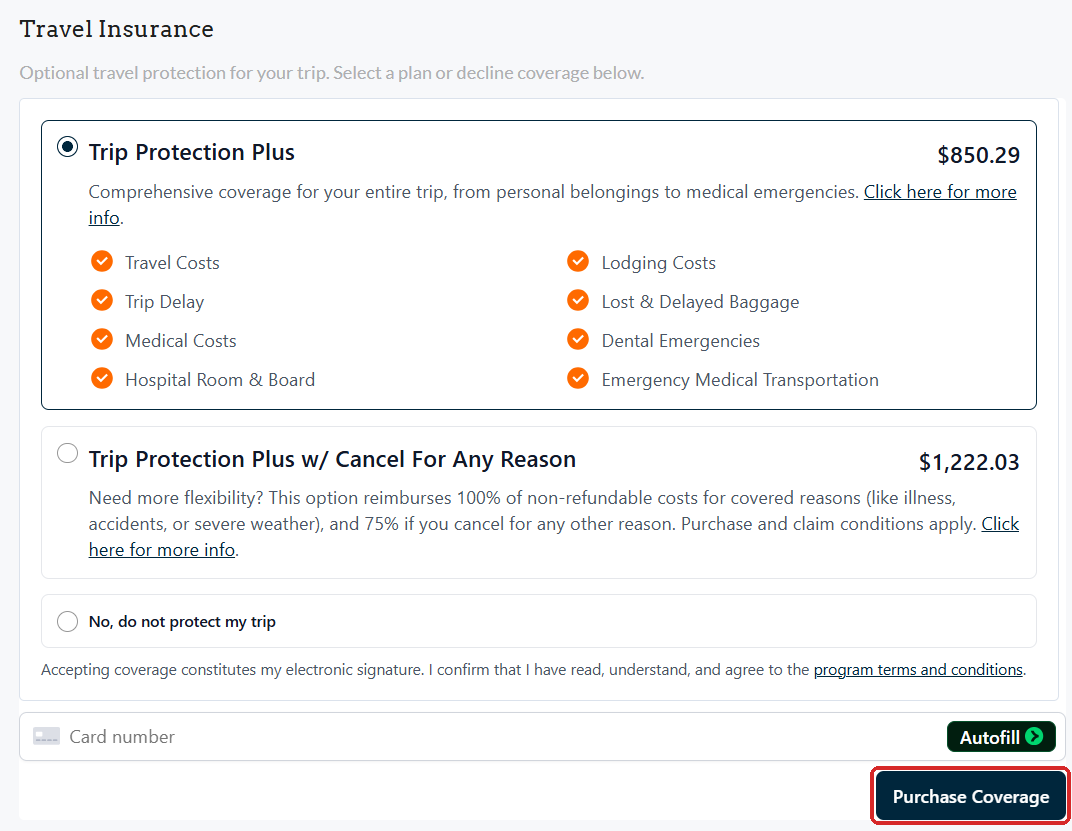
3. When a plan is selected, it expands to show what is covered, such as Travel Costs, Lodging Costs, Trip Delay, Lost & Delayed Baggage, Medical Costs, Dental Emergencies, Hospital Room & Board and Emergency Medical Transportation.
4. Your client enters their card details in the secure card field and clicks Purchase Coverage. Accepting coverage serves as their electronic signature on the program terms and conditions, which are linked just above the card field.
| To Learn More About Client Invoices Click Here! |
| Important Reminders: |