Welcome! Today, we'll quickly show you how to view a Trip Itinerary in the Oasis Travel Platform.
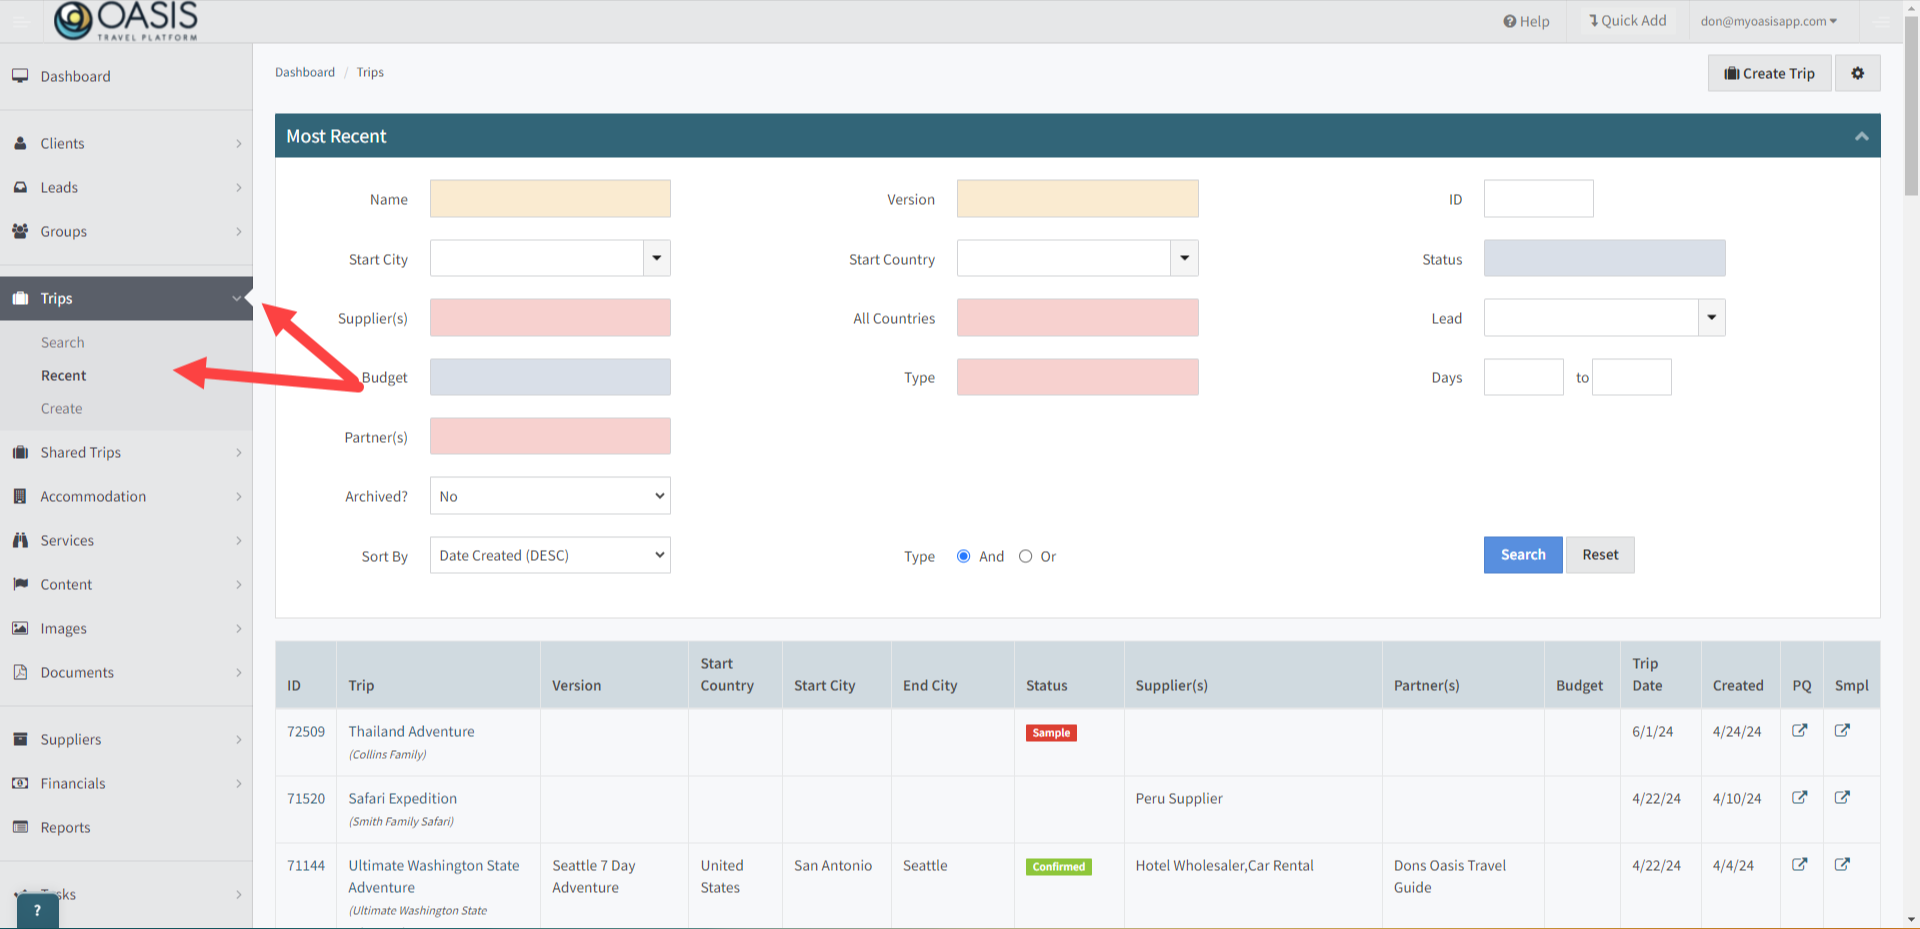
1. First Navigate to Trips, on the left hand side, then, select Search, or Recent, search for and open the specific trip you want to view.
2. On the Trip, there are different ways to view trip details.
Proposal View: Ideal for the initial sales process, this view allows you to send detailed, visually appealing proposals that include pricing, images, and videos to captivate potential clients.
Itinerary View: This view simplifies the itinerary by removing pricing information, focusing solely on the travel schedule. It's perfect for clients who are finalizing their plans.
Confirmation View: Used post-sale, this view provides all the essential details of the confirmed trip, including timings, confirmation numbers, and contact information for a seamless travel experience.
Sample View: This view is used to demonstrate potential itineraries to new clients without revealing personal or sensitive information from past clients.
Supplier Views: Comprising Itinerary and Confirmation formats, these views communicate necessary details to suppliers, omitting unnecessary marketing content to streamline service delivery.
The Proposal View will have the Book this trip button at the top along with a corresponding area at the bottom that includes the pricing and pay now options.
This view is designed for the sales process. it allows you to send dynamic and visually engaging proposals to leads, complete with pricing details, images, videos, and comprehensive descriptions. The Proposal View is ideal for making a strong impression during the negotiation phase, as it presents a complete and attractive package tailored to the potential client's interest and needs.
Click image to view full example - opens in new tab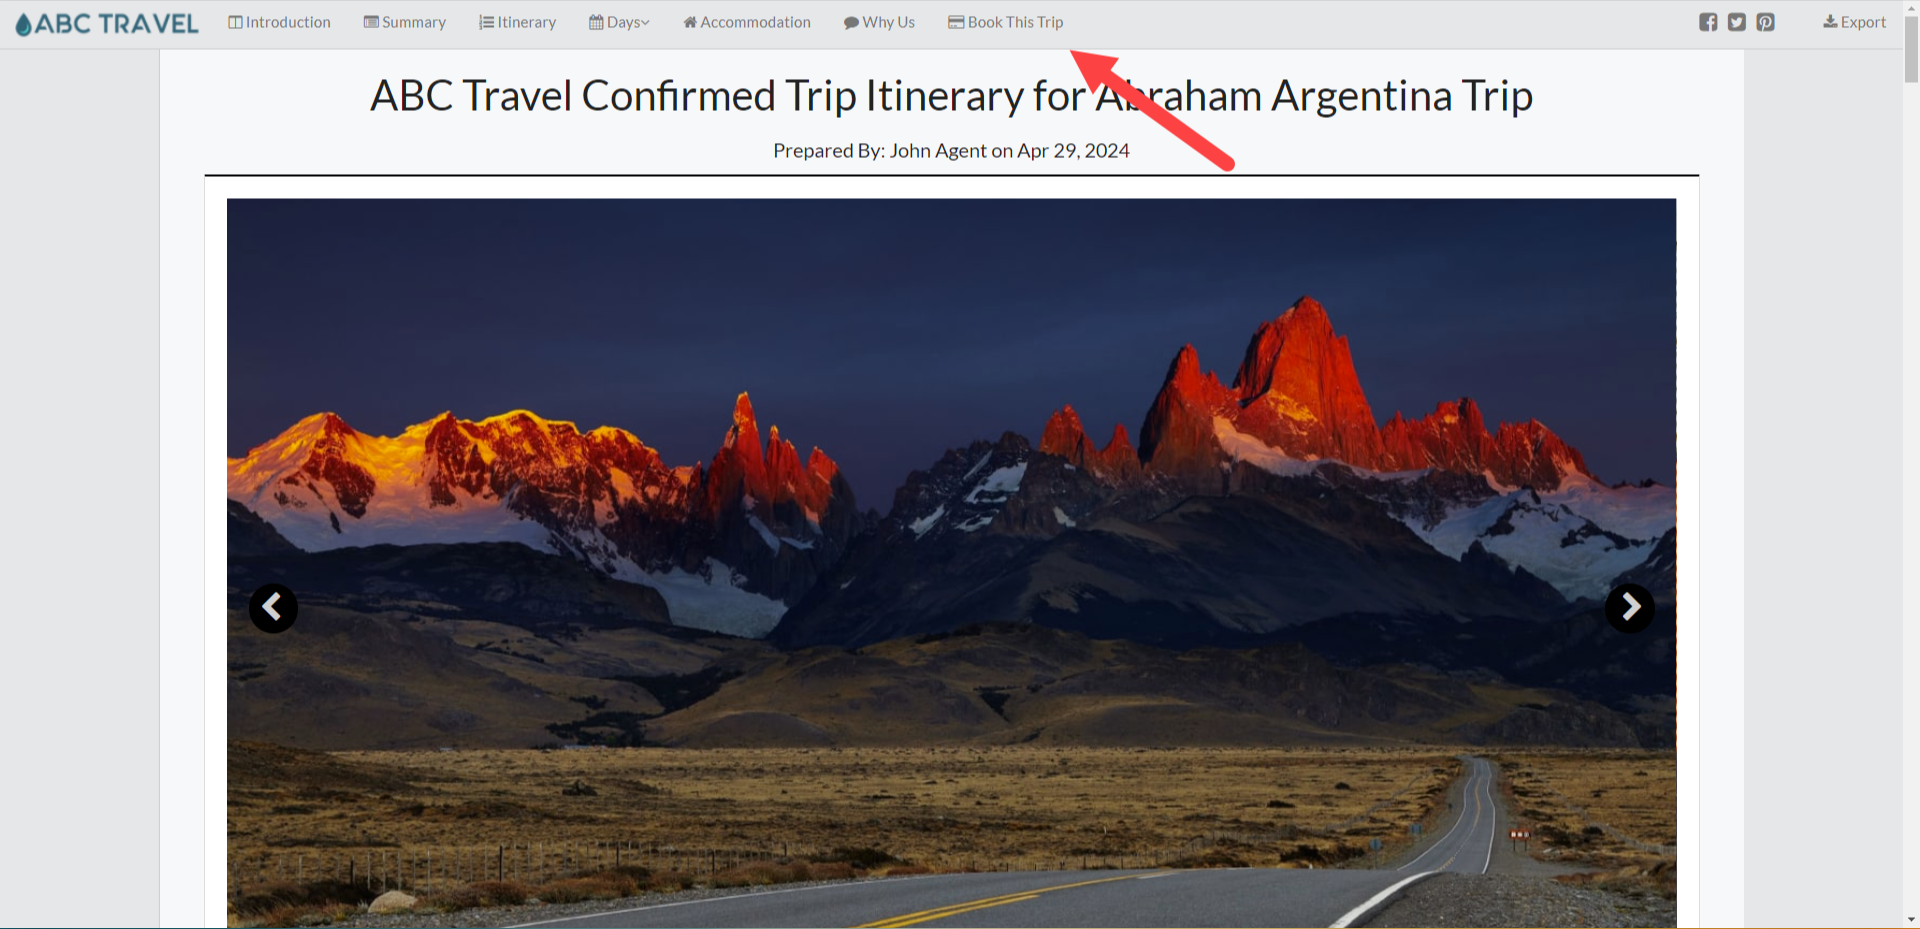
Click image to view full example - opens in new tab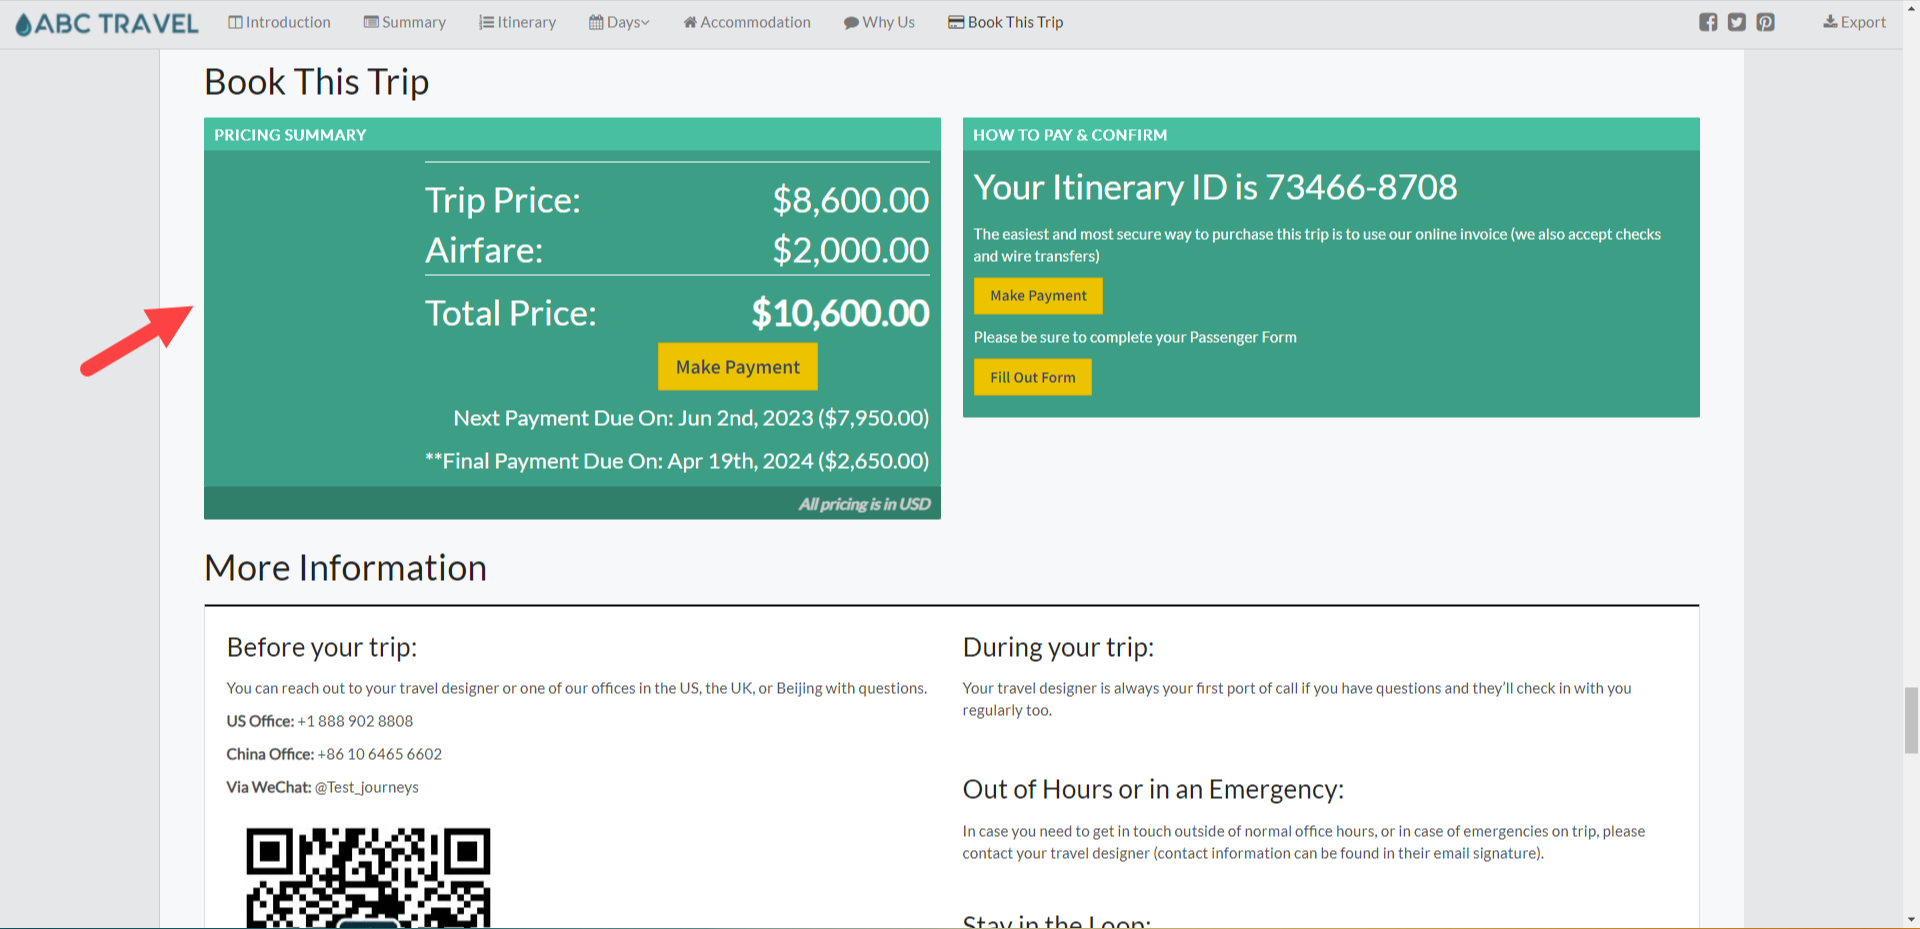
The Itinerary View similar to the Proposal View, the Itinerary View caters to a slightly different need. Once the client is more engaged and the proposal moves forward, this view removes pricing details to focus on the itinerary itself. It's perfect for clients who have moved past the initial proposal stage and need a clear, concise view of what their trip will entail without the distraction of costs.
Click image to view full example - opens in new tab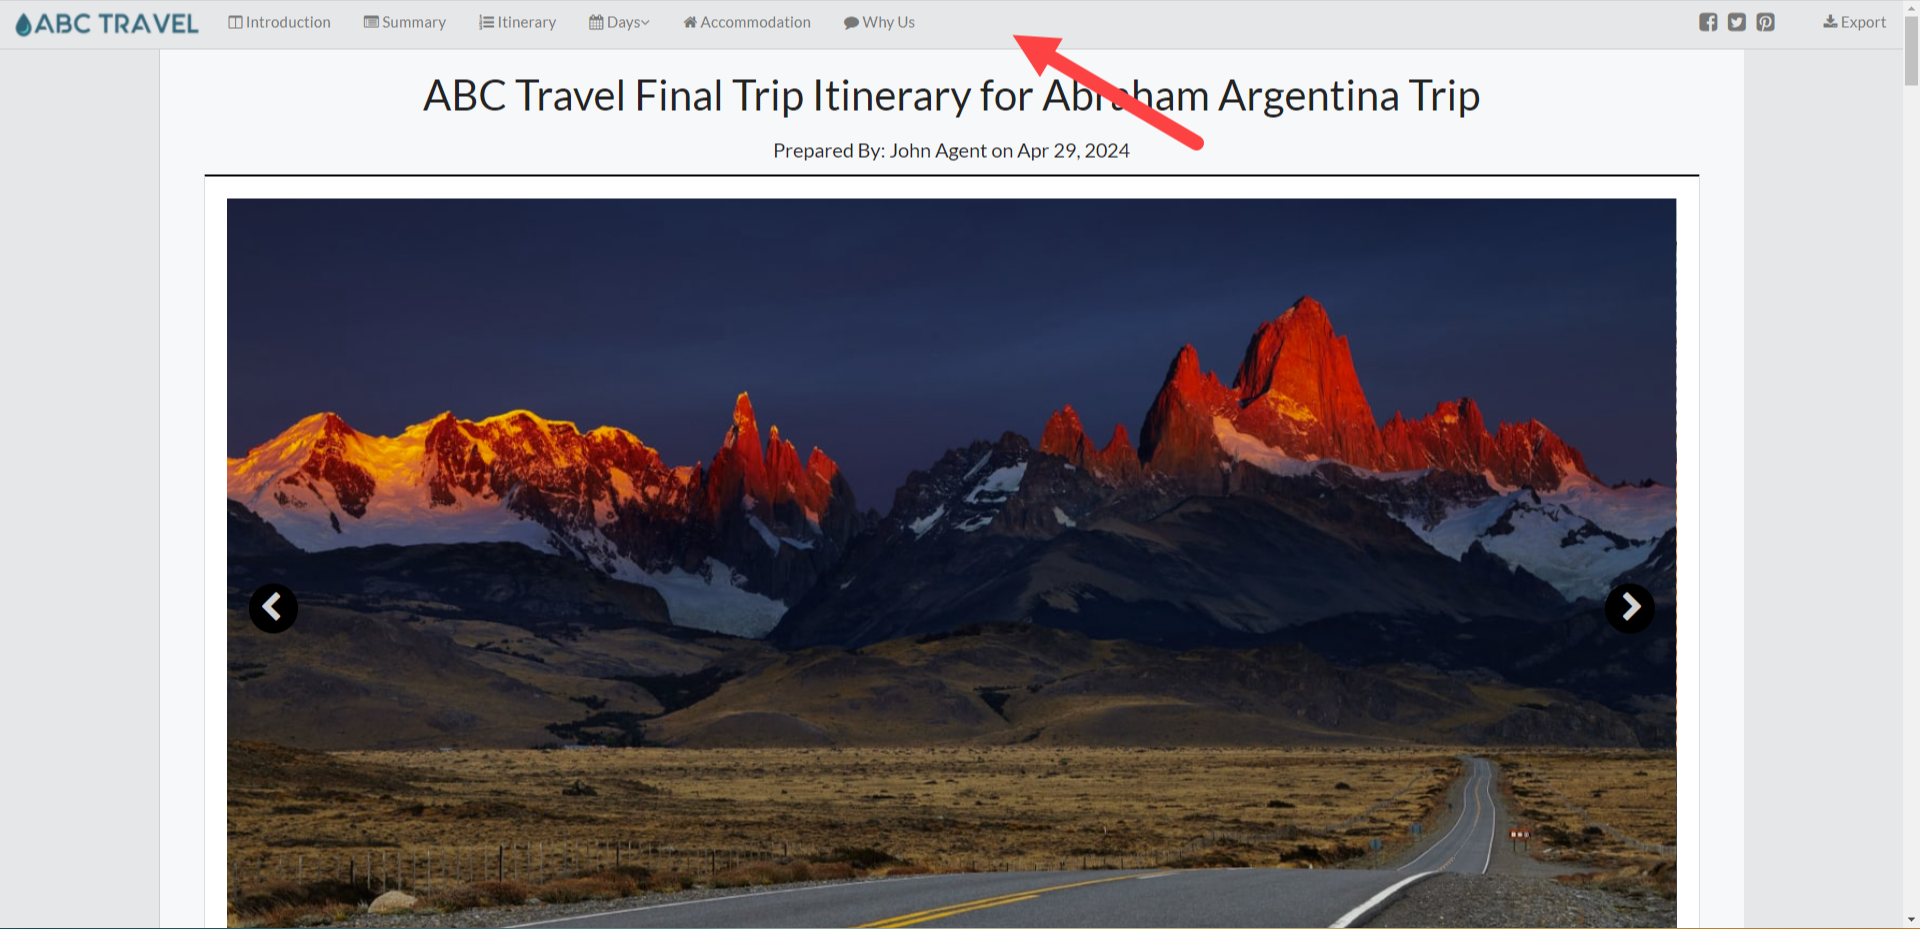
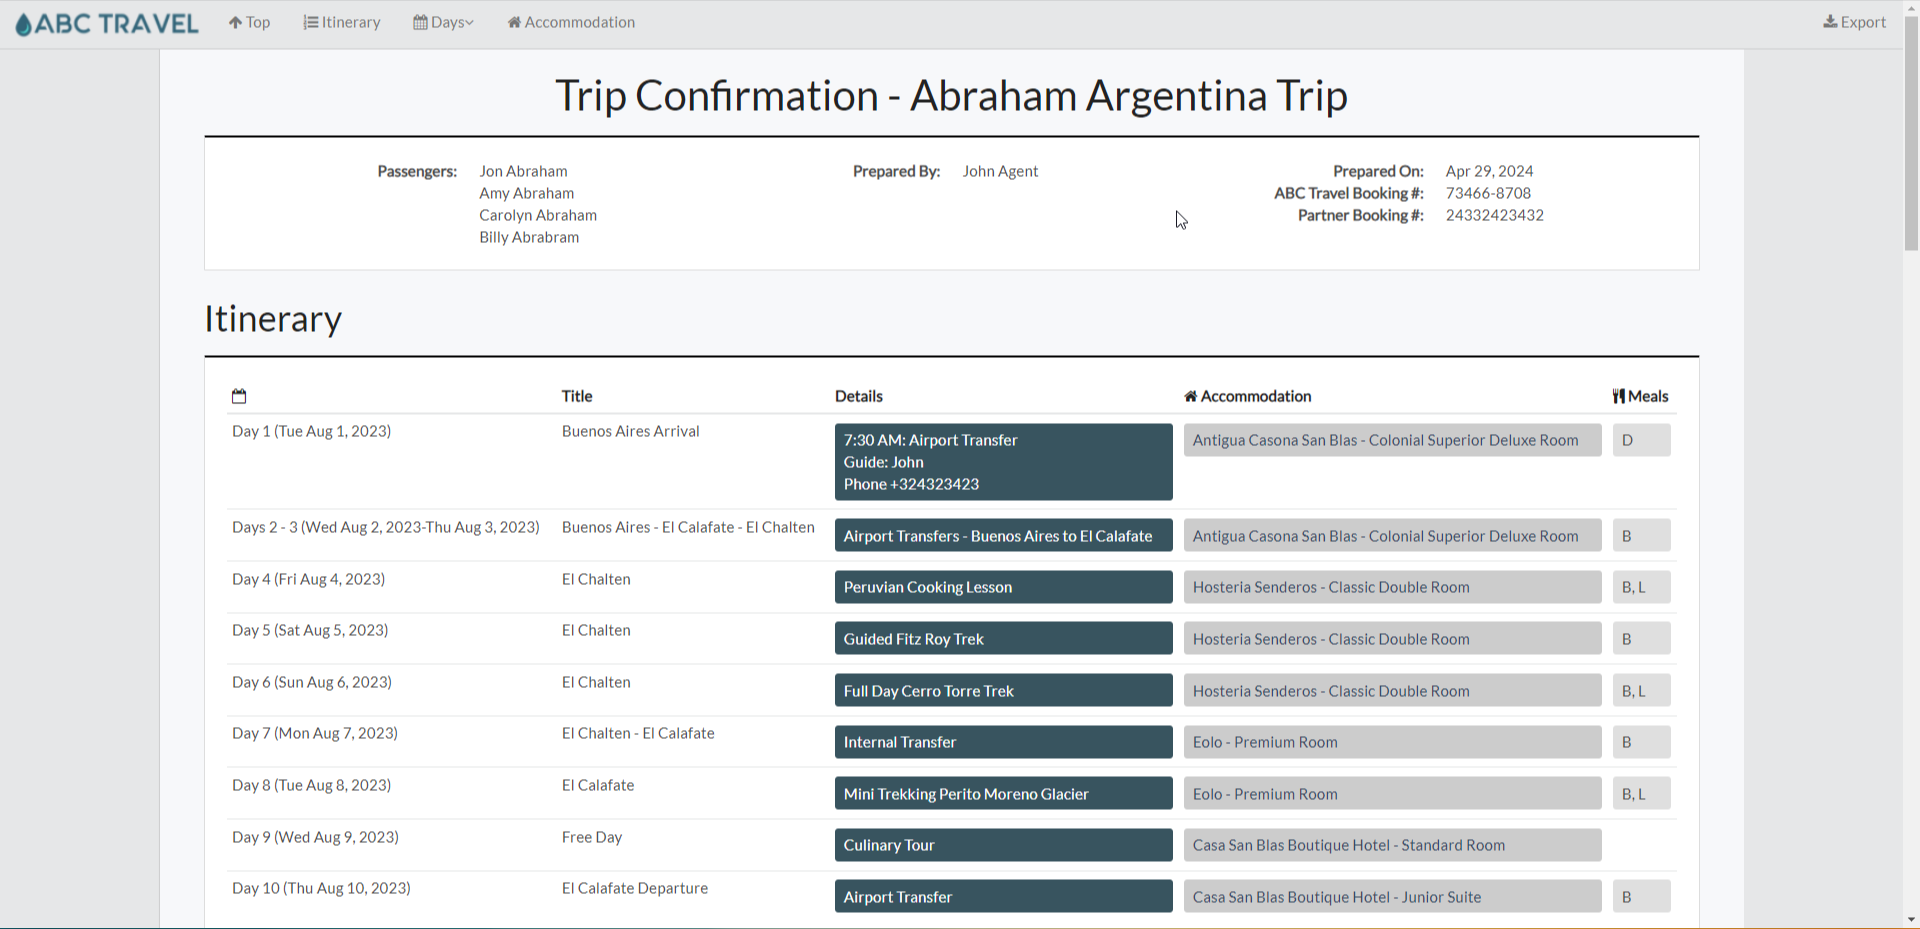
The Confirmation View is essential during the Post-Sales or Confirmation phase, the Confirmation View provides a detailed outline of the Confirmed Trip. It includes start and end times, confirmation numbers, and comprehensive contact information for all Suppliers and Accommodations. This view ensures that both the travel advisor and the traveler have all the necessary details at their fingertips.
Click image to view full example - opens in new tab
The Sample View is used primarily in the Qualification process for New Clients, the Sample View is crafted to showcase your offerings while safeguarding privacy and relevance. It removes sensitive information such as previous client data, specific dates room types, and pricing. This view is ideal for illustrating potential travel plans to prospects without revealing details of past clients' experiences.
Click image to view full example - opens in new tab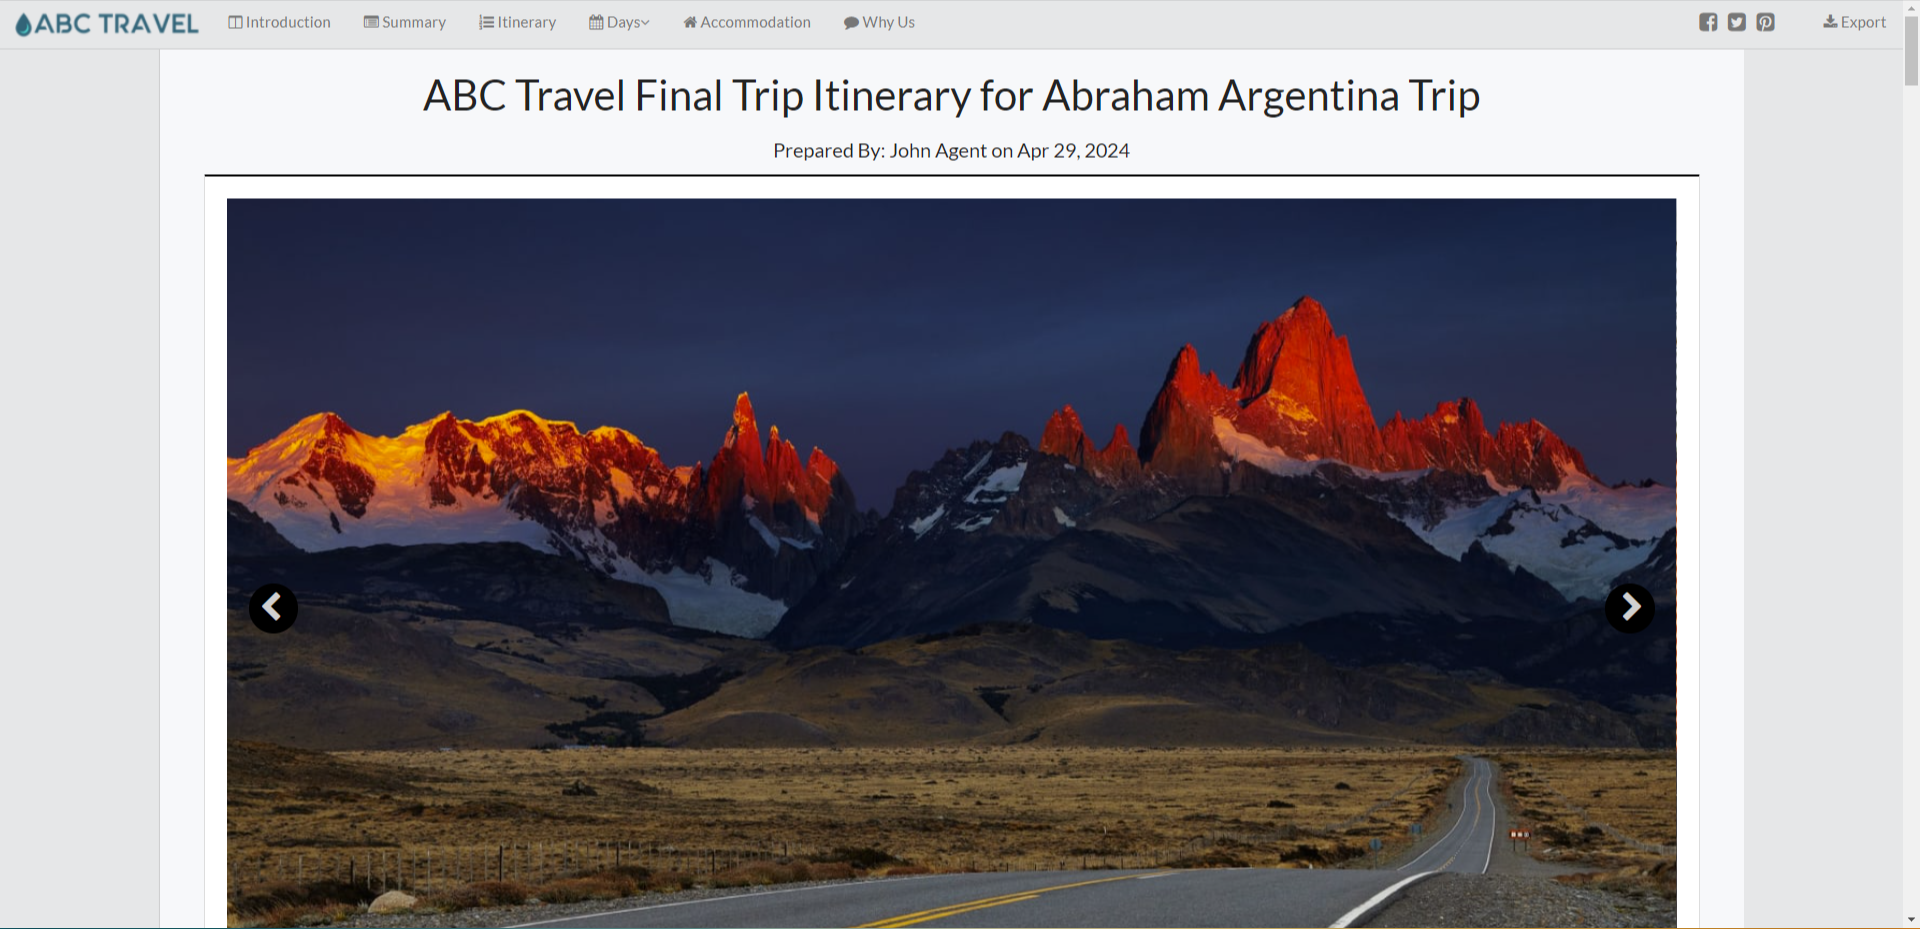
The Supplier Itinerary views are tailored for communicating with your DMC's. They come in two forms: Itinerary and Confirmation. Both versions are streamlined to exclude Rack pricing, Images, and Videos, focusing instead on essential information that suppliers require to fulfill their part of the service effectively. This ensures that suppliers receive only the information necessary to meet the travelers' needs without the clutter of marketing materials.
Supplier Itinerary View
Click image to view full example - opens in new tab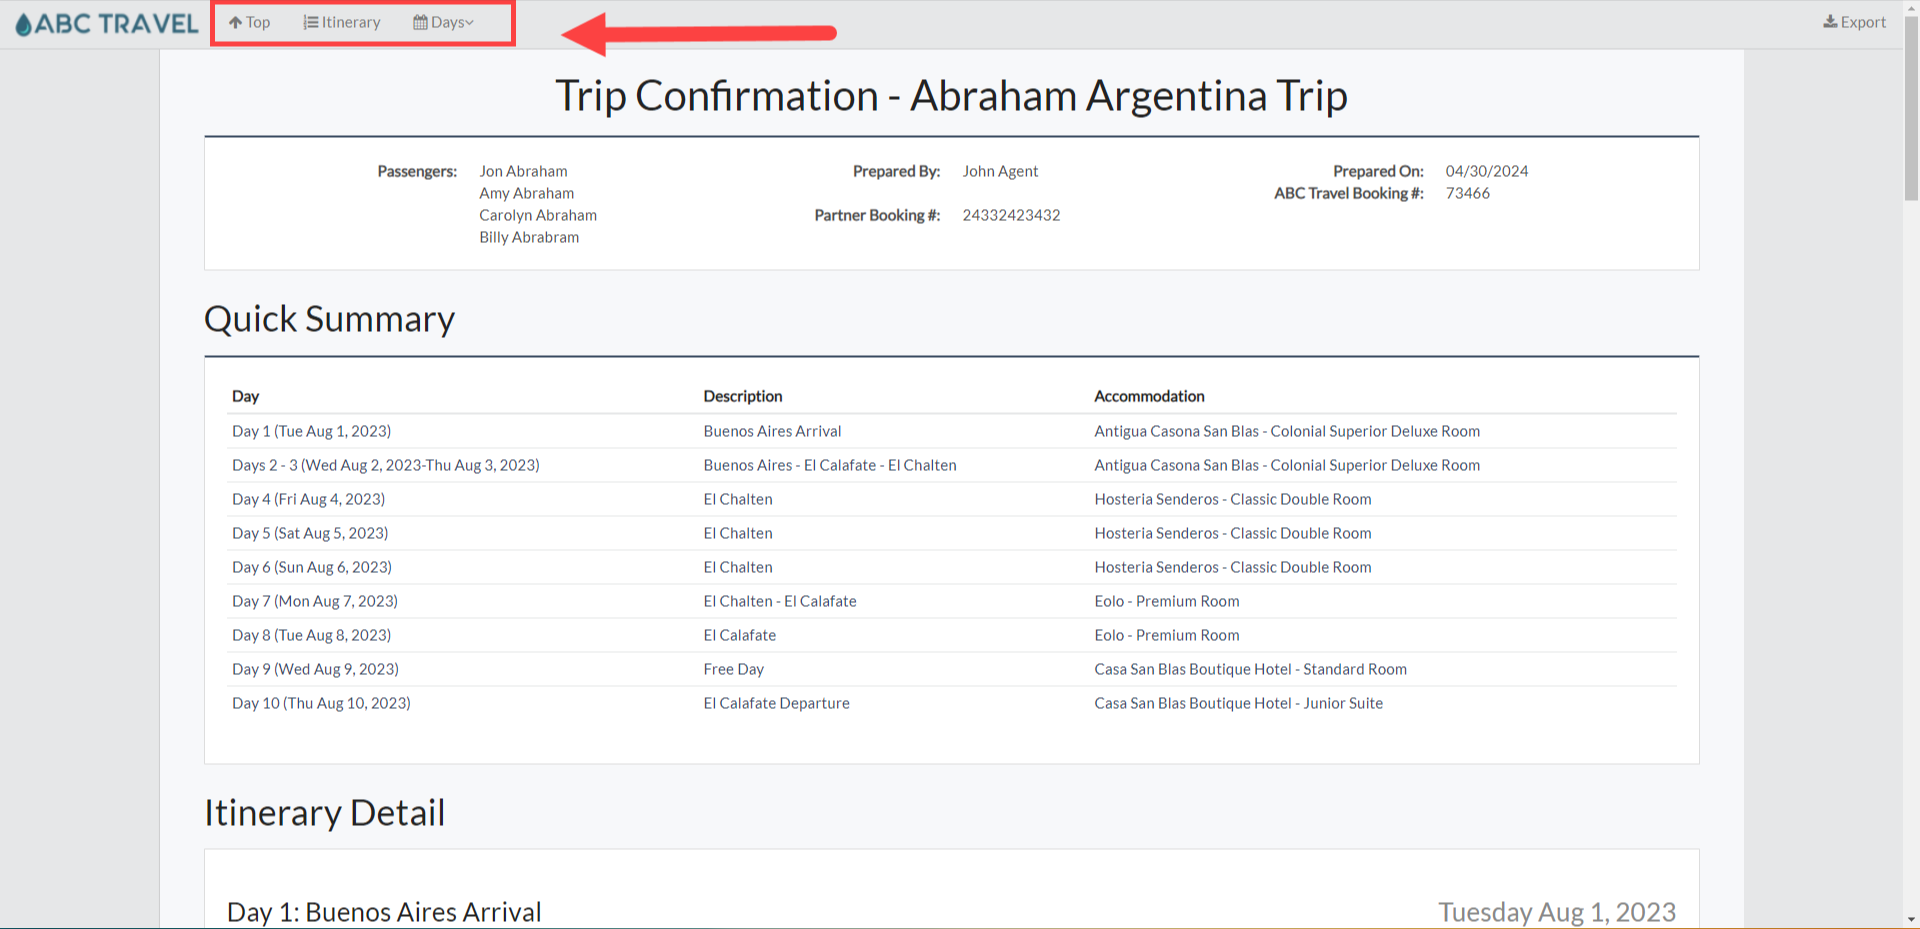
The Supplier Confirmation adds Accommodations and travel details.
Click image to view full example - opens in new tab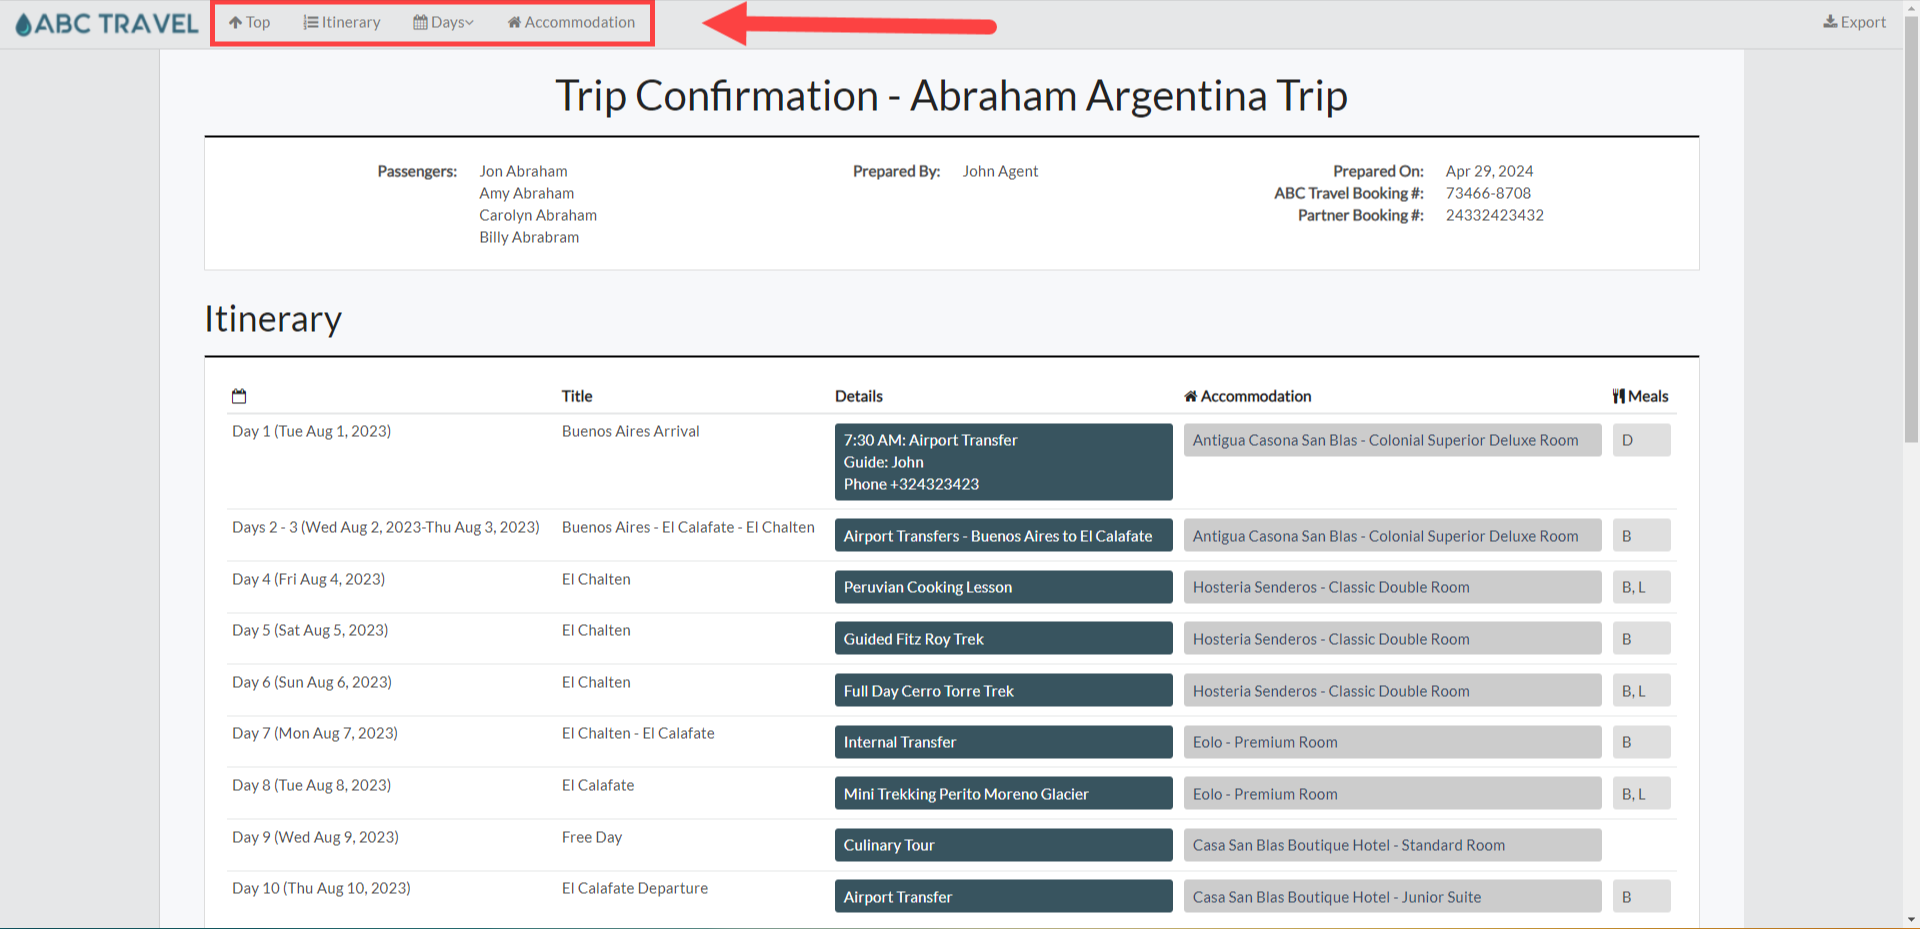
And that's how to view the different trip itineraries on the Oasis Travel Platform!
We hope you found this guide helpful. If you need additional help or want to share your thoughts, reach out at support@myoasisapp.com. We love hearing from you and are always here to help.
Was this article helpful?
That’s Great!
Thank you for your feedback
Sorry! We couldn't be helpful
Thank you for your feedback
Feedback sent
We appreciate your effort and will try to fix the article