Welcome! Today, we'll quickly show you how to Share Trips in the Oasis Travel Platform.
What are Shared Trips?
With the Shared Trips, companies that you work with can share their own Oasis Trips with you. The following is just some of the key things shared trips allows you to do:
Add the shared trip to your own Lead Booking record
Add your own Documents
Your partner companies branding, colors, and fonts will be stripped out and replaced with your own
Share your own Proposal, Confirmation, Itinerary and Sample Links
Embed shared trips on your own website if you are using the Oasis Trip Widget
Edit the Trip's custom content
Edit the Trip's name, display currency and client URL among other Trip settings
Accepting a Partnership Invitation
Before you start receiving shared trips, you will need to accept an invitation from another company.
 | Note: you only have to do this once for a partner |
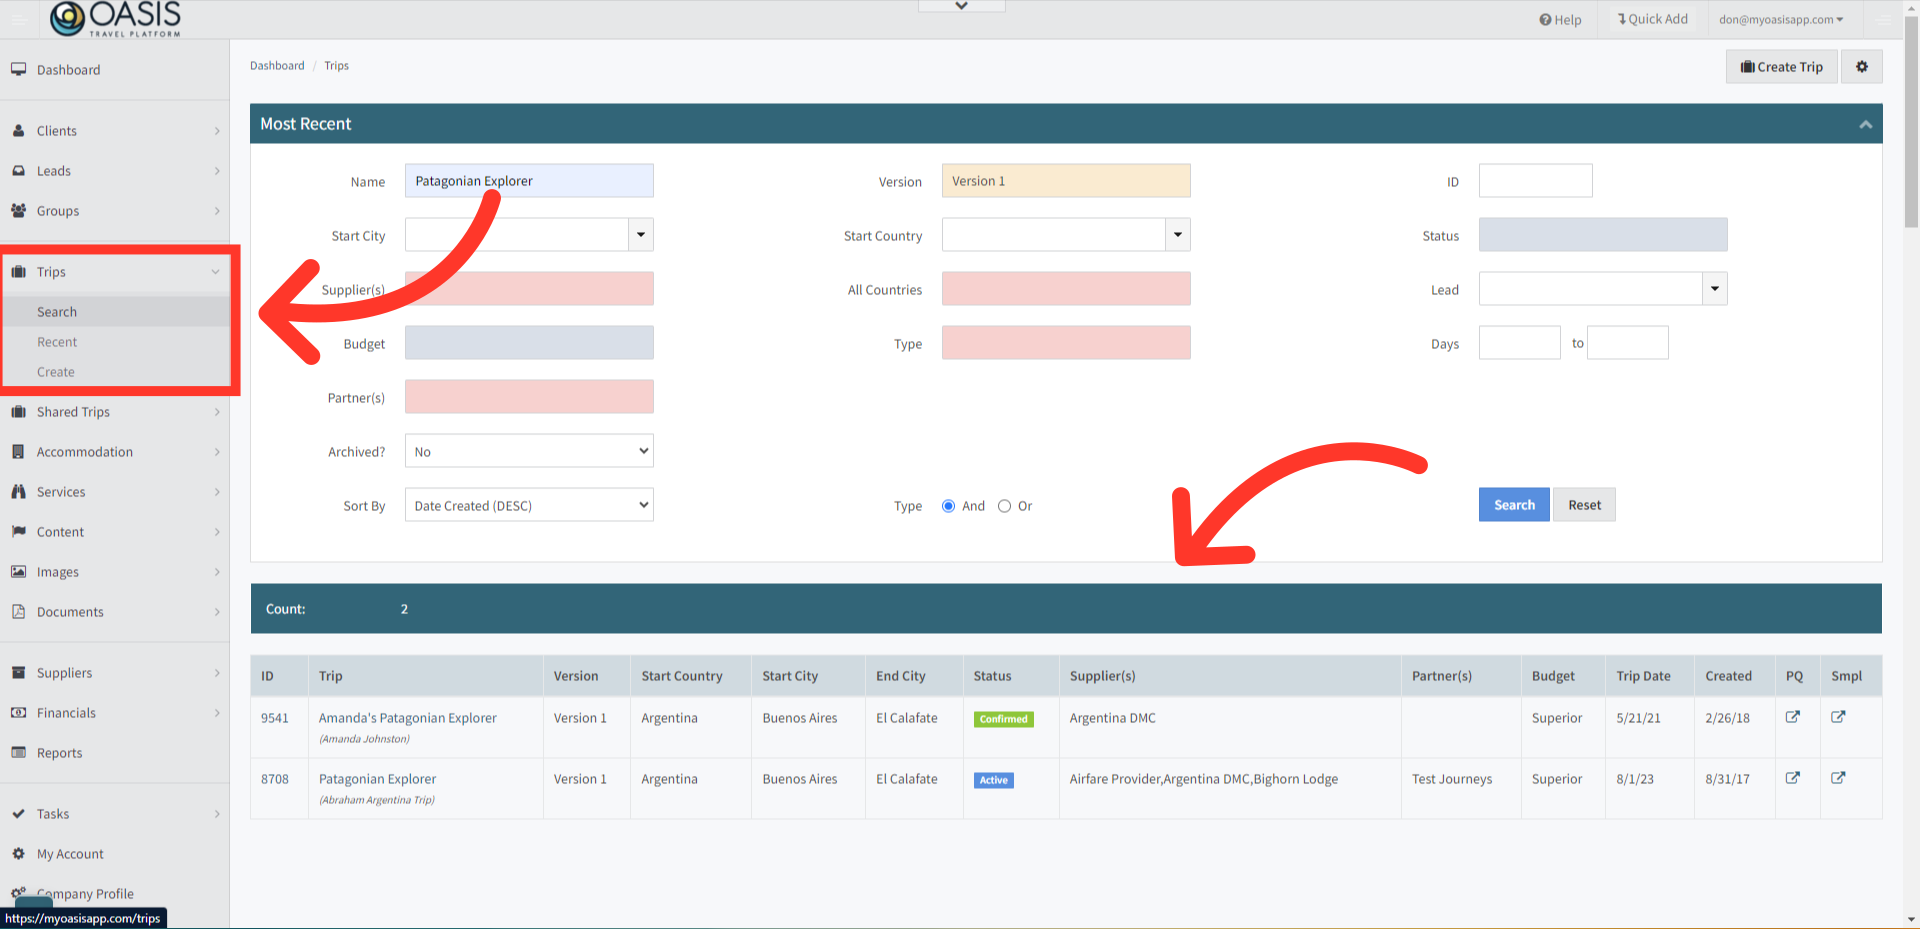
1. To begin, access the Trips tab from the left side menu, then search for and open the specific Trip you intend to share.
2. Now, click on the Sharing tab on the far right.
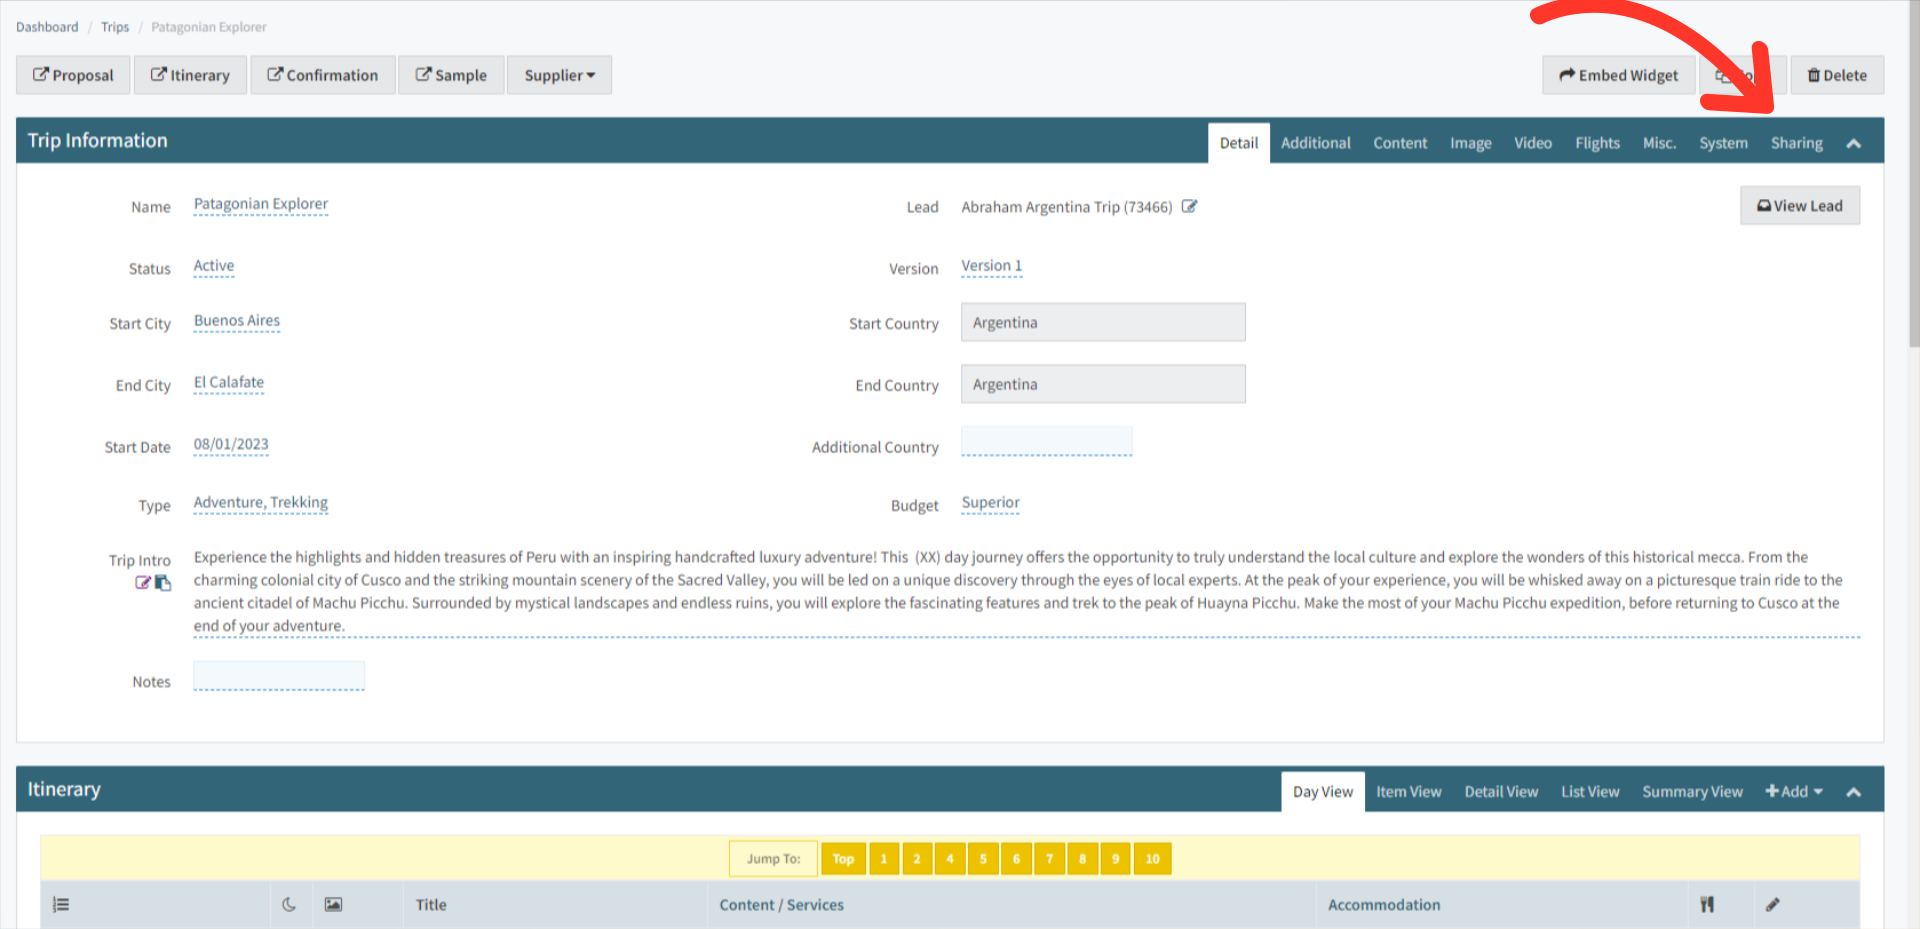
3. To share the Trip with another Oasis User click on the Share button.
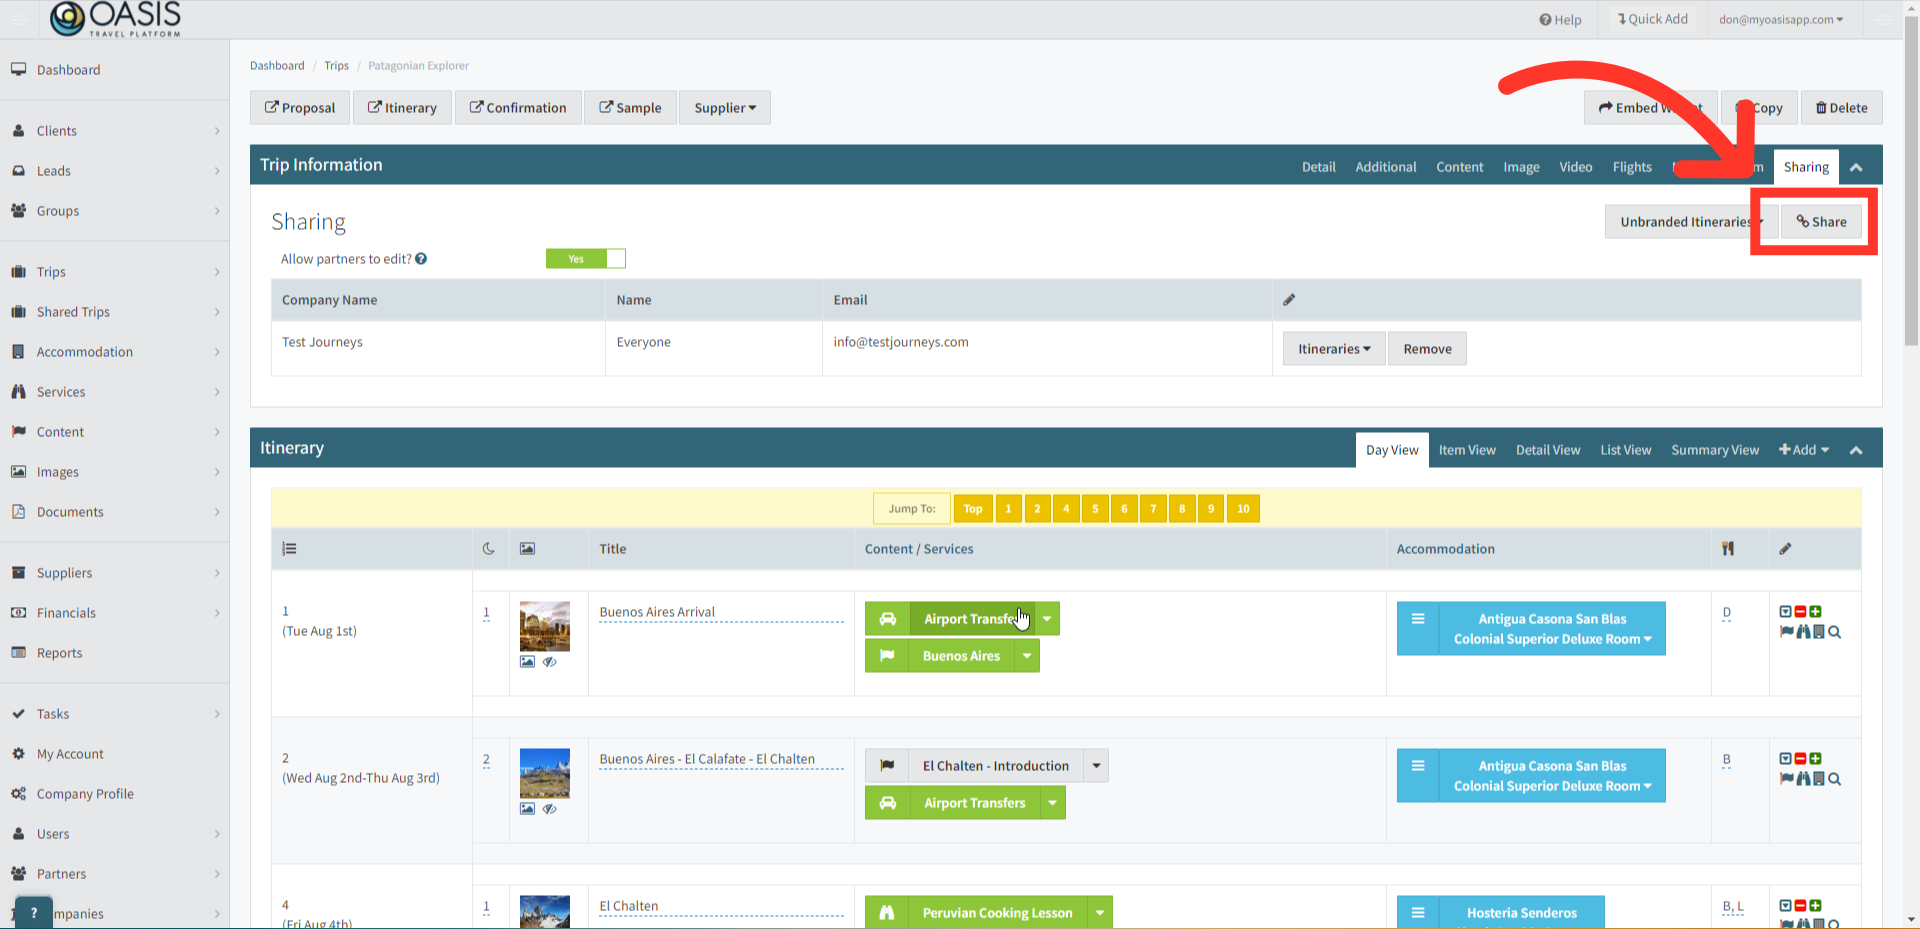
4. Search for who you'd like to share the Trip with by either searching the Company Name or Agent Name. Then locate them from the search results and click on the Share button to send an email invite.

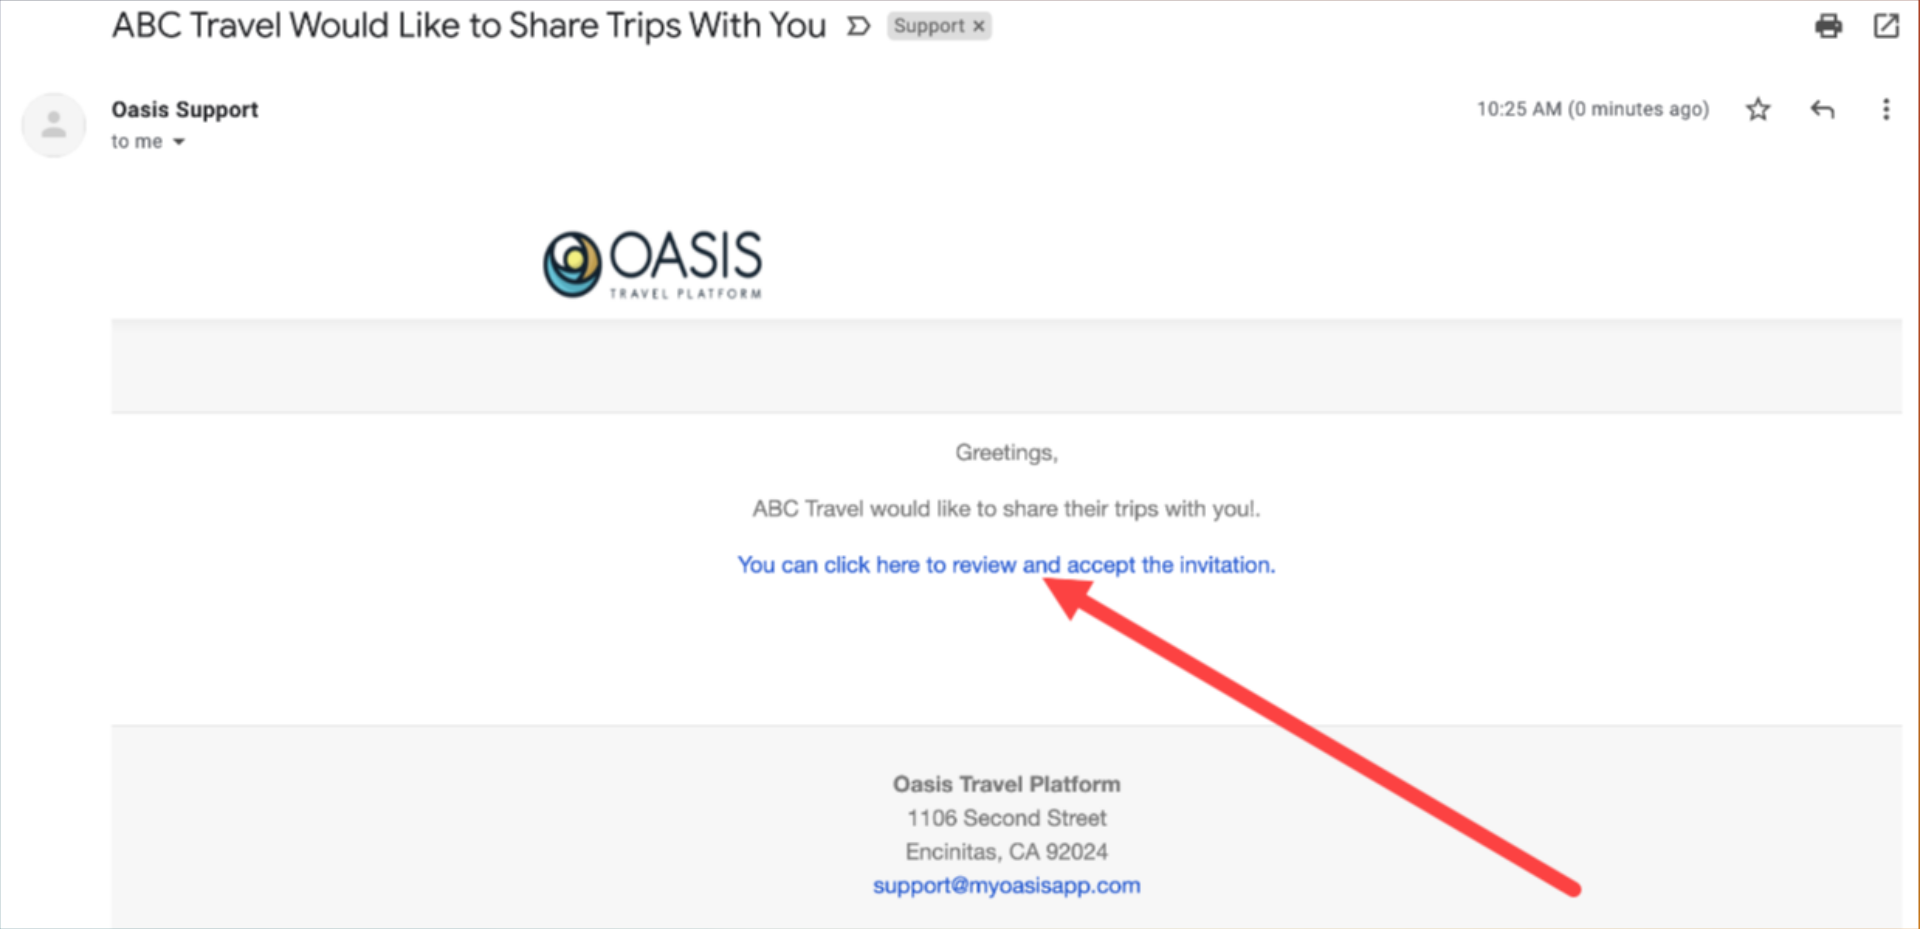
5. Here is an example of the email that the user will receive. They simply click on the link and review the invitation. Opening the link the user will be directed to the Trip Invitation area of Oasis.
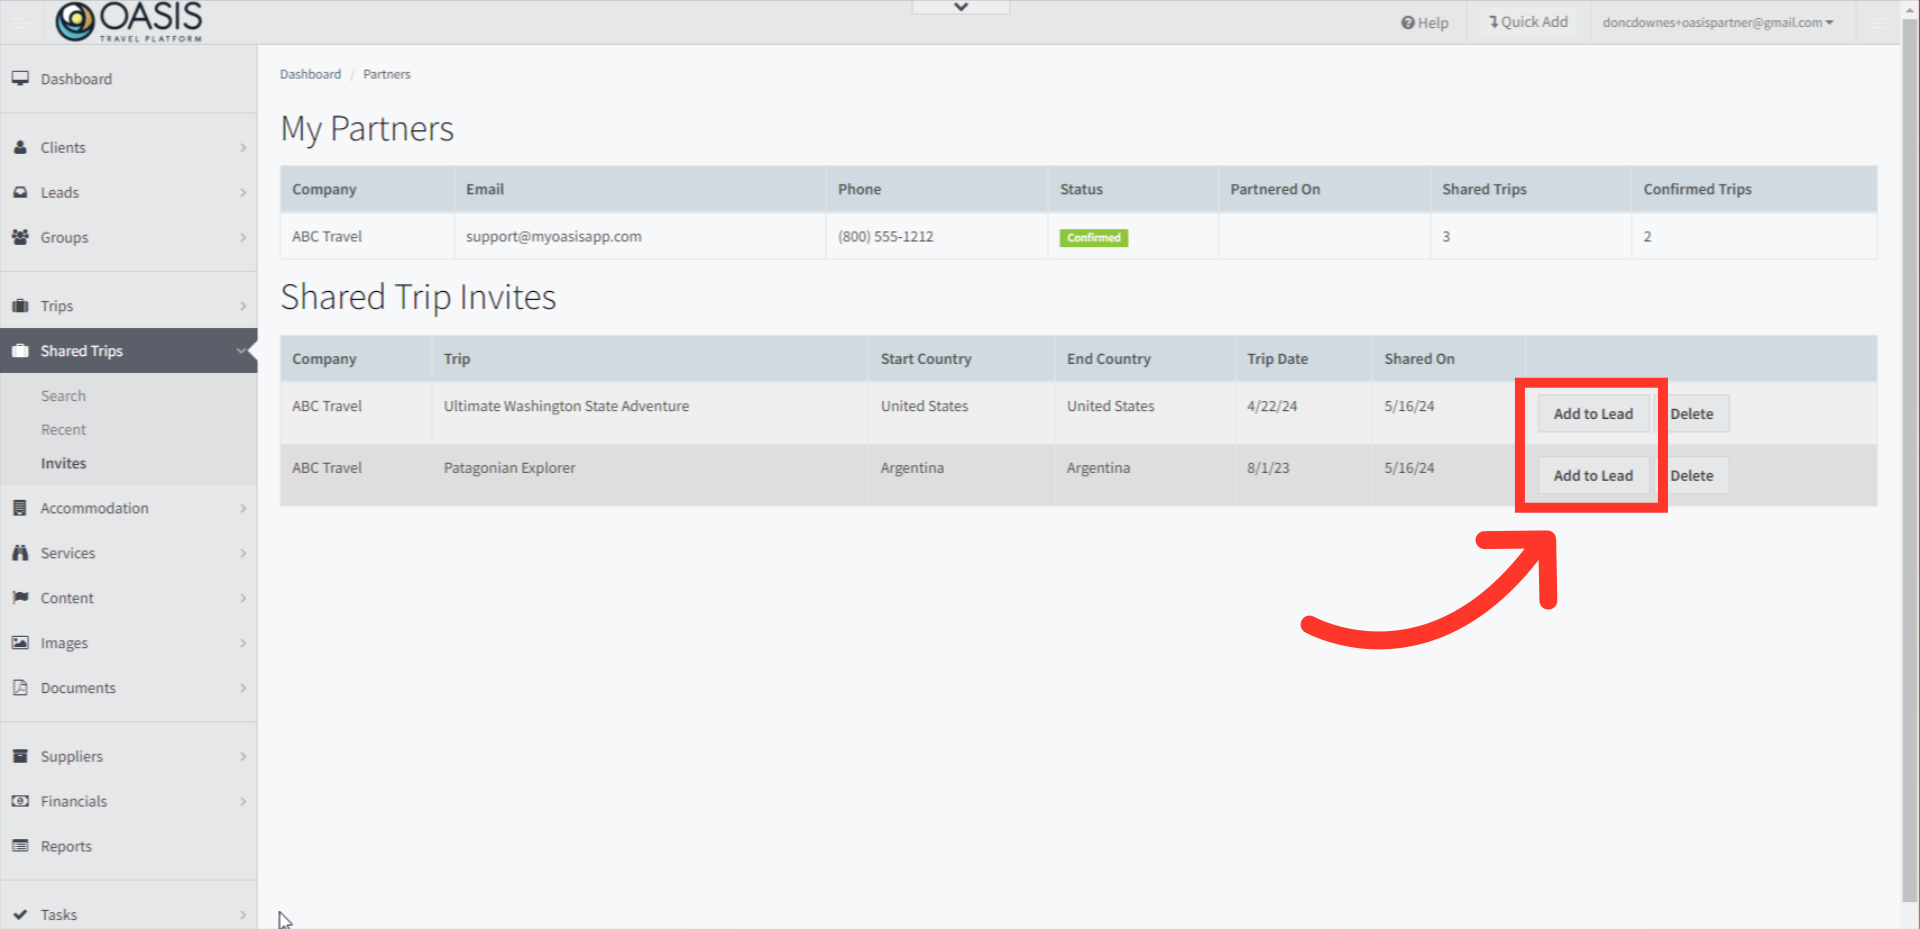
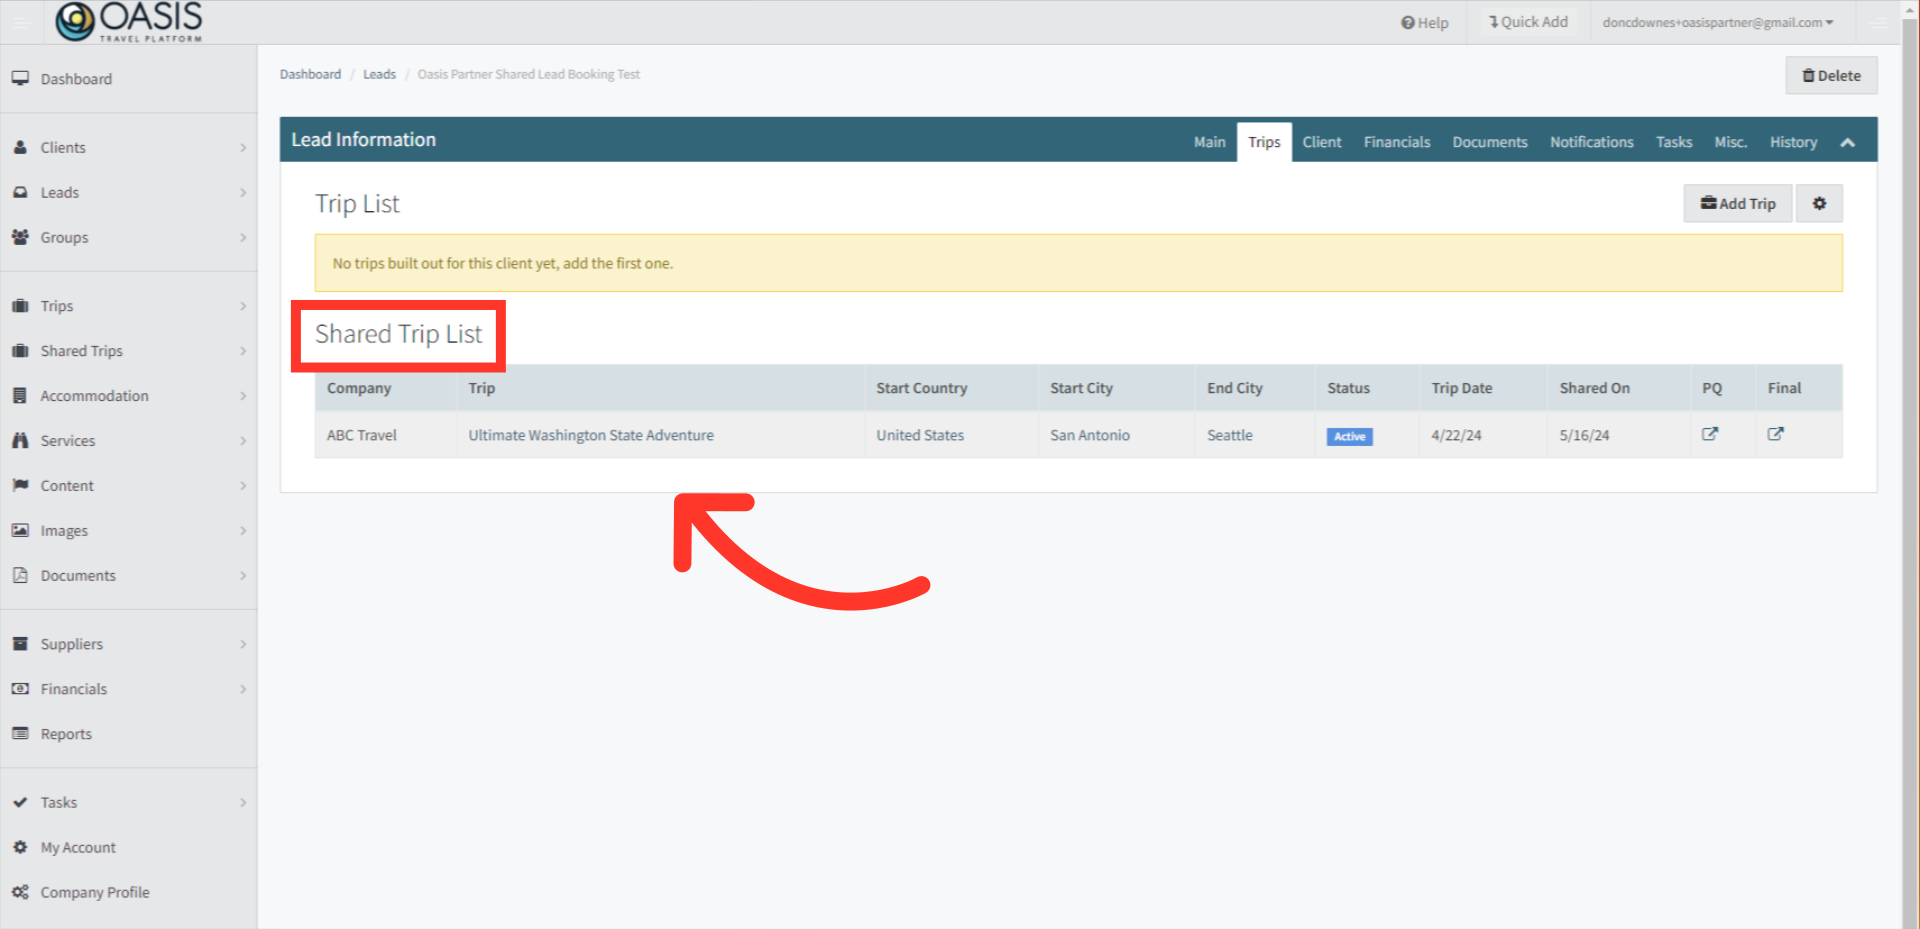
6. Under Shared Trips, the Invites tab will show them the Invitation. Once they accept by clicking Add to Lead, the company will have access to the Trip.
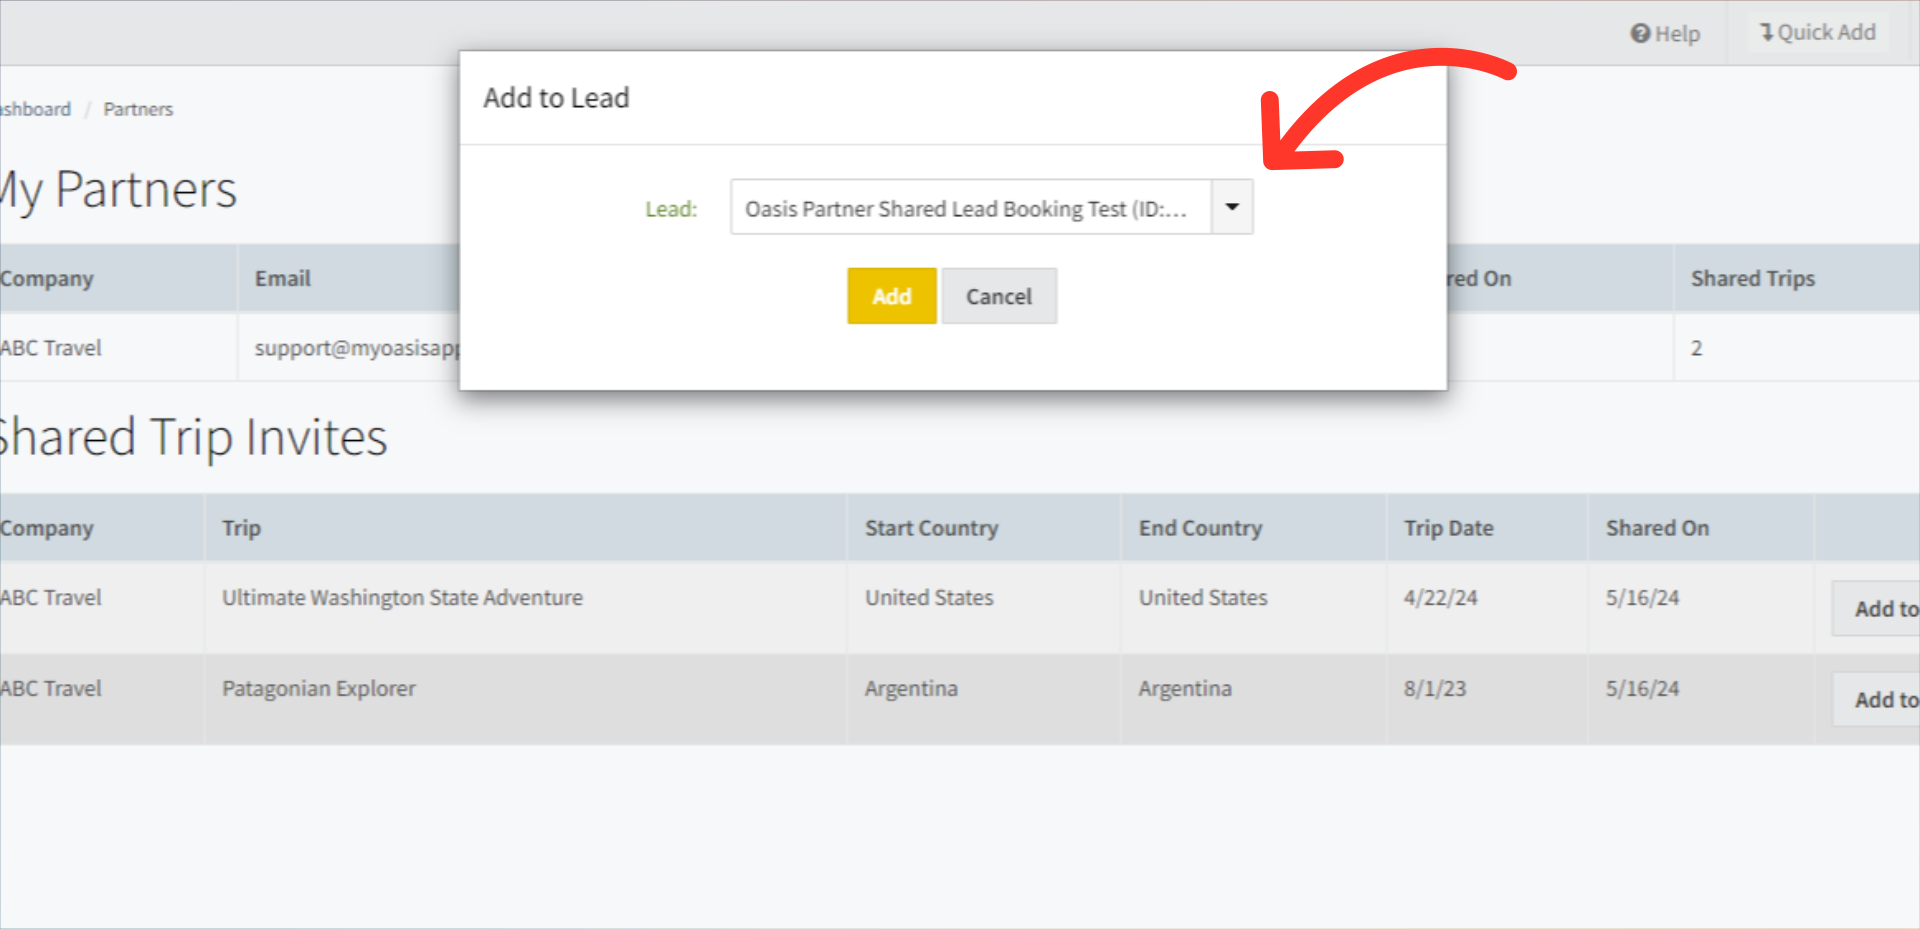
7. They can select the Lead Booking and assign the Trip by clicking Add, which will link the two together.
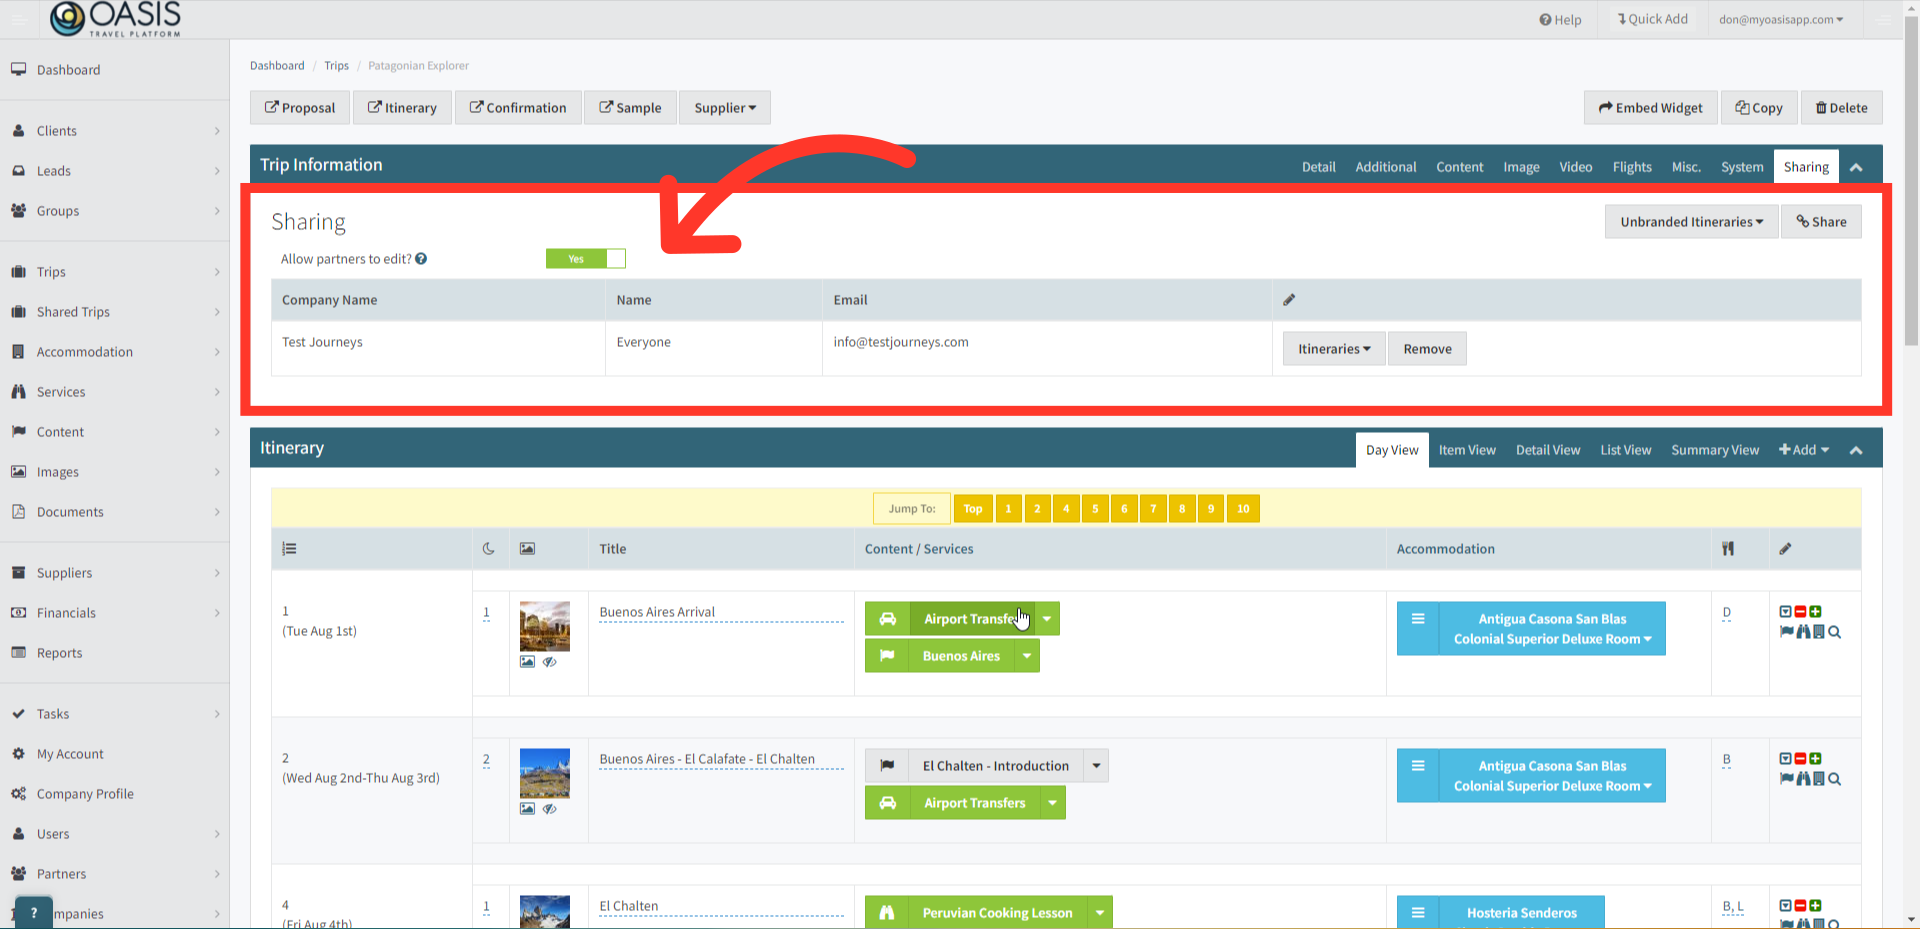
8. Back in the Trip section, you'll find a list of companies with whom you're sharing the trip with. You can toggle the companies ability to edit custom content, append day items, and edit appended content and services if needed. It's recommended to keep this option off if you intend to share the trip with multiple companies.
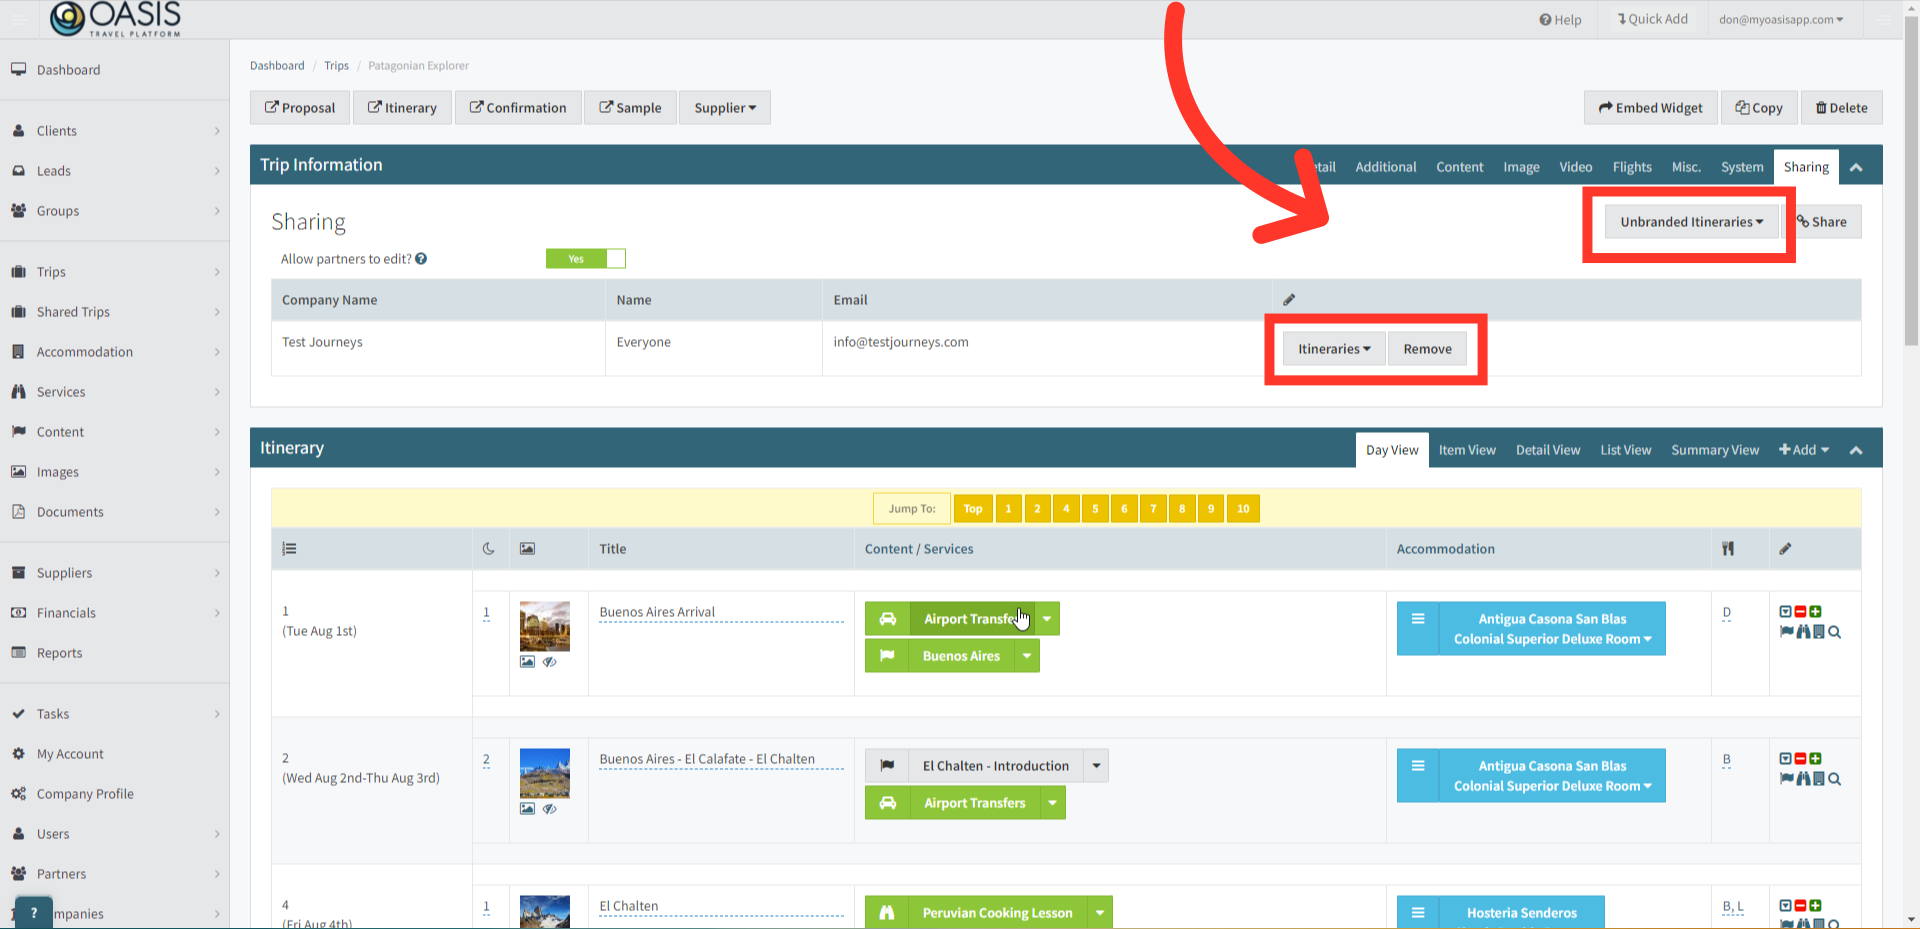
9. Here are 2 options to shareitineraries. You have the option for Unbranded Itineraries or in the Sharing Company list below, you can share Itineraries that include your branding and colors.
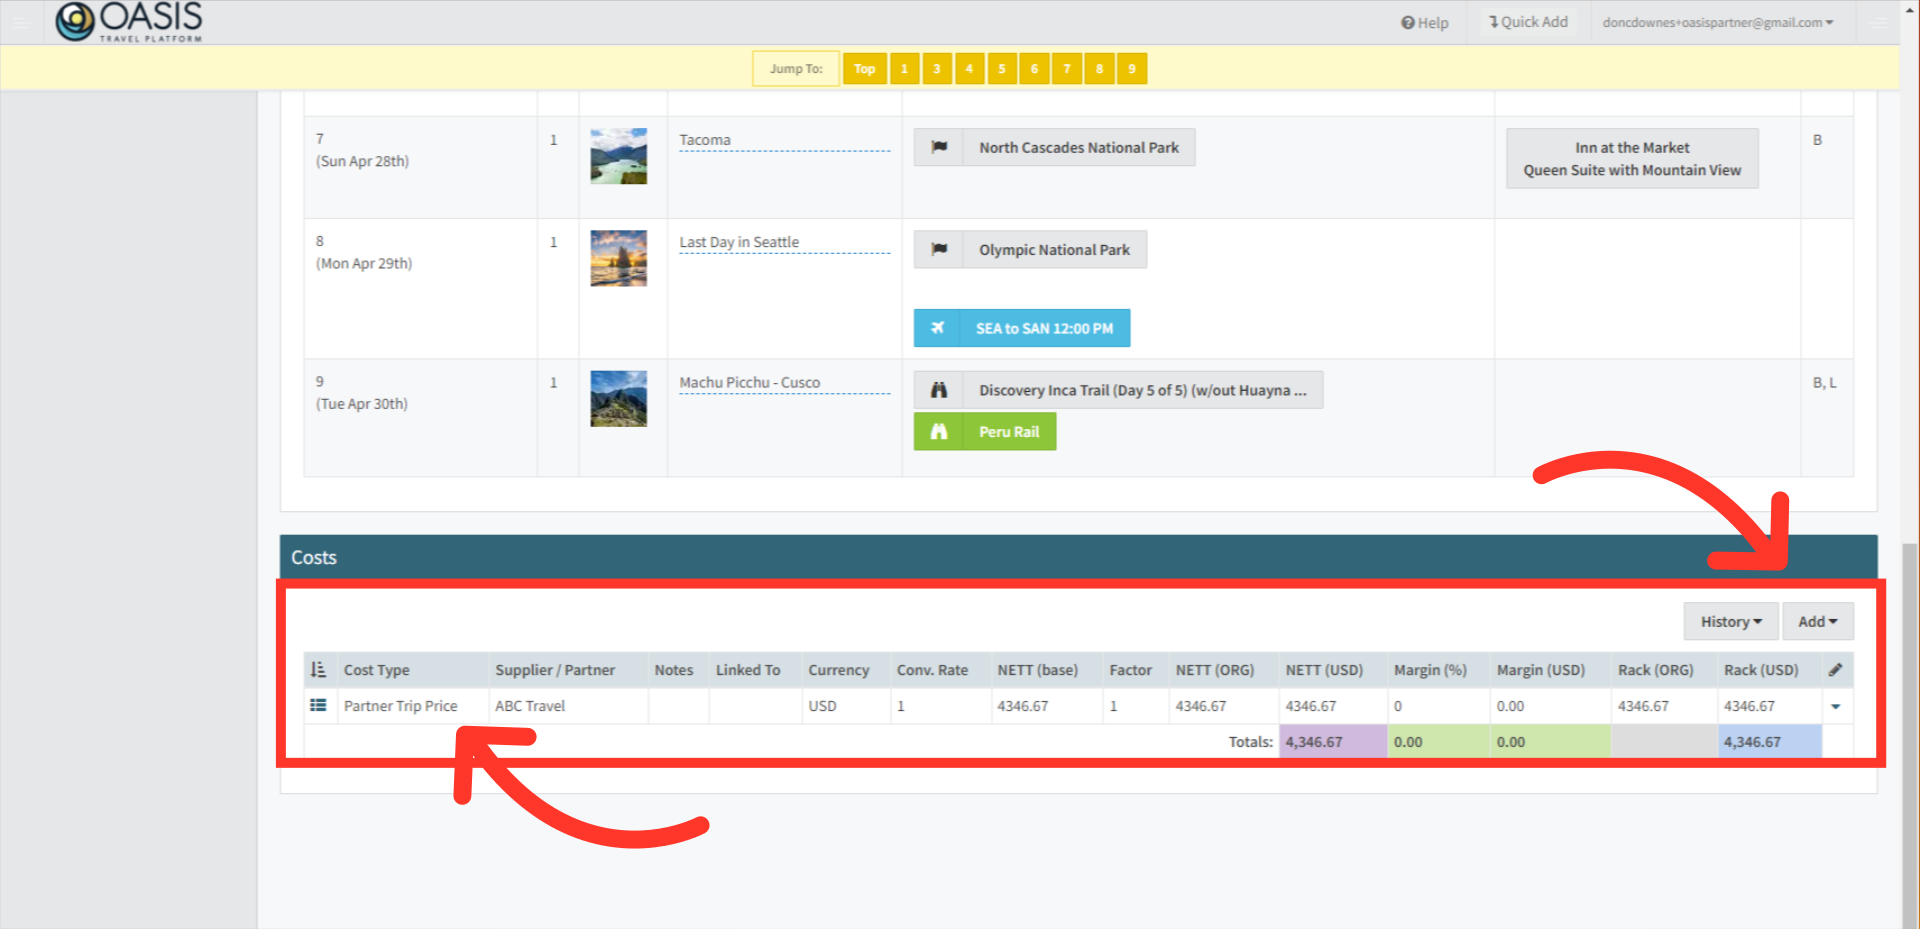
10. If your partner company had configured any costs for the trip, they would be rolled up into one cost item and labelled as 'Partner Trip Price'. The costs section should be familiar, and you can add your own costs or markup the same way you would add costs to a regular Oasis Trip.
11. The shared trip will behave just like a regular trip on the lead booking level. Once the trip status is set to Confirmed, you will be able to tie out Financials, Send Invoices, Invite Clients to use the Mobile App, Add Documents, etc.
The only difference is that shared trips will be differentiated from regular trips in the trips tab of the lead booking record.
And that's how to Share Trips on the Oasis Travel Platform! We hope you found this guide helpful. If you need additional help or want to share your thoughts, reach out at support@myoasisapp.com. We love hearing from you and are always here to help.
Was this article helpful?
That’s Great!
Thank you for your feedback
Sorry! We couldn't be helpful
Thank you for your feedback
Feedback sent
We appreciate your effort and will try to fix the article