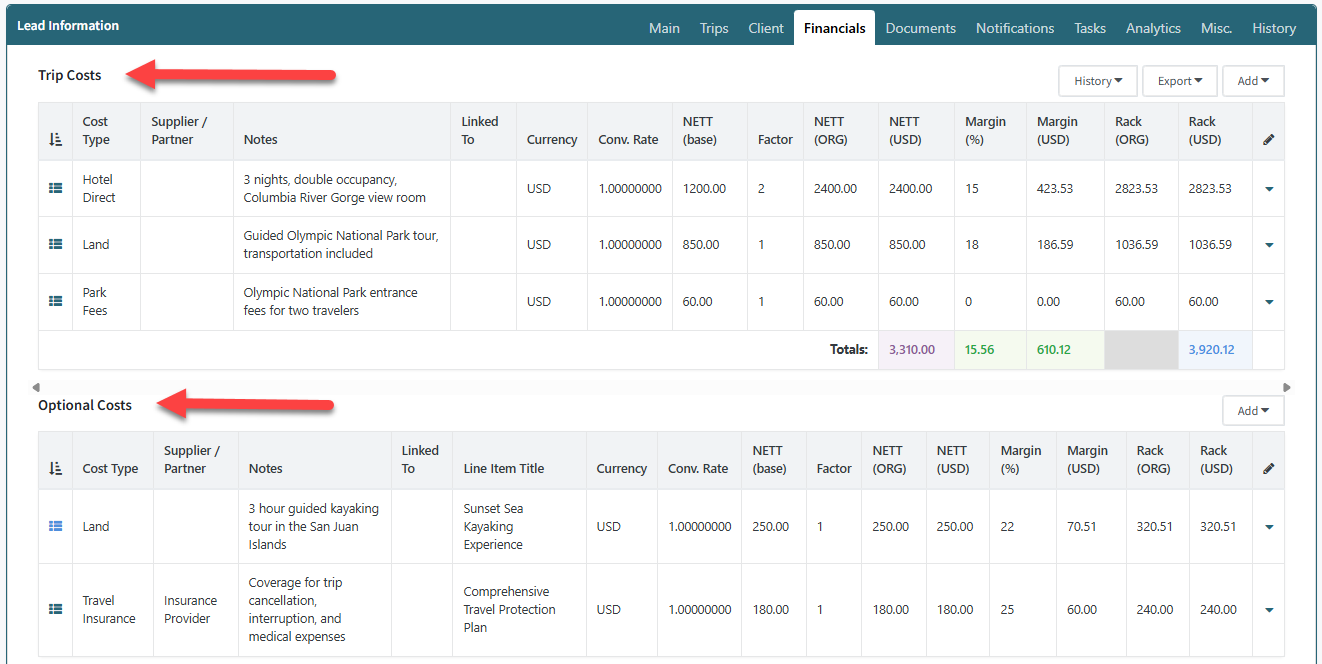
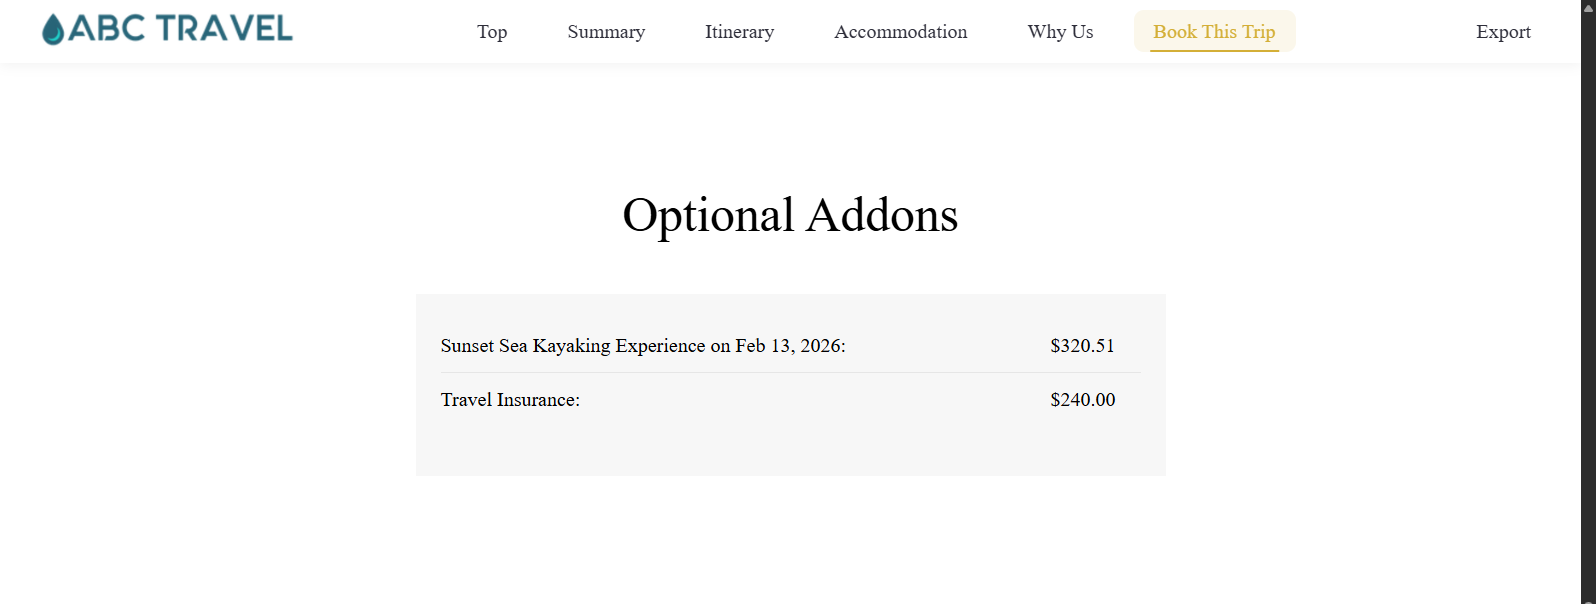
The Optional Costs feature allows you to prepare and present additional services, upgrades, or experiences that travelers may choose to add to their trip. These items appear in a separate Optional Add-Ons section on the itinerary, making it easy for clients to review and select additional options.
Behind the scenes, Optional Costs help you manage these add-ons without affecting the trip’s financial totals until the item is confirmed and converted into a Trip Cost.
Where to Find Optional Costs
Optional Costs are available in both the Trip Builder and the Lead record.
In the Trip Builder, scroll to the bottom of the page below the main Costs section. You will see a separate section labeled Optional Costs where you can add and manage optional line items.
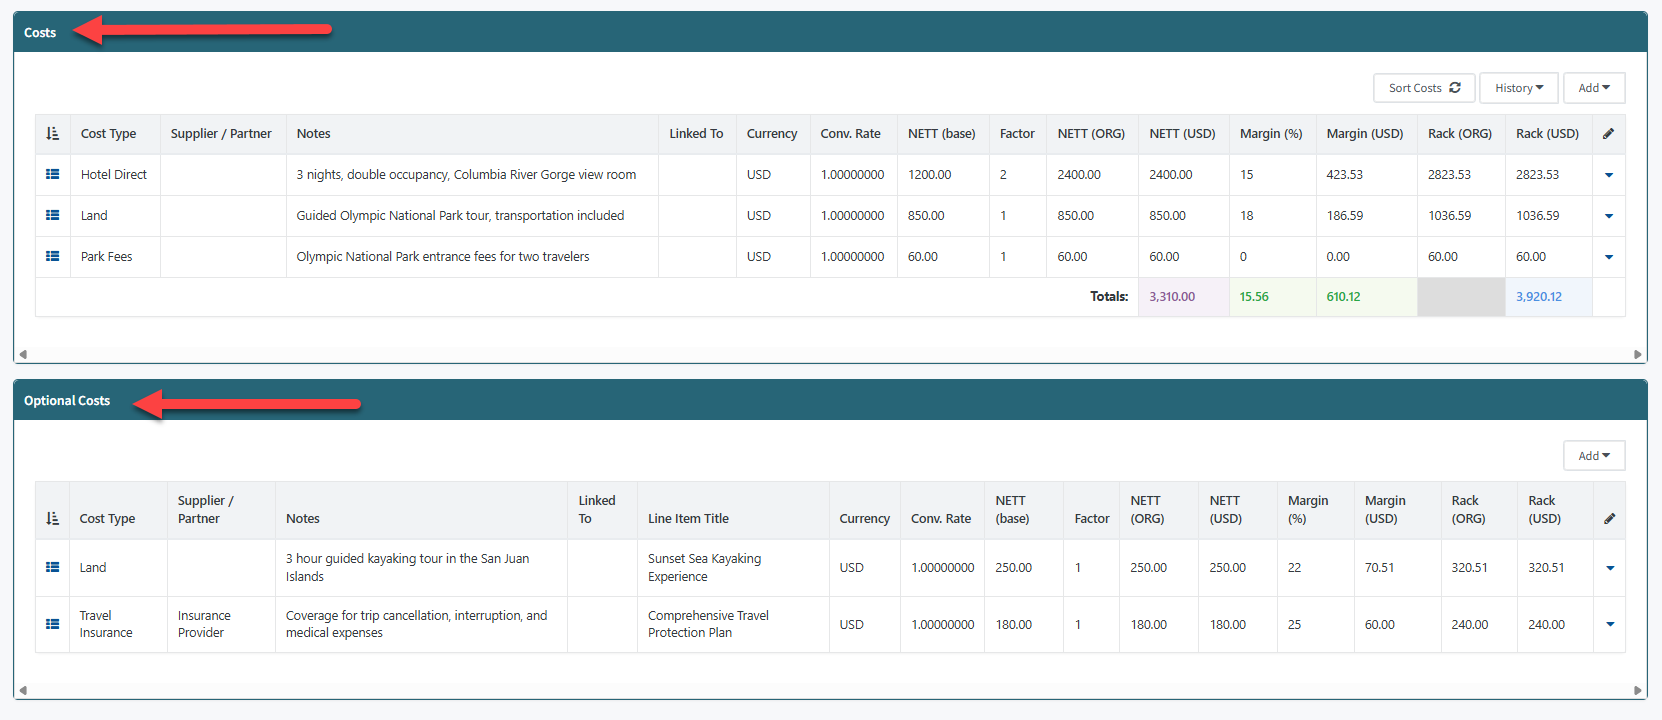
In the Lead record, the Optional Costs section appears directly below the Trip Costs section. The layout and functionality mirror what is available inside the Trip Builder.
Adding an Optional Cost
Optional Costs use the same Net Cost Calculator and Commission Cost Calculator already used to create Trip Costs.
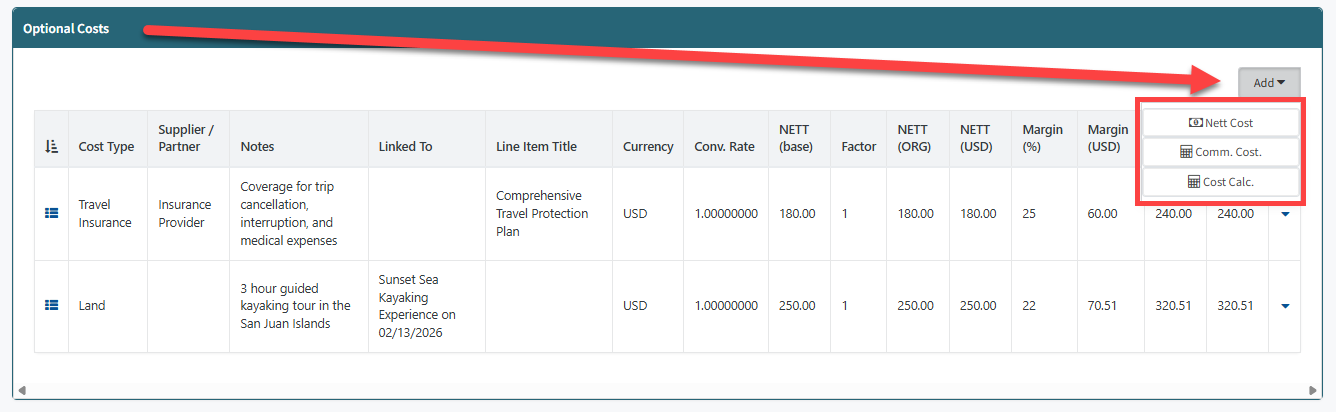
When creating or editing a cost, simply enable the Optional Cost toggle to classify the item as optional. Once enabled, the cost is placed in the Optional Costs section and excluded from financial calculations.

This toggle can also be used on existing costs to convert them into Optional Costs.
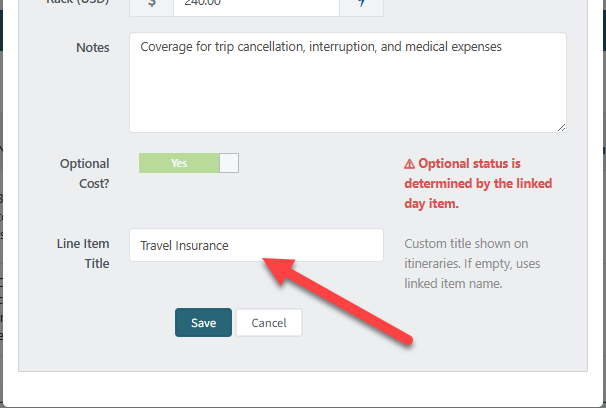
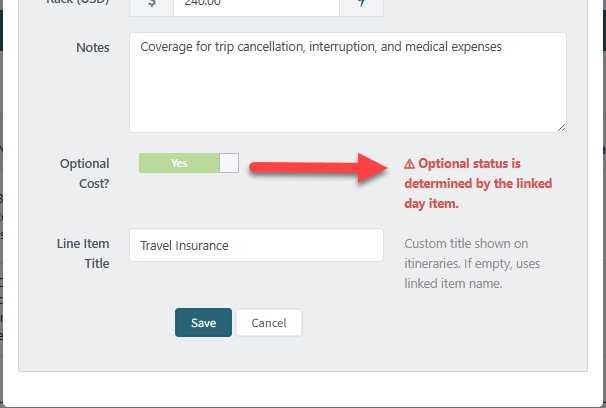
If a cost is linked to a Day Item, the optional status is automatically controlled by the itinerary item. When the service or accommodation is marked as optional in the itinerary, the linked cost will also be treated as optional.
Line Item Title for Itinerary Display
The Line Item Title field controls how an Optional Cost appears on the client-facing itinerary.
Optional Costs display below the Pricing Summary and the How to Pay and Confirm section. When clients scroll further down, they will see a section labeled Optional Addons. ***
 | This display is currently available only in the new layout and applies to PageFlow and PageSnap. It is Not supported in Classic versions at this time.*** |
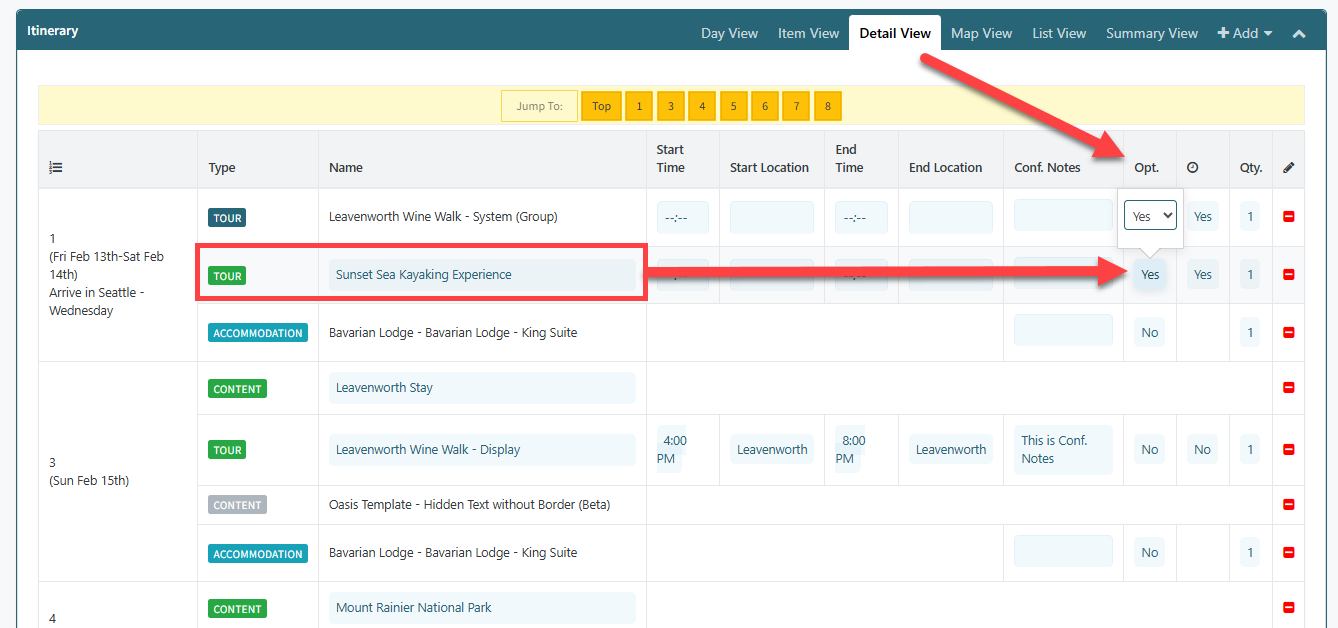
Linking to a Day Item
Optional Costs can be linked to a Day Item in the itinerary. When a cost is linked, the Optional setting is controlled by the Day Item, not by the toggle inside the cost.
If you attempt to change the Optional toggle on a linked cost, you will see a message indicating that the optional status is determined by the linked Day Item.
To update the status, go to the itinerary Detail View and locate the Optional column. If the item is set to Yes, the cost remains in the Optional Costs section. If changed to No, the system will automatically move the cost into the Trip Costs section and include it in financial calculations.