How to Create a Custom Traveler Form.

Modified on Sat, 22 Jun 2024 at 07:00 PM


Welcome! Today, we'll quickly show you how to create a custom traveler form in the Oasis Travel Platform. You have the ability to create multiple custom traveler forms within oasis.

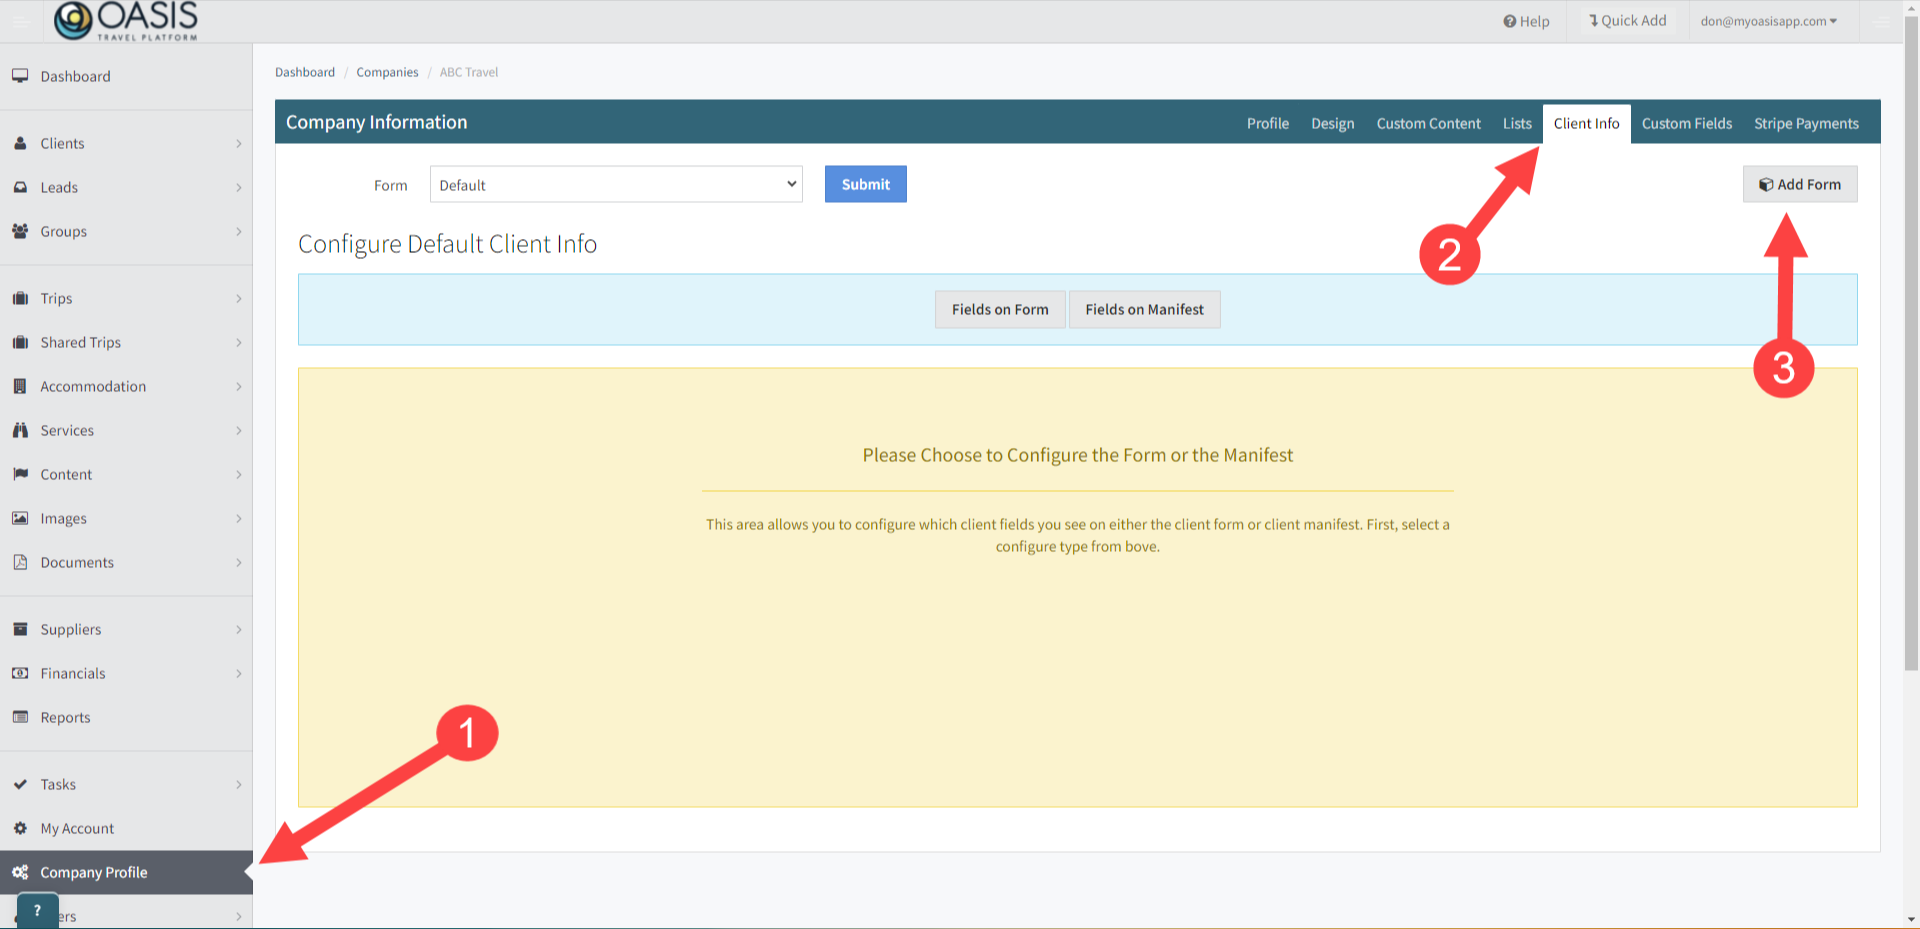
1.  First navigate to the Company Profile tab on the left, then click on Client Info, then the Add Form button.


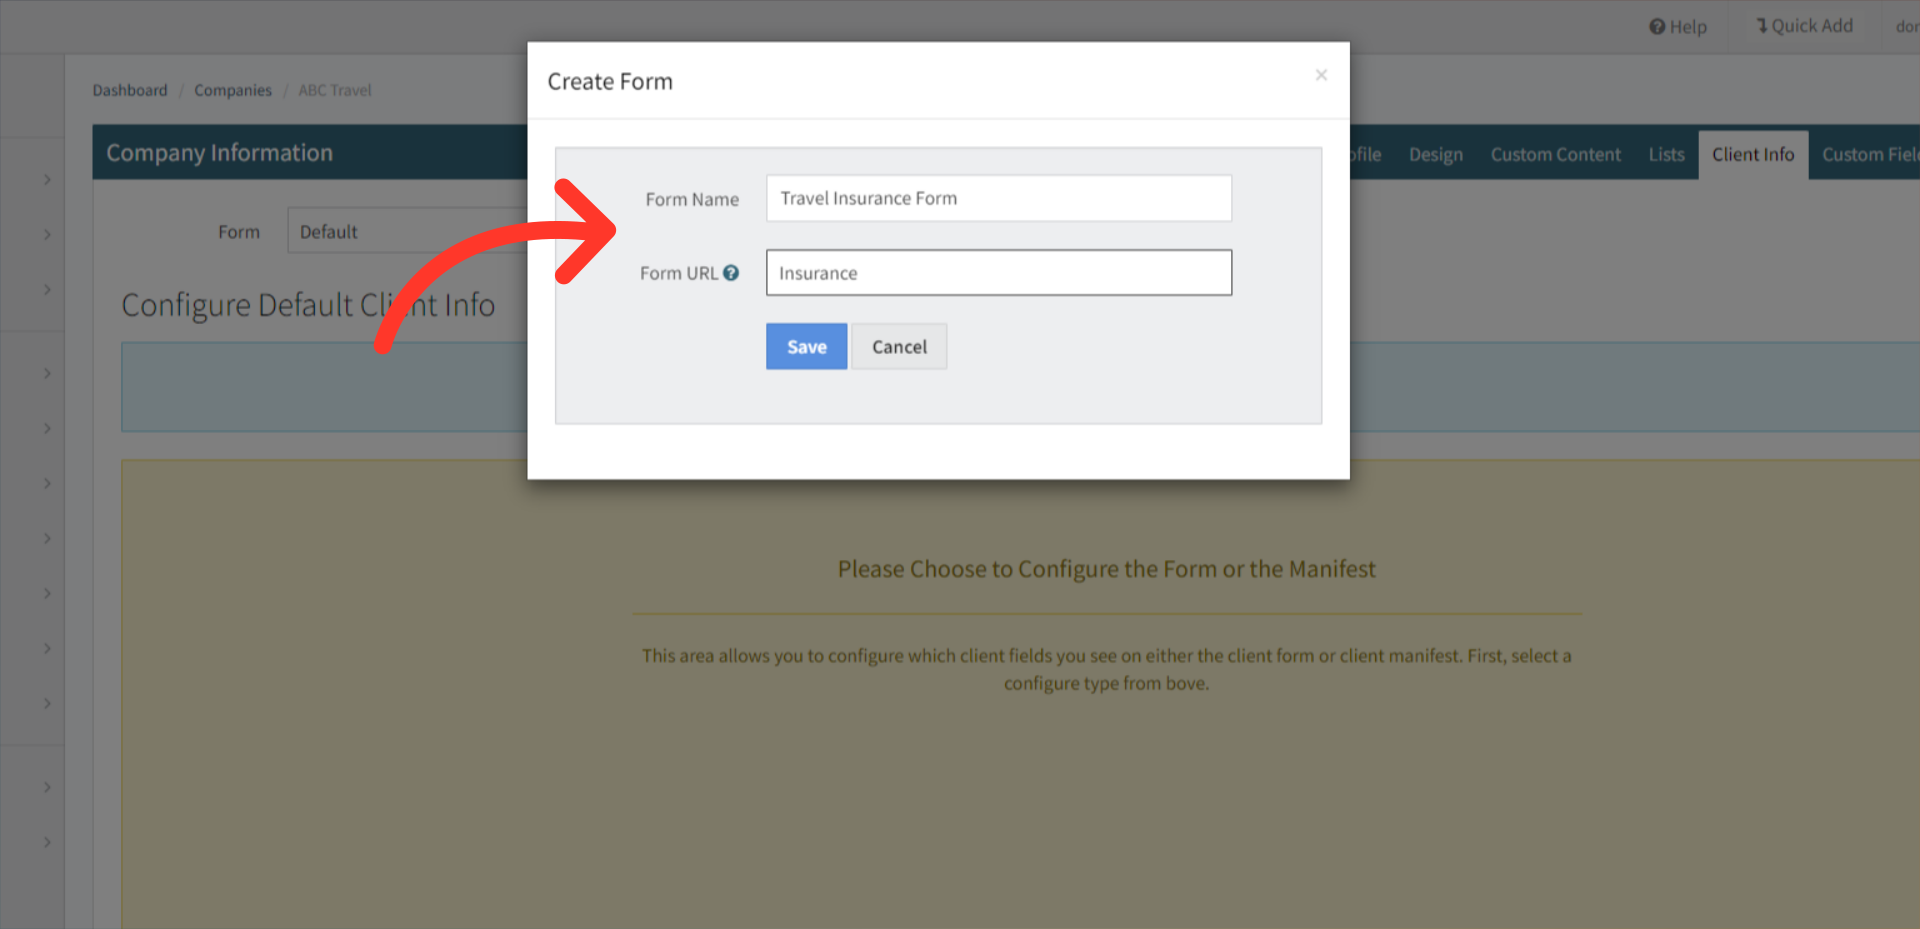
2. On the popup, provide a name for your form and specify a custom form link. The form link helps create a personalized URL for your form. For instance, if your default form URL is myoasisapp.com/traveler/, you can append it with your preferred text, like 'Insurance'. Click Save to proceed.


  Note: Lowercase only, no spaces or special characters.


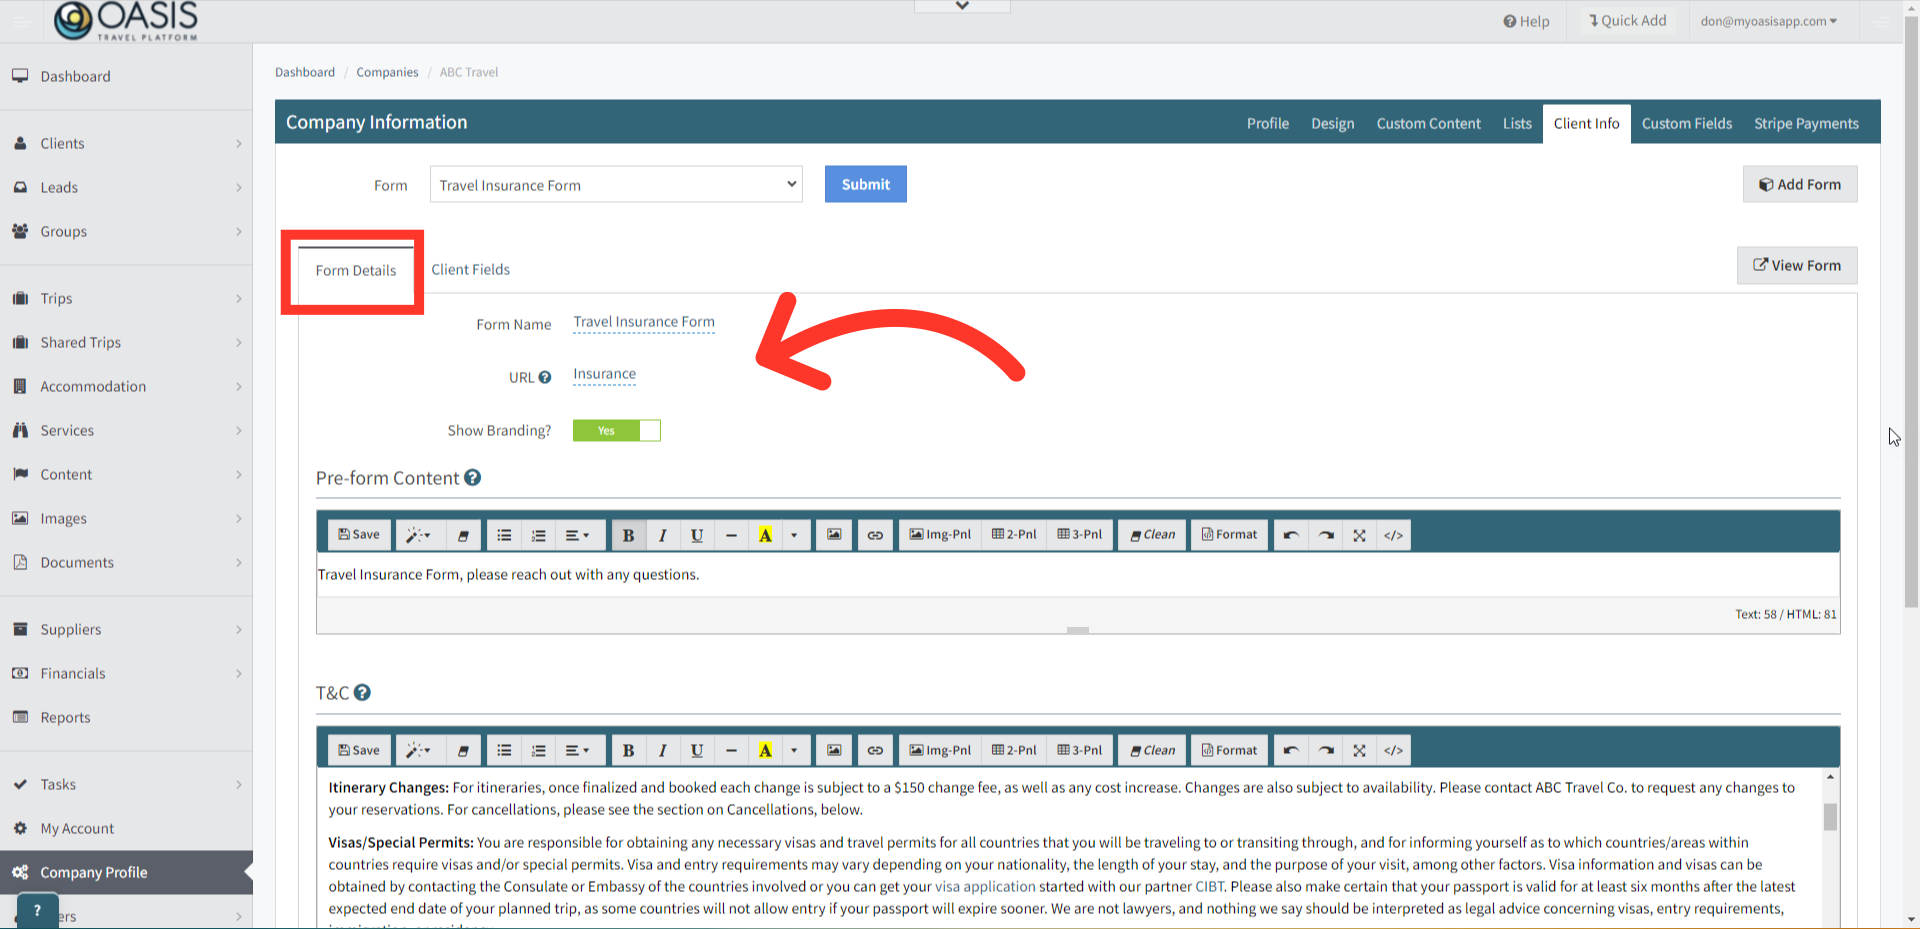
3. Within the Form Details tab, you'll find options to customize various aspects of your form. You can modify the Form Name, edit the URL ending, and toggle branding on or off. Your control extends to three distinct sections: the pre-form content, located above the client fields, the Terms and Conditions field, positioned below the client fields, and the post-form content, which appears at the bottom of the successful submission page after the form has been submitted.


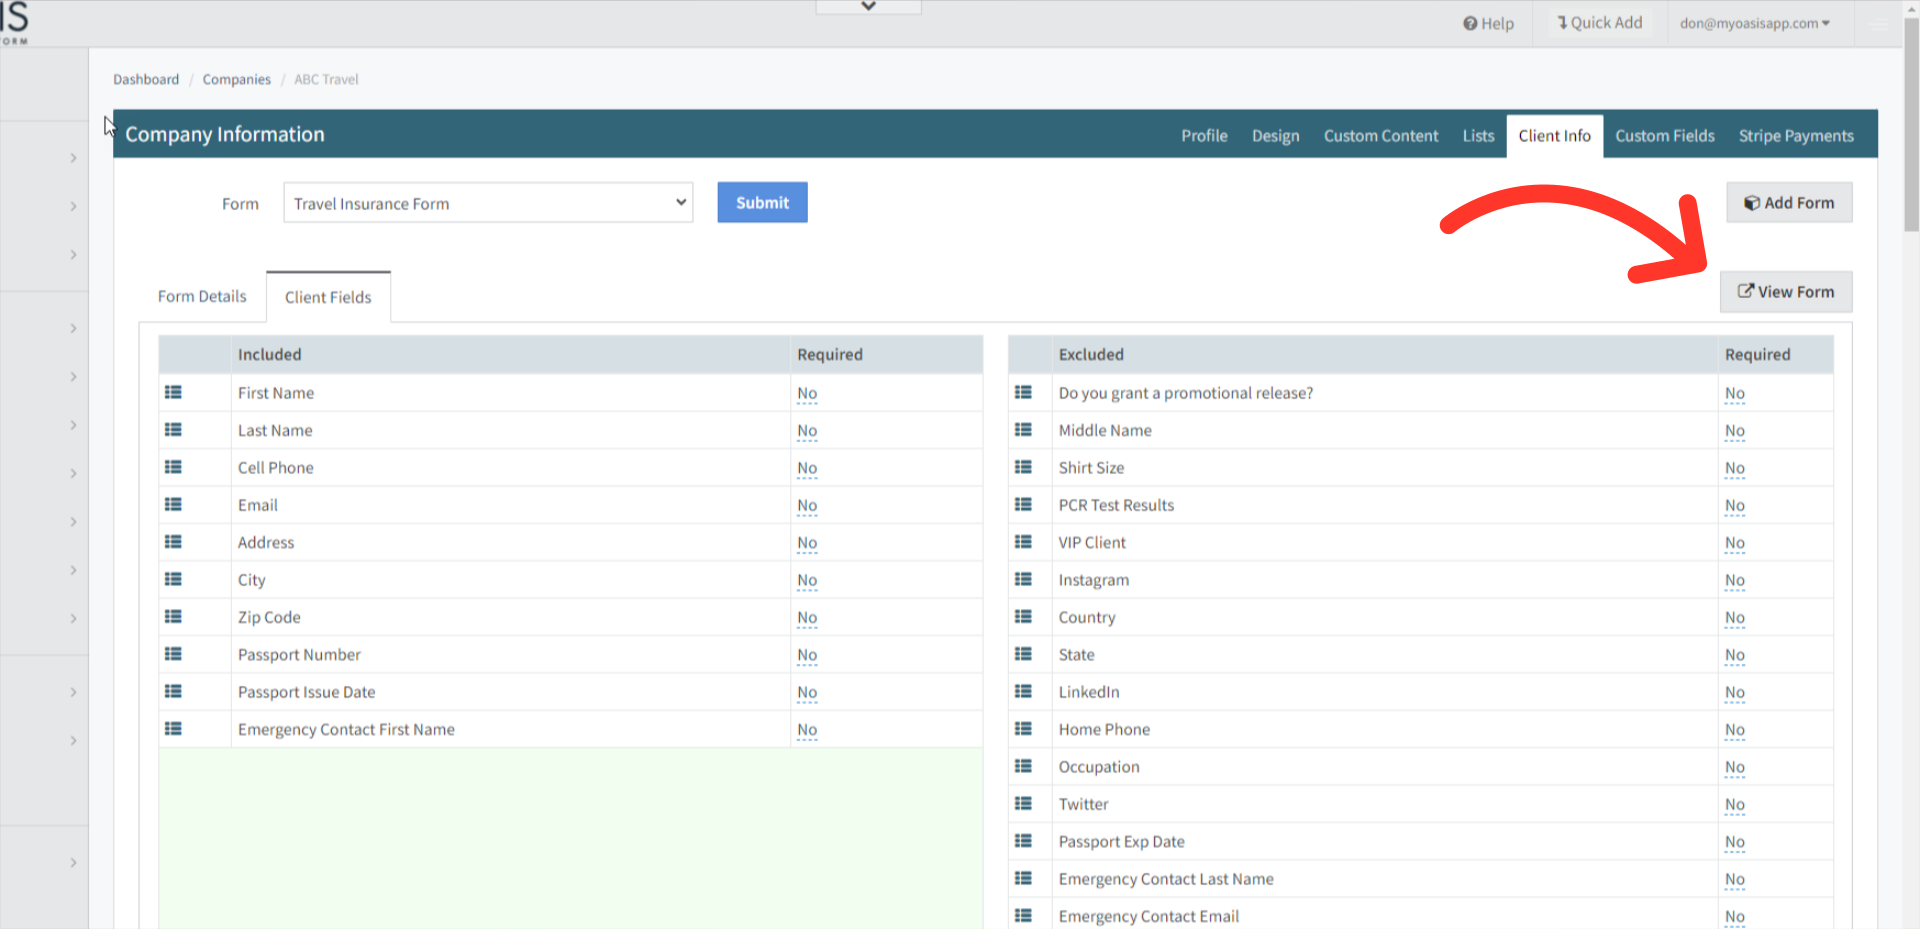
4. On the Client Fields tab you can add or remove client fields that show on the form by dragging them from one side to the other. The left side is what will display on the form in the order that they appear here. Reorganize using the same drag and drop method.


5. To view the form click the View Form button.


From your Lead Booking, you can now assign Traveler Forms you've created.


And those Traveler Forms can then be linked to the Book This Trip button when the Trip Status is either Active, Master, Multi-Day Tour, and Sample.


And that's how to create a custom traveler form in the Oasis Travel Platform! 

We hope you found this guide helpful. If you need additional help or want to share your thoughts, reach out at support@myoasisapp.com.  We love hearing from you and are always here to help.

Was this article helpful?

That’s Great!

Thank you for your feedback

Sorry! We couldn't be helpful

Thank you for your feedback

Let us know how can we improve this article!

Select atleast one of the reasons

Feedback sent

We appreciate your effort and will try to fix the article