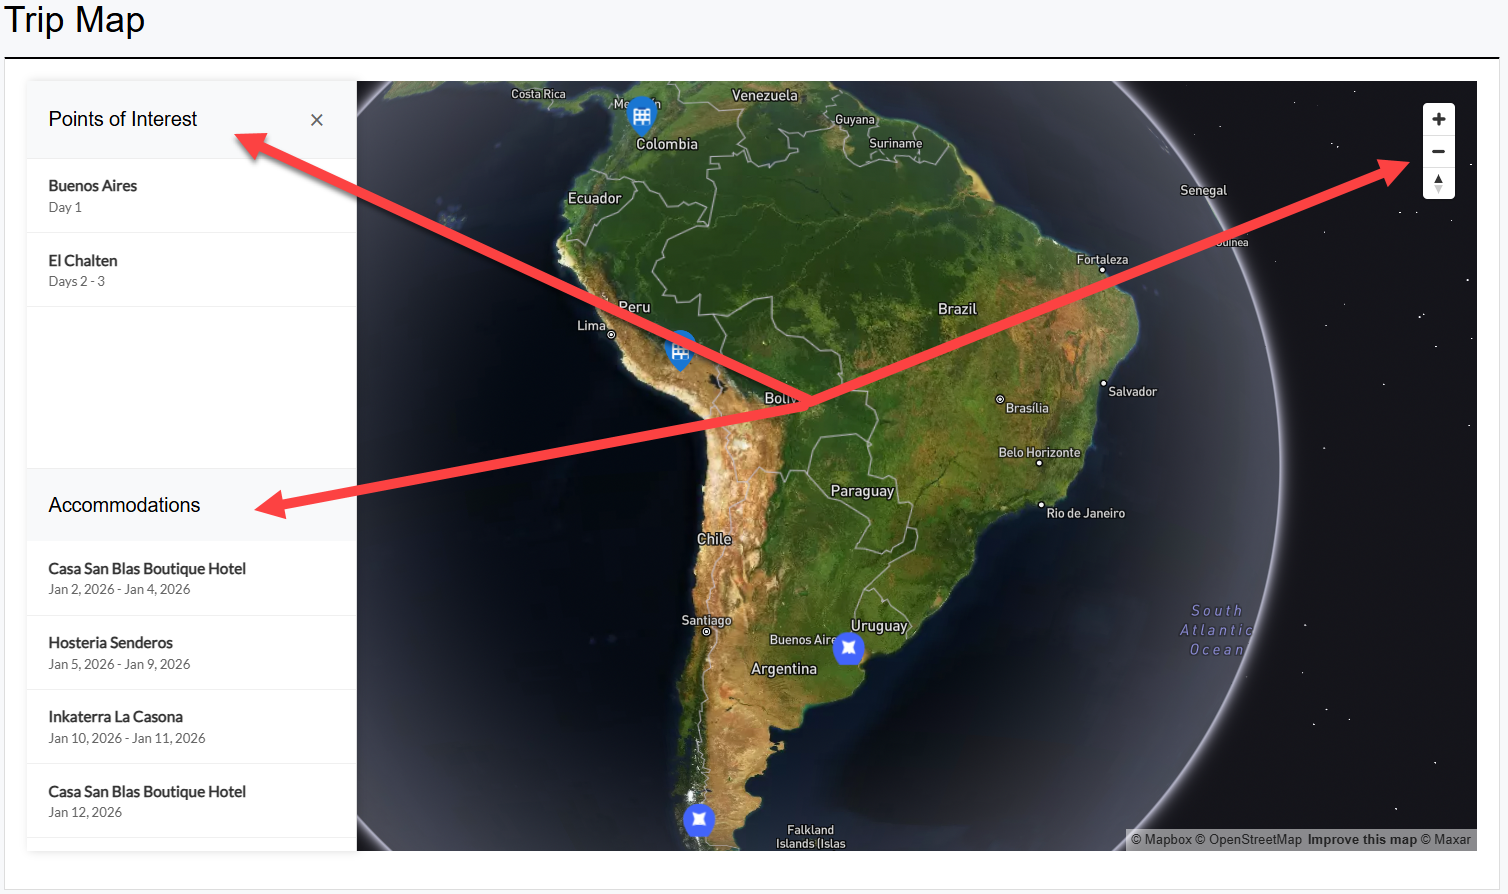
The Map feature lets you add and manage trip locations as interactive Points of Interest on an itinerary map. Services and accommodations can now be assigned precise coordinates for a visual and easy-to-follow trip overview.
1. Add Locations with Coordinates
Open a Service, Content or Accommodation record.
In the Coordinates section, either enter longitude and latitude manually, or click the Map Pin button to use a Google Search bar.

Use the search bar to find a the location using the name or address of the Service or Accommodation. Use the search bar as a streamlined, global lookup. Enter a location name (city, hotel, landmark), view matching results, and edit the coordinates directly if needed.

Click Use Selected Coordinates to save.
That item will now appear as a Point of Interest on your itinerary map.

2. Manage Map Display Settings
In an open Trip and in the Itinerary section, click on the Map View tab to customize your map options:
Show Map – toggle the map on or off.
Show Accommodations on Map – choose whether accommodations appear as points of interest.
Map Theme – select from themes to match the style you're going for. (Default View is Satellite Streets.
You can also include or exclude specific day items manually. If a day item lacks coordinates, click Edit to add them.

3. Editing or Appending Day Items for Map Locations
When adding locations, the options available depend on whether the service content is Appended (green) or still the original version (grey).
Green items (Appended) - If the content or service has been appended, it will display in green on the itinerary and on the map. These items include a Map Pin button. Click the button to open the map popup with the globe and search bar. From here, you can search by business name, city, or landmark, and select the location to automatically add the coordinates.
Grey items (Unappended) - If the item is grey, it has not been edited from the original record. You will see two options:
Edit - Opens the content or service record in a new tab. Any location you add here will be applied across all itineraries where this service is used, as long as those services remain unappended.
Append - Creates a unique copy of the content just for this itinerary. Any location you add will only apply to this itinerary, not the original service record.
Accommodations - For accommodations, you will only see an Edit option. You can use the same globe popup and search tools to set the location.
This flexibility allows you to decide whether a location should be updated everywhere the service is used, or only for a specific itinerary.
4. Show the Map on Itineraries
When enabled, the map shows all your trip locations in one view.
For the Classic Itinerary Design, the Map will take on a full width under the Trip Intro section.

For the new itinerary design, the overview page is split into two parts:
Left: Interactive map with clickable daily locations
Right: Summary text in a half-width layout OR
Summary text in bottom half with additional Hero images (or if Video is added the video will appear instead of the images.)
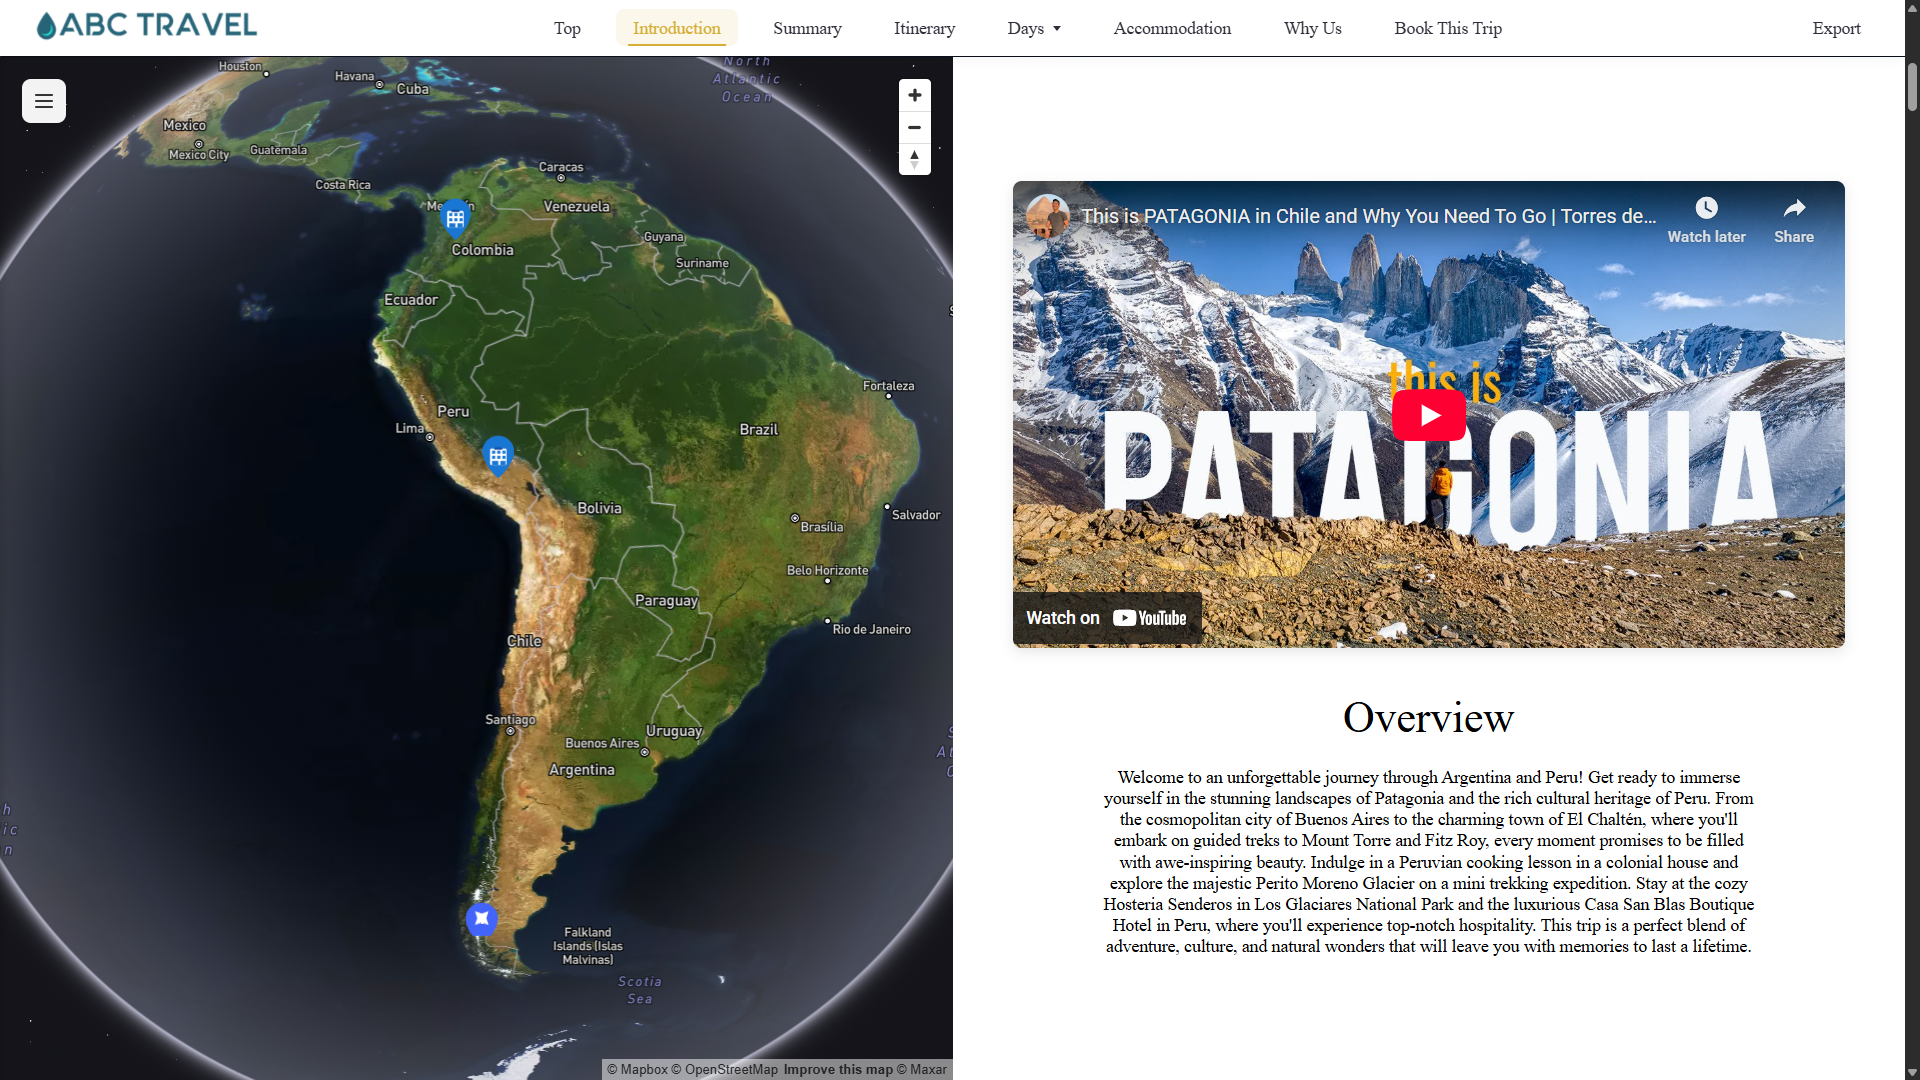
This combined view offers a dynamic, visual trip overview.
The Map offers a Menu on the top left of the map which shows all the Points of Interest on the map including a section for Accommodations. In the top right is a + and - which will allow you to zoom in and out. The dual triangles below will automatically orientate it to due north.
For details on how the map integrates into the itinerary layout, see [ How to Use the New Itinerary Design ].
Troubleshooting & FAQs
If the map is not displaying on your itinerary, or if only the Points of Interest appear without the map background, use the steps below to identify and resolve the issue.
1. Make Sure the Map Is Enabled
Open the Trip’s Itinerary and go to the Map View tab. Confirm that Show Map is turned on. When the map is disabled, it will not appear within the itinerary layout. In this case, the Overview section (Trip Intro) automatically fills the space or appears on its own page.
Also confirm that your Content, Services, or Accommodations include valid coordinates. If there are no locations with coordinates, the map will display the default globe view but will not zoom in or highlight any areas. Once coordinates are added, the map will automatically center and zoom to show those Points of Interest.
2. Refresh the Page or Clear Your Browser Cache
If the map previously displayed but no longer appears, clear your browser cache and refresh the itinerary. This reloads the map scripts and often resolves missing visuals.
3. Check for Browser Extensions or Add-ons
Extensions that block scripts, ads, or privacy trackers can prevent the map from displaying correctly. Open your itinerary in an Incognito or Private Window to test, since most extensions are disabled in that mode.
If the map appears there, disable your extensions one by one in your regular browser window until you find the one causing the issue.
4. Confirm Hardware Acceleration (WebGL)
The map relies on hardware-accelerated graphics for WebGL rendering. In your browser settings, make sure hardware acceleration is turned on. Below are the steps for the most common browsers:
For Chrome (Windows / Mac):
Click the three dots in the upper-right corner and select Settings.
Scroll down and click System.
Toggle Use hardware acceleration when available to ON.
Restart Chrome to apply the change.
For Safari (Mac):
Open Safari and go to Preferences (or Settings in newer versions).
Select the Advanced tab and check Show Develop menu in menu bar.
In the menu bar, click Develop, then make sure Disable WebGL is not selected.
Restart Safari to apply the change.
5. Try a Different Browser
If the map still doesn’t display, open it in another browser such as Chrome or Safari. Testing across browsers helps identify if the issue is browser-specific.
Need More Help?
If you’ve tried all the above steps and your map still isn’t displaying, please reach out to support@myoasisapp.com
To help us resolve the issue faster, include as much detail as you can, such as:
Which browser you’re using (for example, Chrome or Safari)
The version number of that browser
Any screenshots of what you see
Any error messages or codes that appear