Welcome! Today, we'll quickly show you how to Add and Edit a Trips Hero Image in the Oasis Travel Platform.
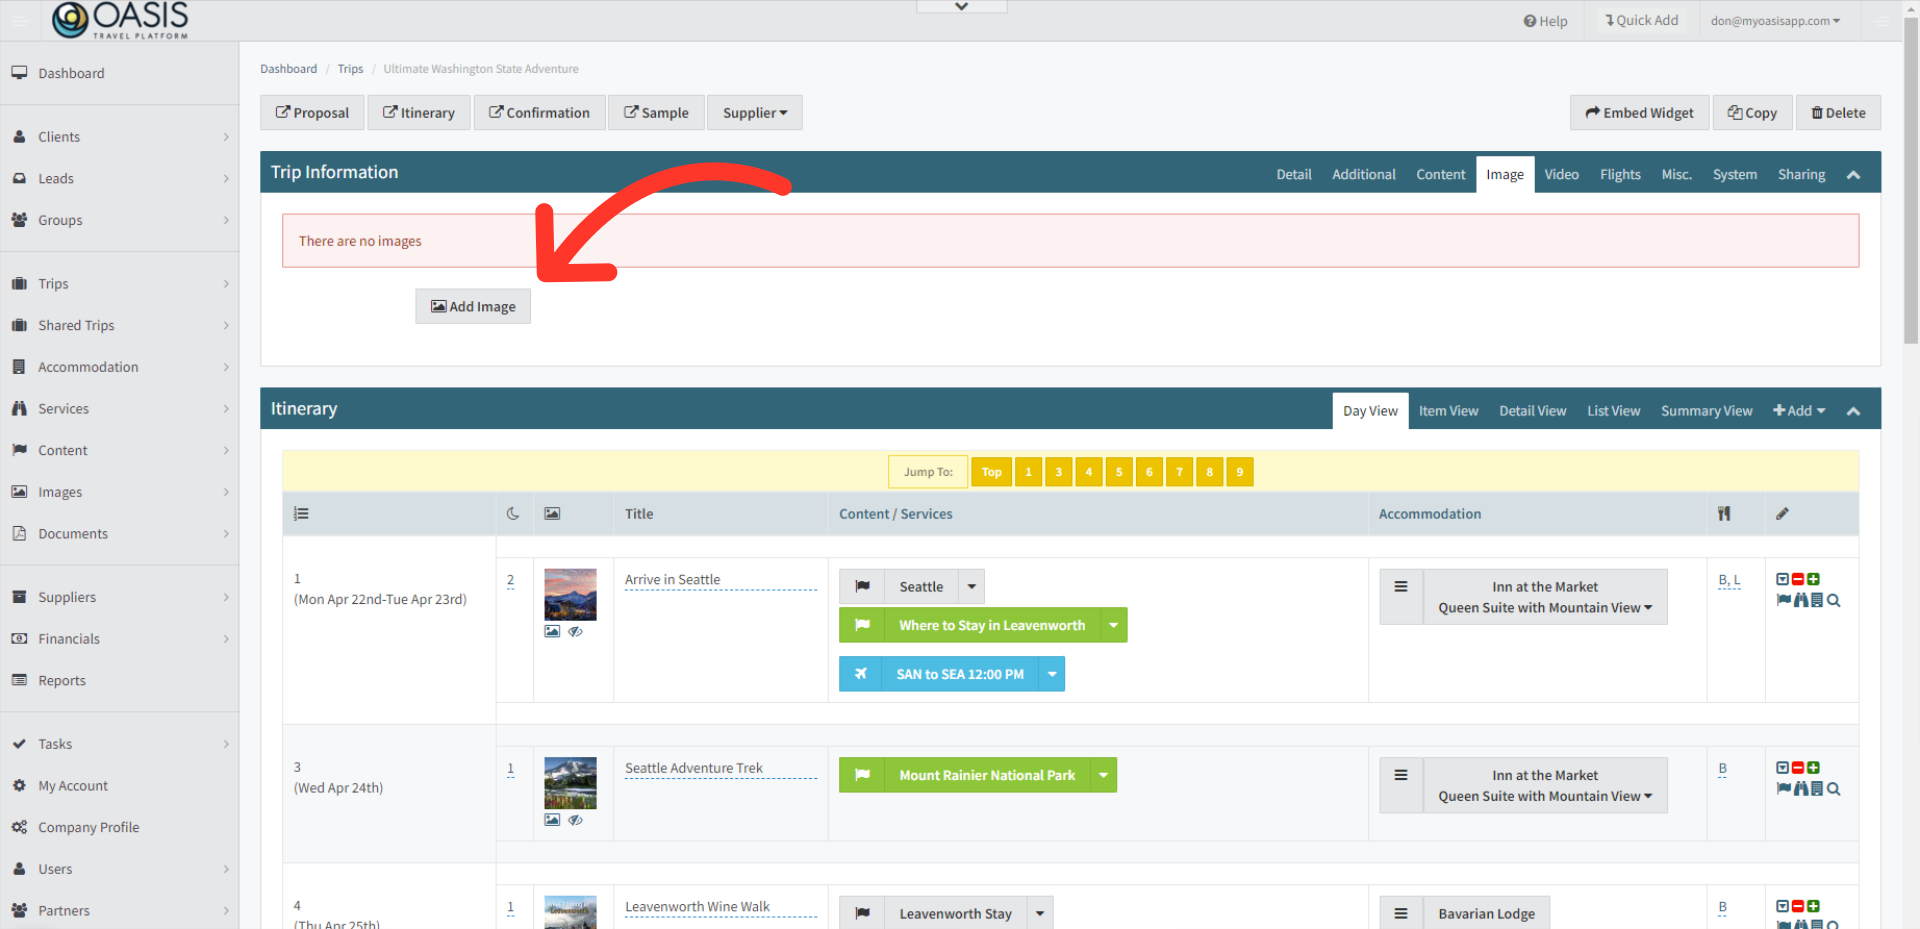
1. First access the Itinerary Builder, then navigate to the Trip Information section, then, click on the Image tab.

2. Next, click on the Add Image button.
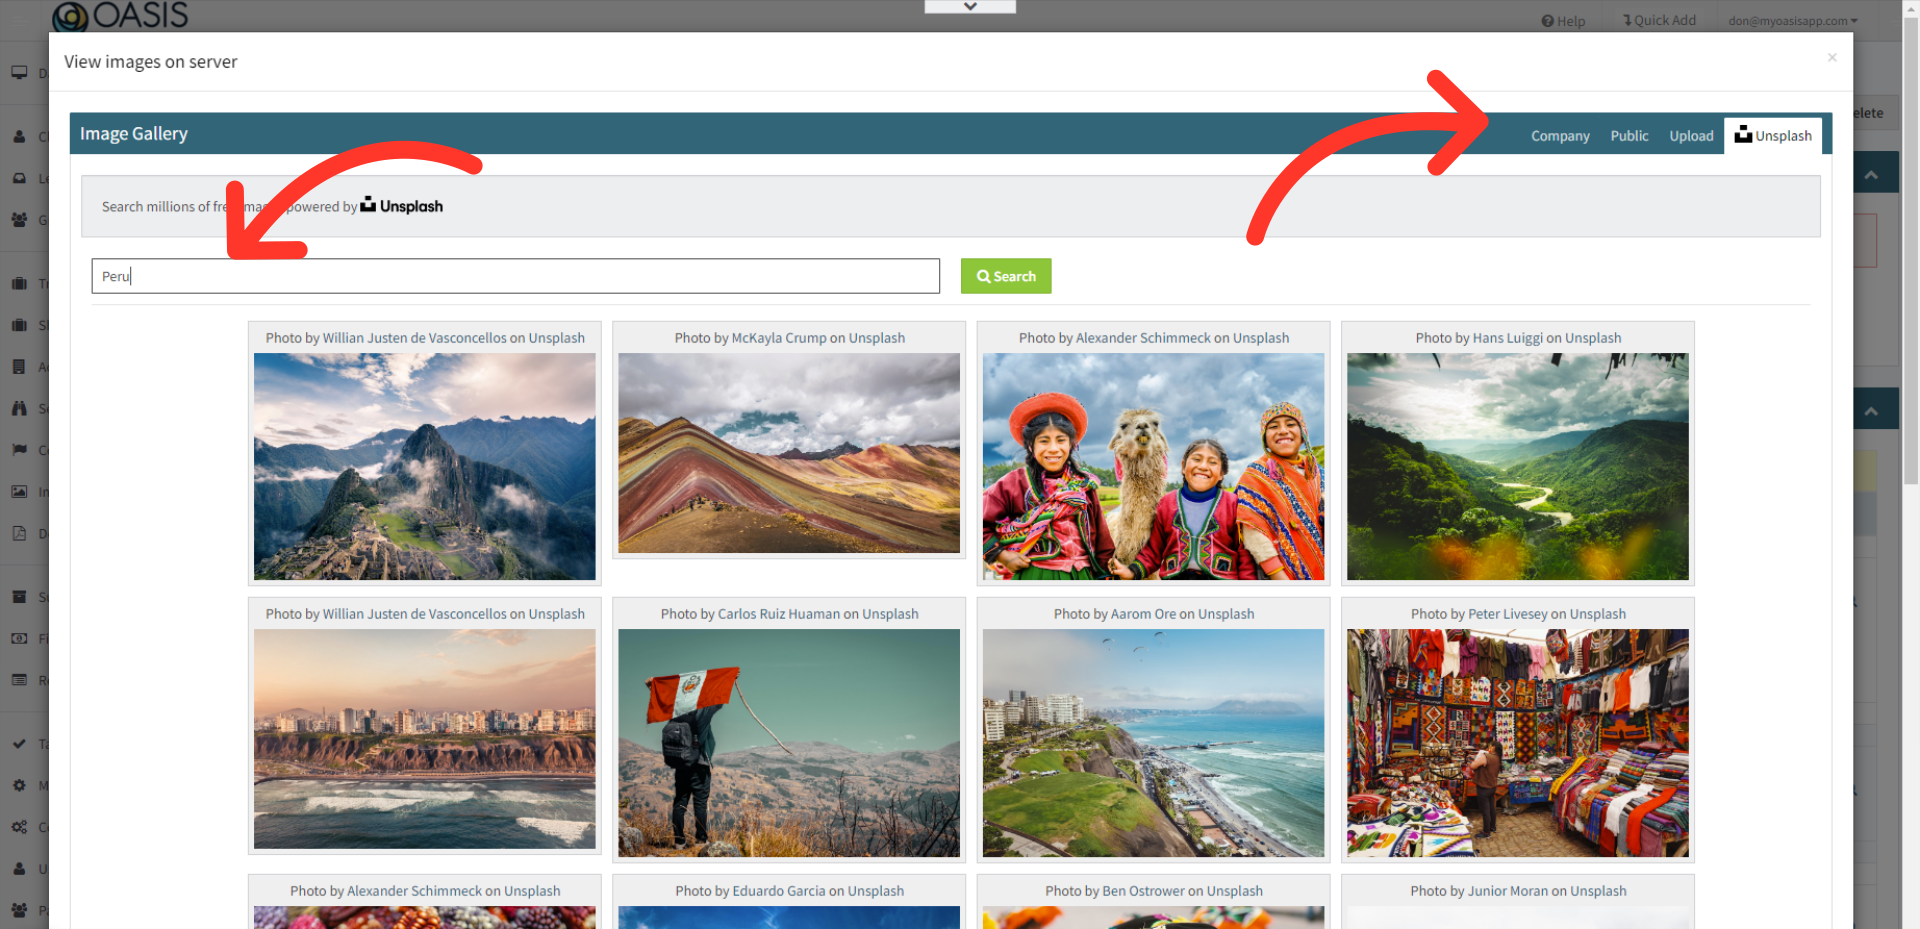
3. Here you have several options:
Company Image Library: This repository houses all image uploads contributed by users within the company.
Public Image Library: This expansive collection encompasses images made public by any users, as well as thousands of Oasis Curated Images, with a specific focus on regions such as Asia, Africa, and South America.
Unsplash Image Library: With over 3 million high-quality, royalty-free images, the Unsplash Image Library provides an extensive selection of visuals for users to choose from.
Upload: This feature allows users to contribute their own curated images to the platform. These images can be kept within the company for internal use or marked as public, making them accessible to all users.
Simply click on an image to add it to the Trip.
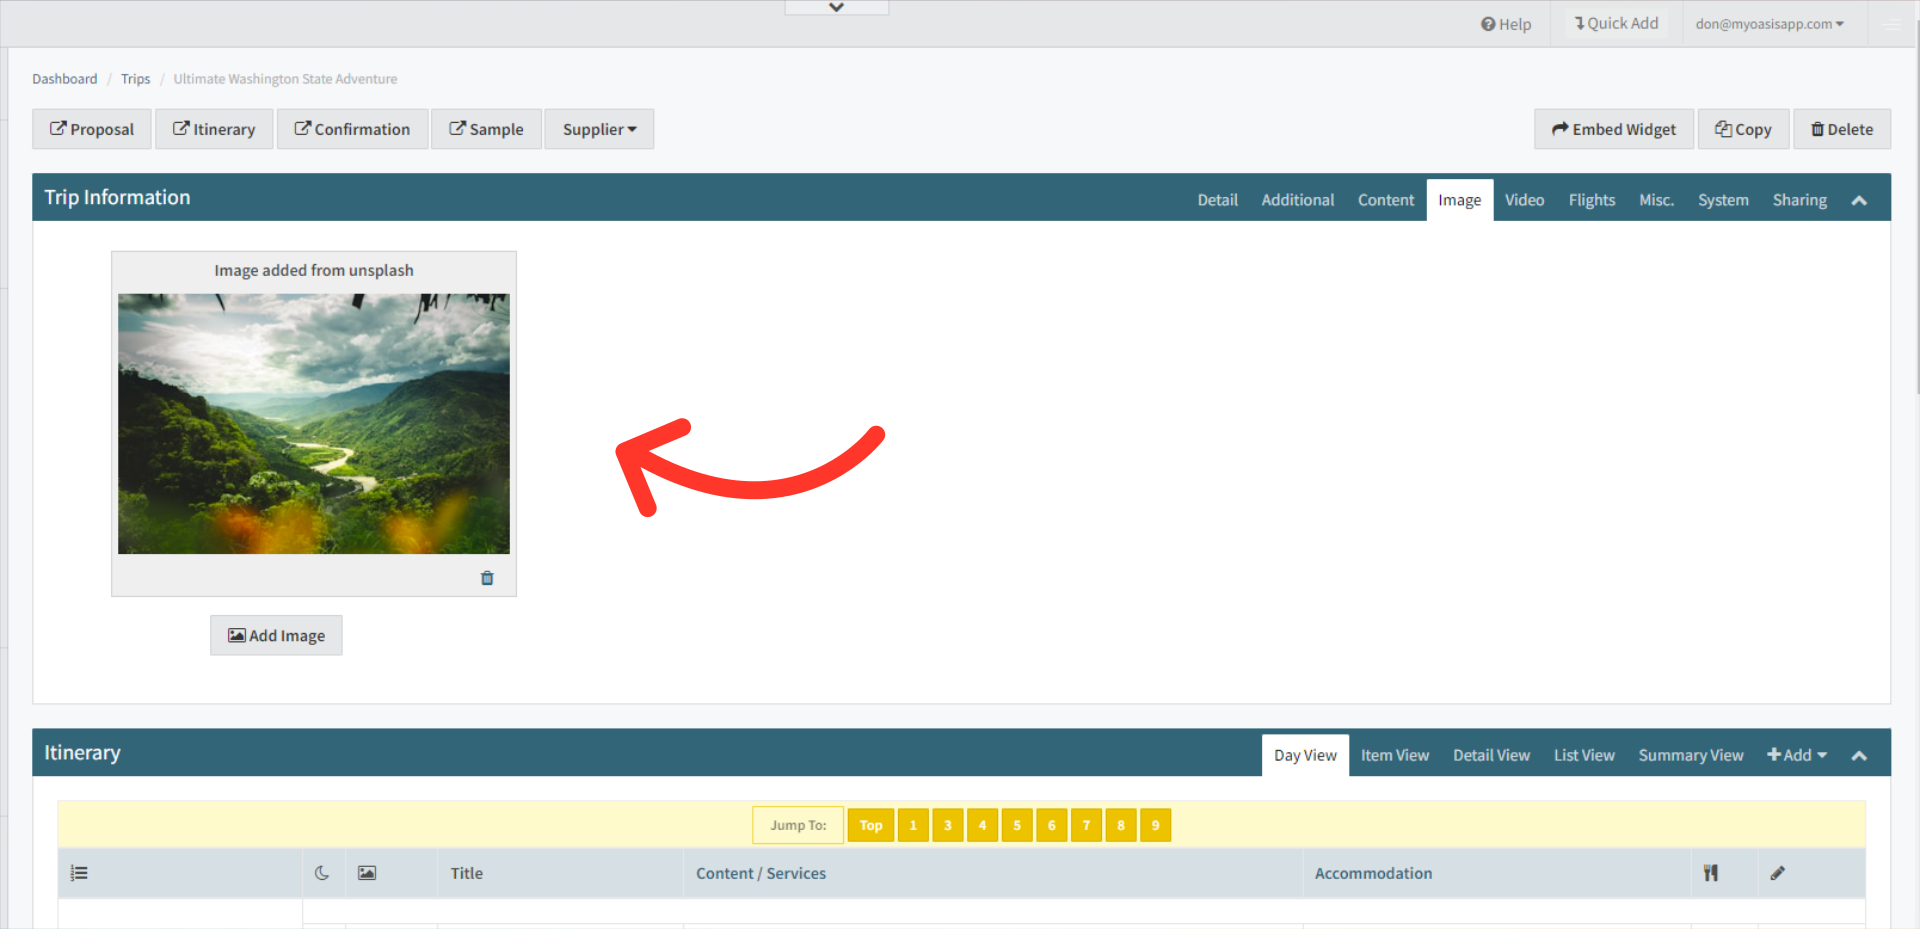
4. Your selected image will be displayed here. You have the flexibility to add multiple images to create a carousel of images or opt for a single main hero image.
And that's how to Add and Edit a Trips Hero Image on the Oasis Travel Platform! We hope you found this guide helpful. If you need additional help or want to share your thoughts, reach out at support@myoasisapp.com. We love hearing from you and are always here to help.
Was this article helpful?
That’s Great!
Thank you for your feedback
Sorry! We couldn't be helpful
Thank you for your feedback
Feedback sent
We appreciate your effort and will try to fix the article